
Thank you DAP Canada for sponsoring this post and helping my home renovation dreams come true! The opinions and photos are of Sew Bright Creation’s.
Board and batten is an easy and inexpensive way to update your space, whether it’s a bedroom, bathroom or living area. If you want to take your DIY board and batten to the next level and really finish it off, then this post is for you!
I know there are quicker ways to do board and batten, but I believe taking your time with these extra steps will really give it the wow factor that it deserves.
1. Pick Your Material
The two most common options would be wood or MDF. MDF or medium density fibreboard is an engineered wood product that is commonly used for trim and baseboards. I would recommend MDF for most applications as long as it is not in a humid/high moisture environment. MDF is inexpensive, it comes primed, it’s easy to work with and it’s smooth, unlike wood.
Moisture will wreck MDF so I went the extra mile and used wood. It cost $67 for the wall I’m sharing below. It required sanding, extra filling and priming, which took more time, vs using MDF.
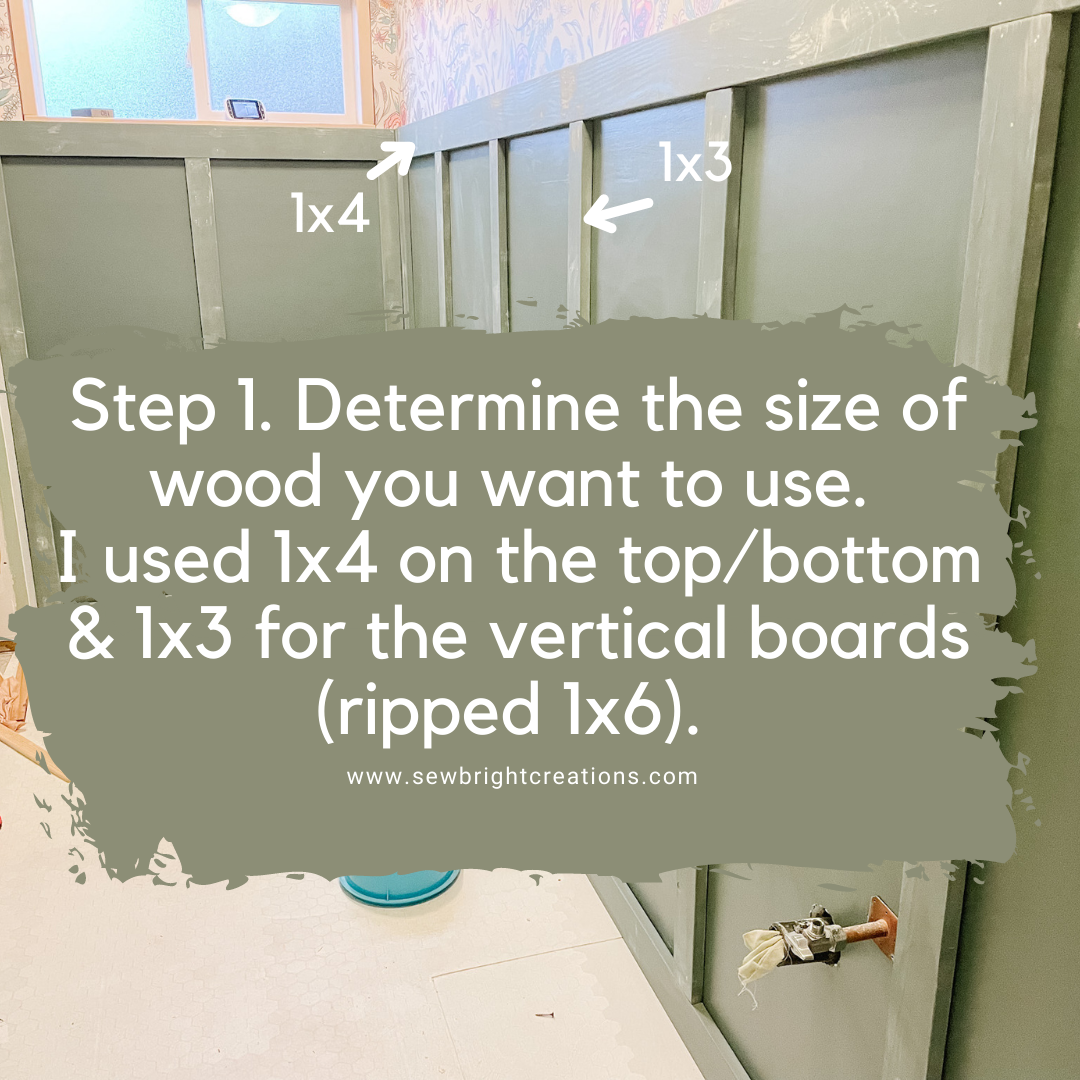
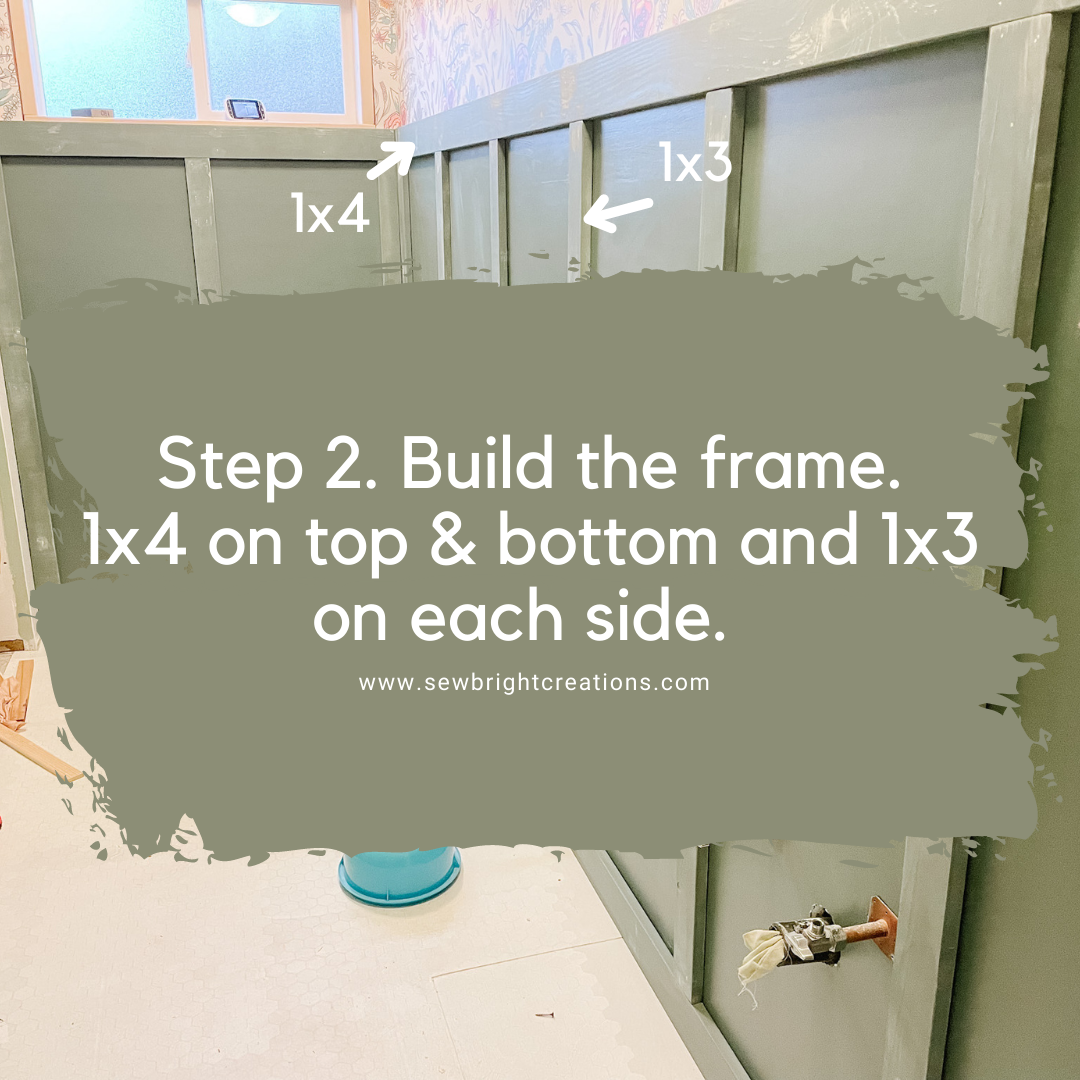
There are often more size options with MDF. I wanted to use 1×4 for the top and bottom and 1×3 for the vertical pieces, however our building supplies store did not have 1×3 in wood. Instead, I bought a 1×6 and ripped it with the table saw. This was a more affordable option as well.
2. Paint Matters
If using wood make sure to prime first. I primed all sides and edges to ensure the wood was extra protected from moisture. A foam roller (linked below) is handy for priming and painting. I would recommend doing one coat with a foam roller once the boards are trimmed (before putting them up). Then do a second coat after your trim/caulking is up. I did the second coat with a brush. It was a bit thicker and covered nicely.
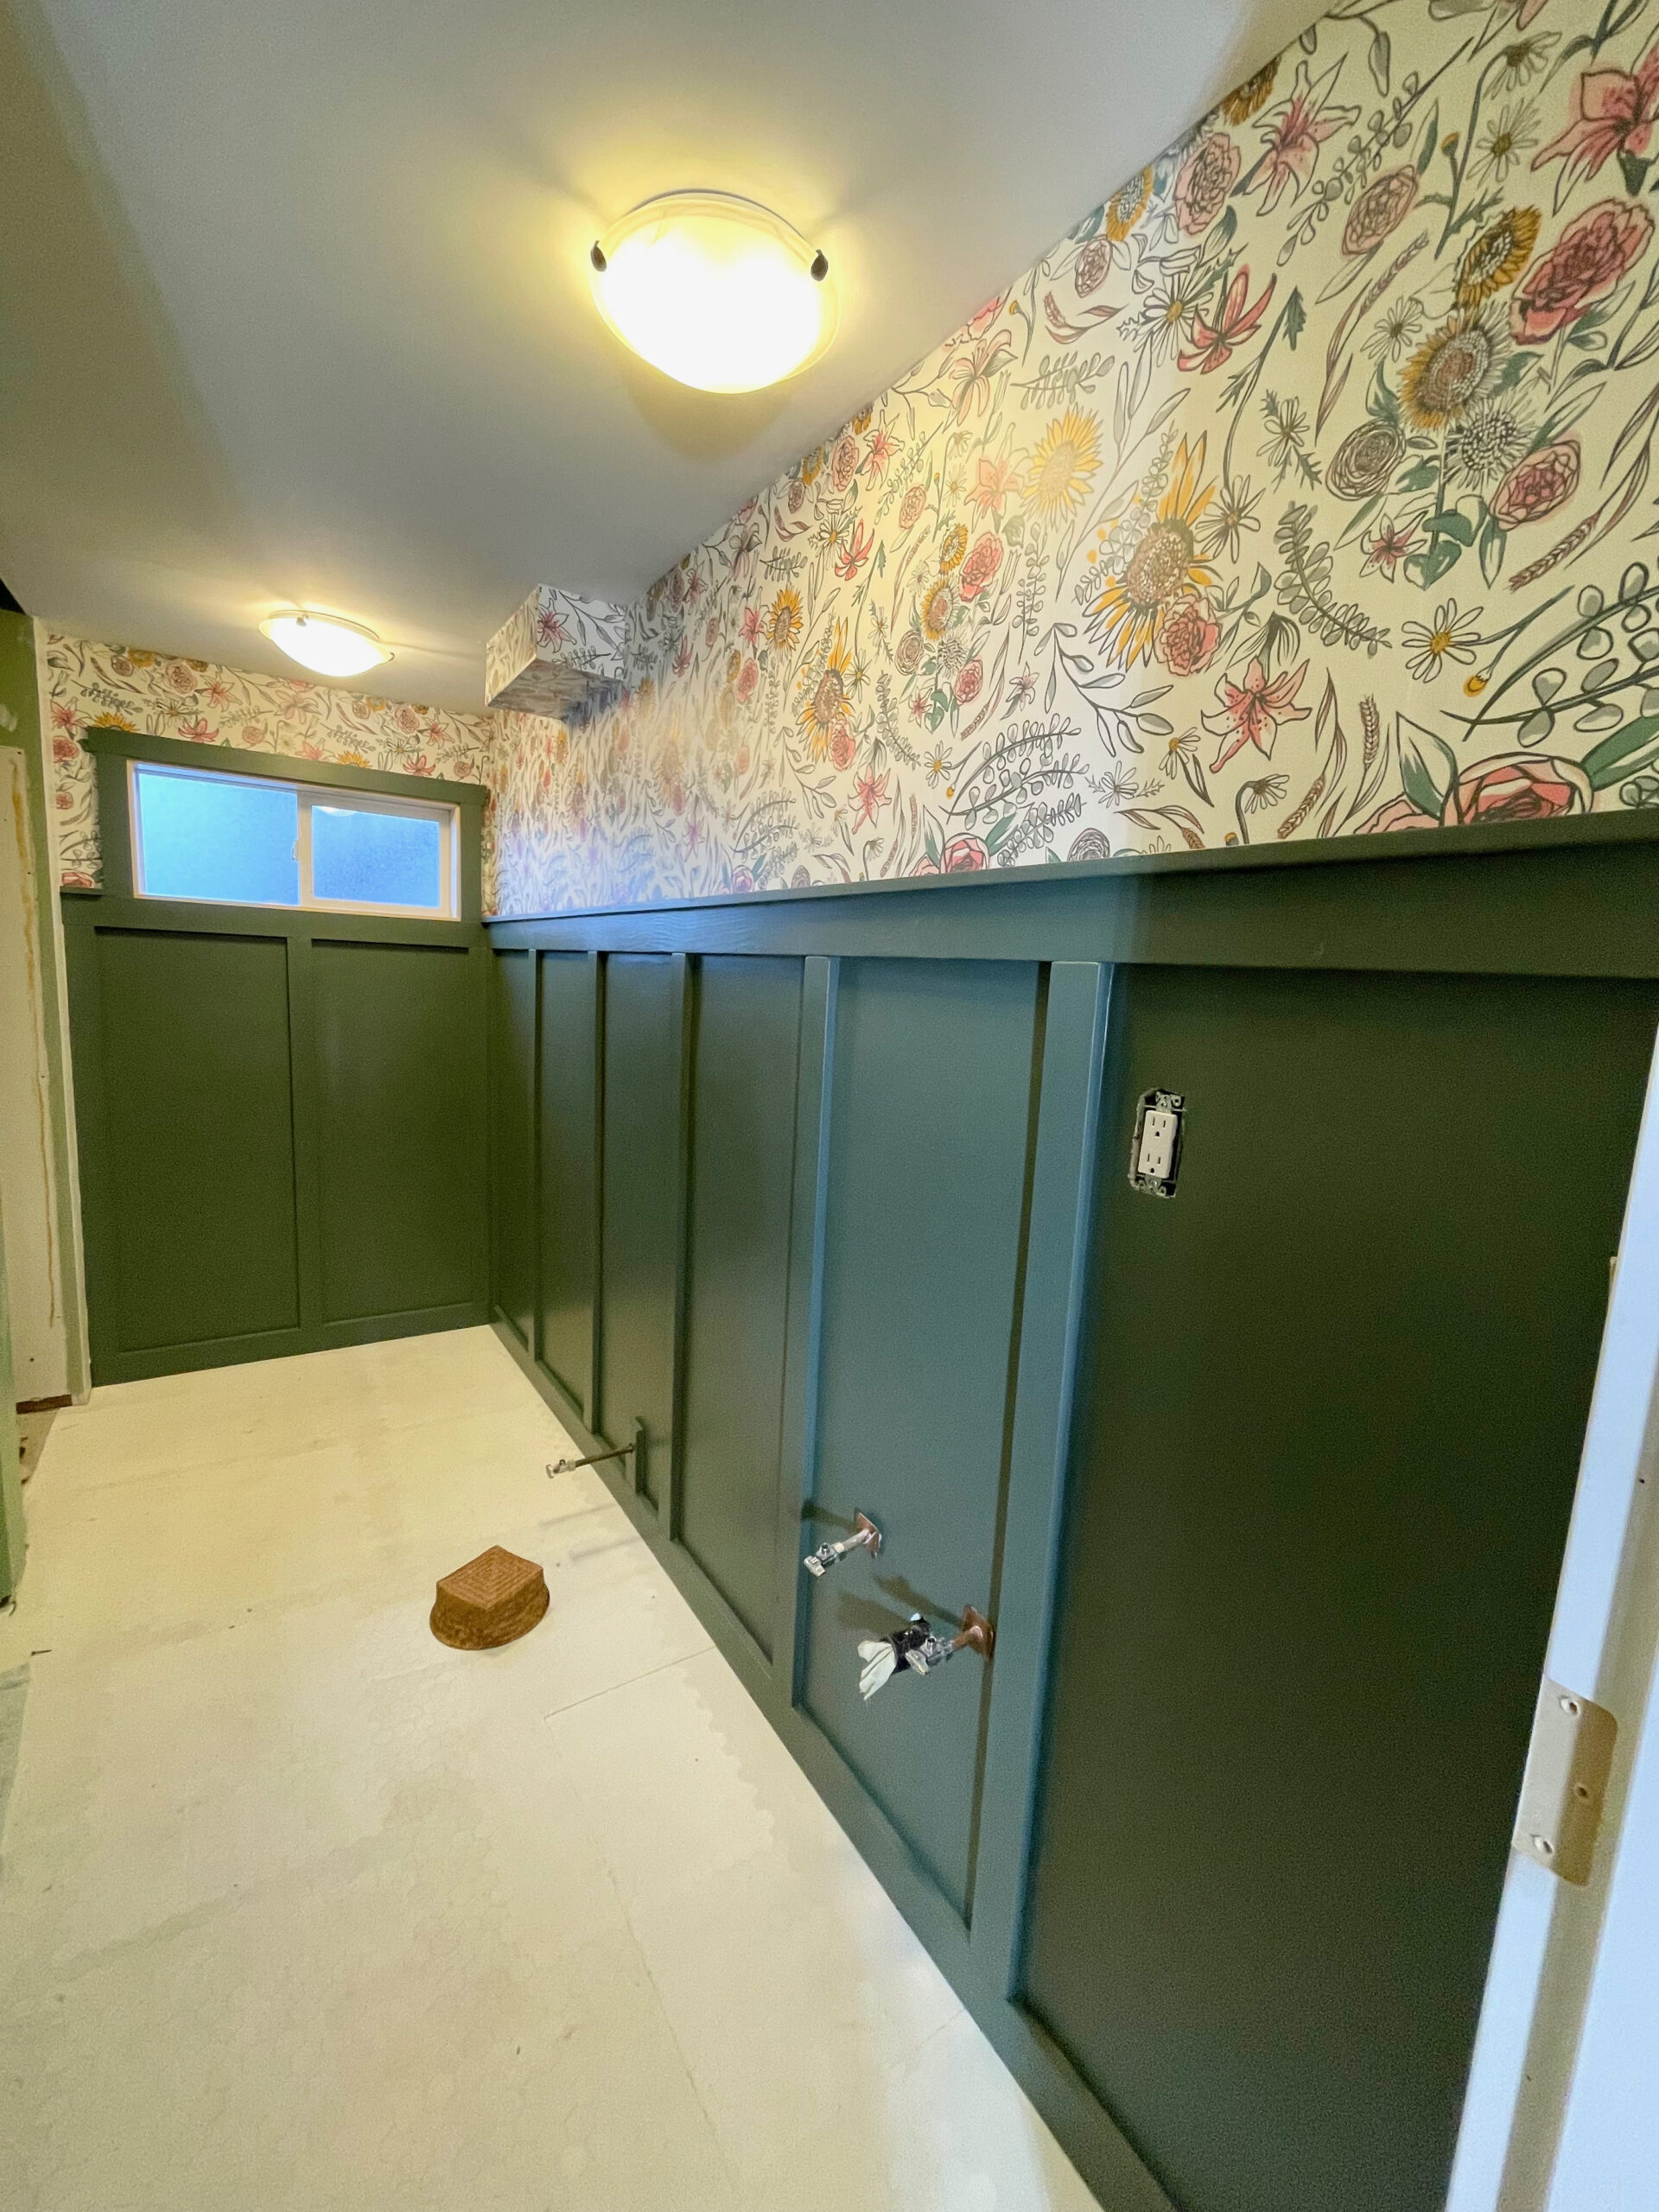
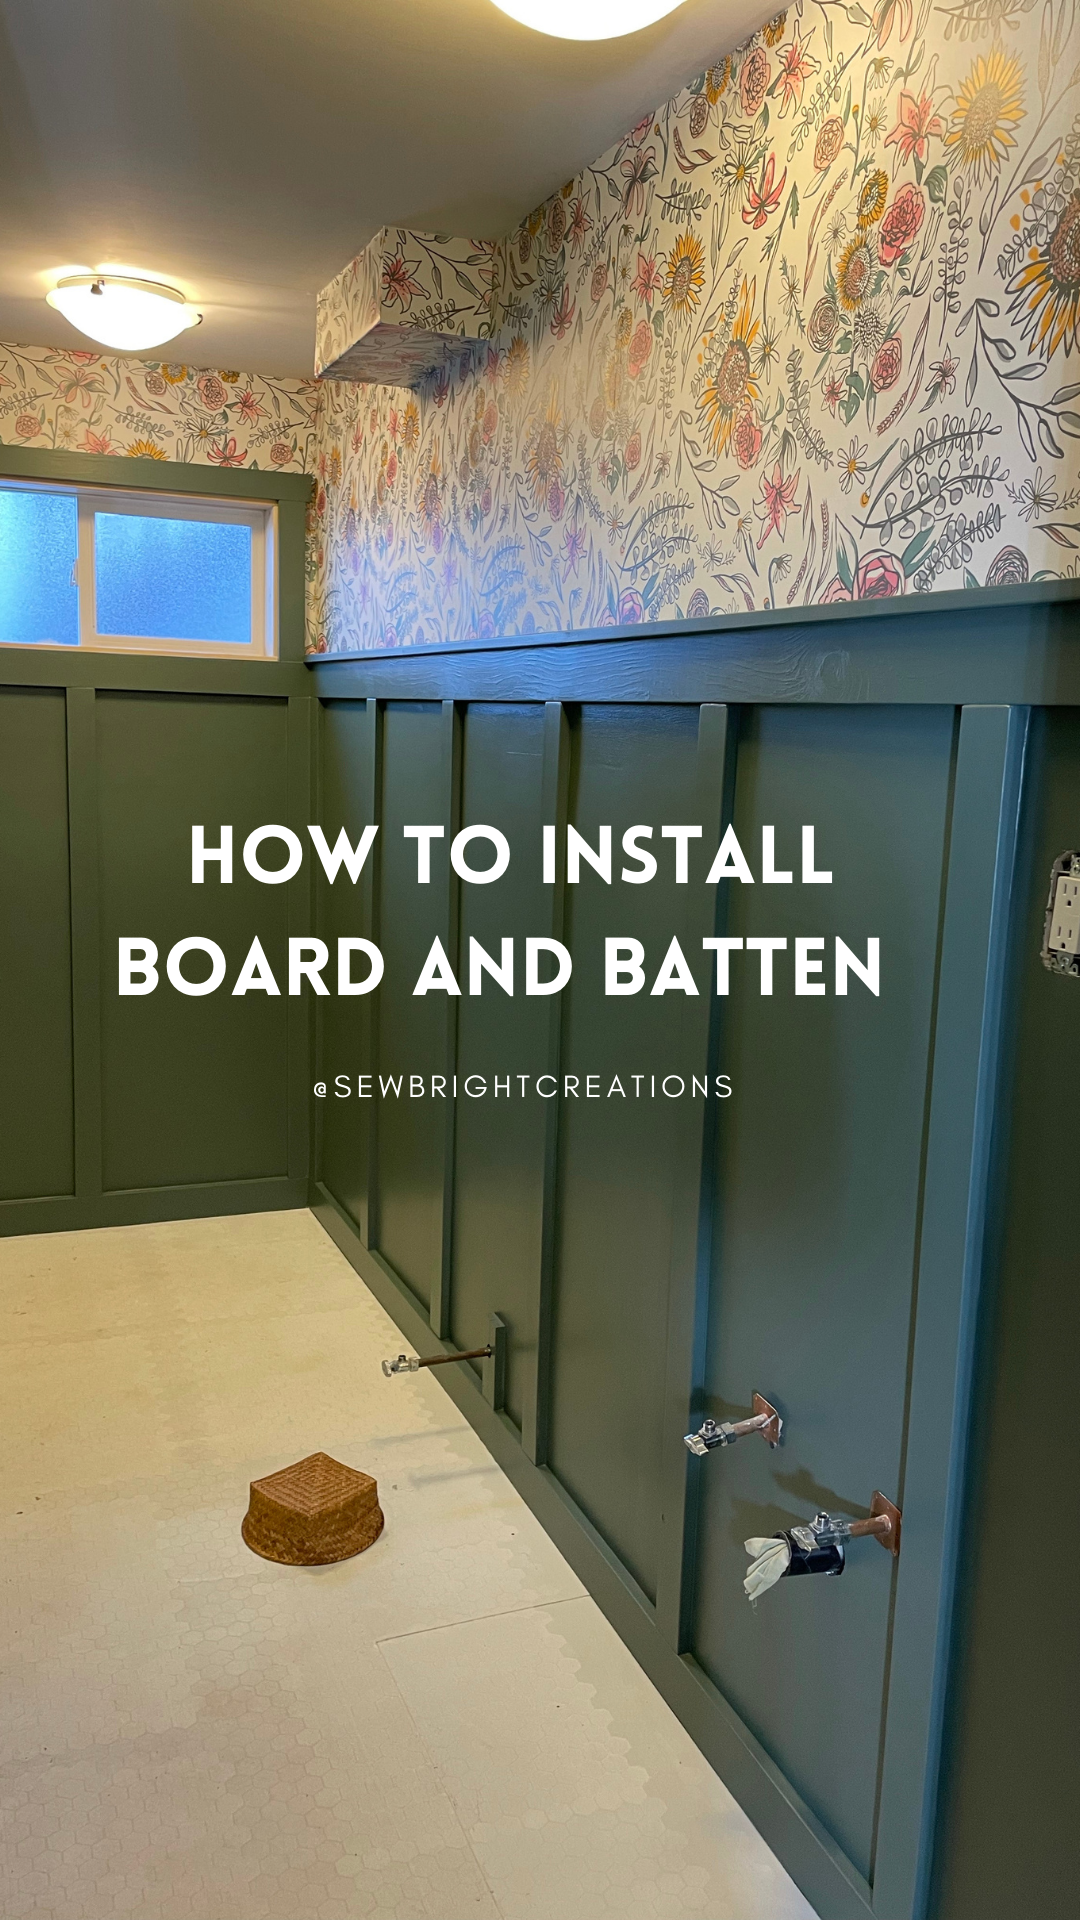
Check with your local paint dealer, but make sure to select the appropriate paint for its application. I went with Kitchen and Bathroom Pearl Finish, HC-124 Caldwell Green by Benjamin Moore.
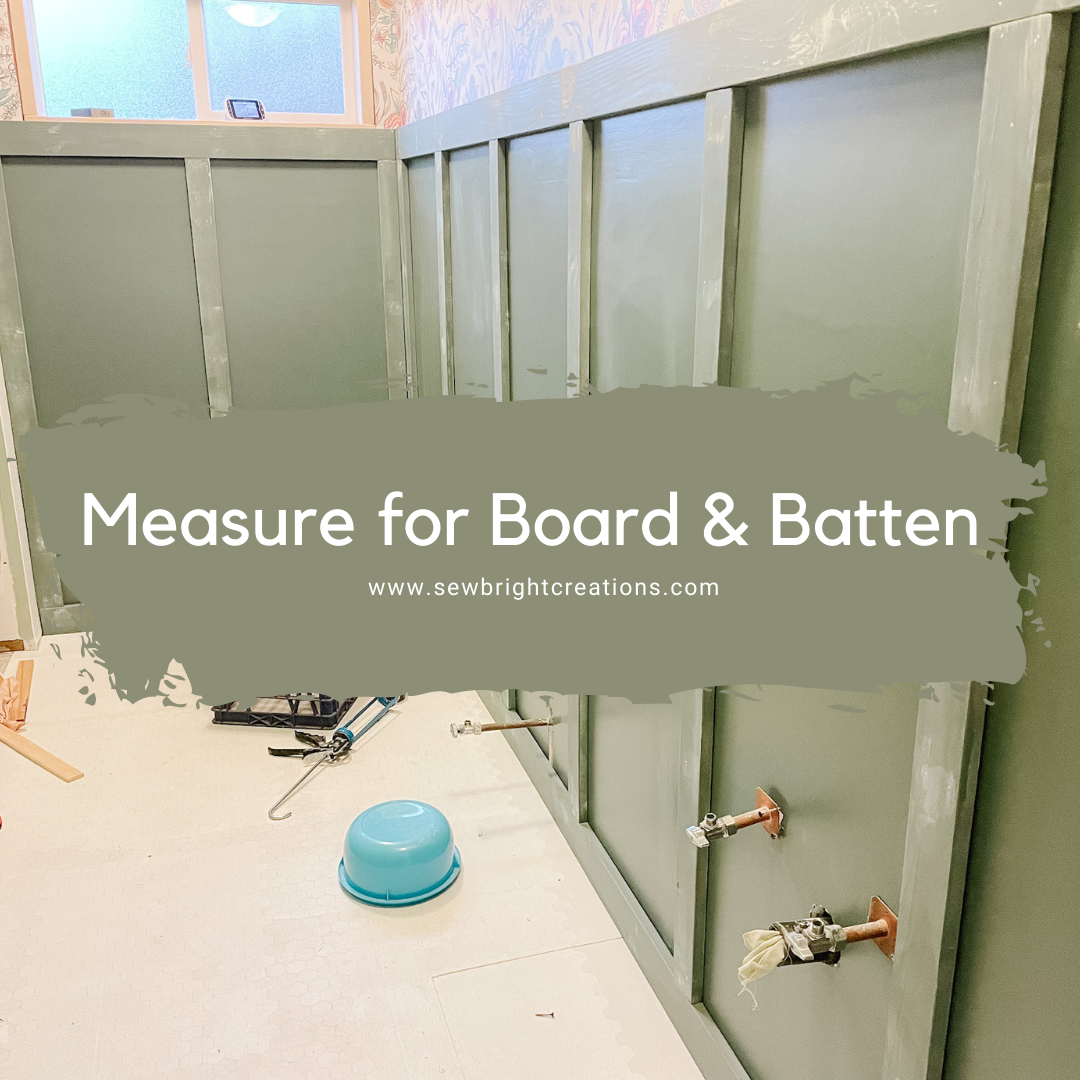
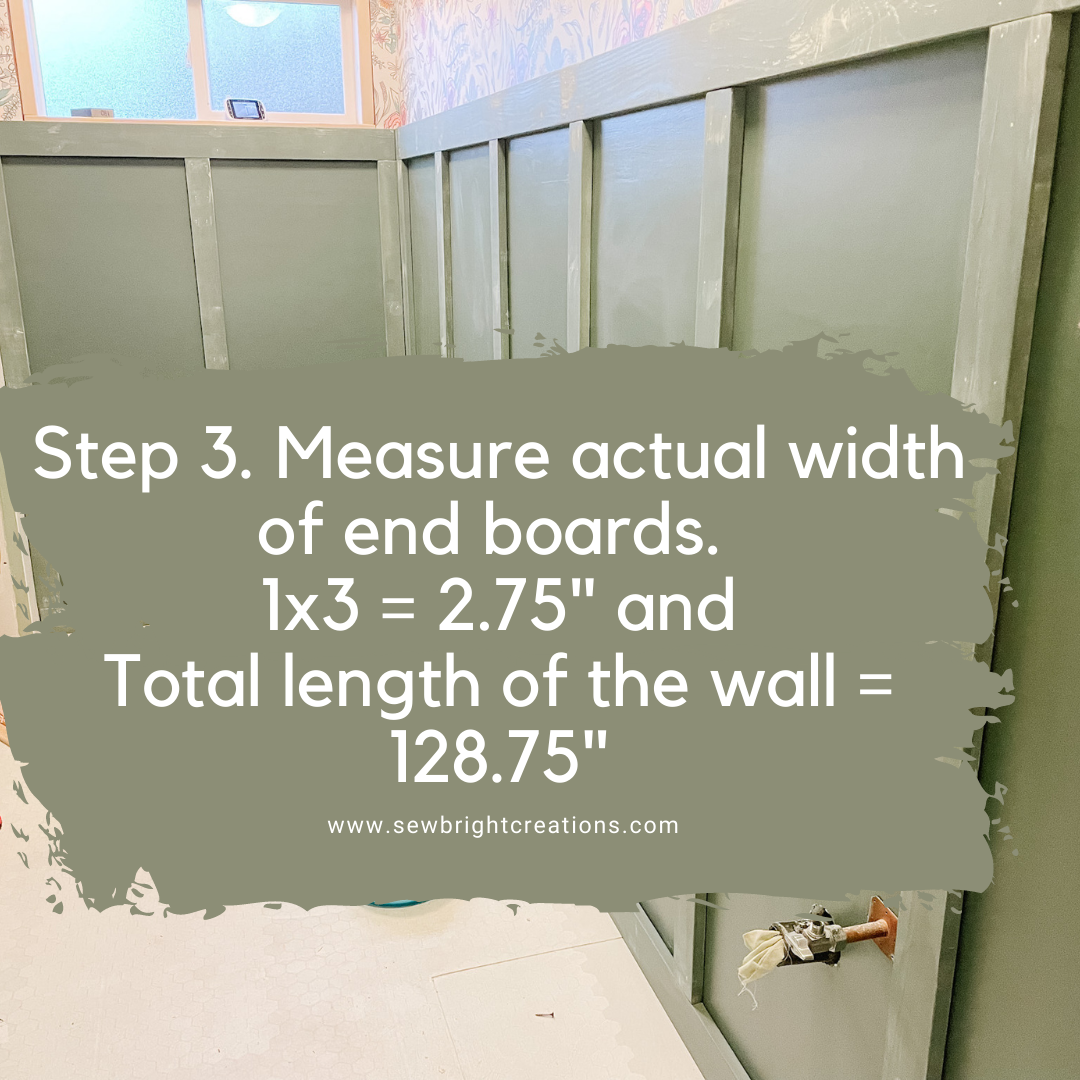
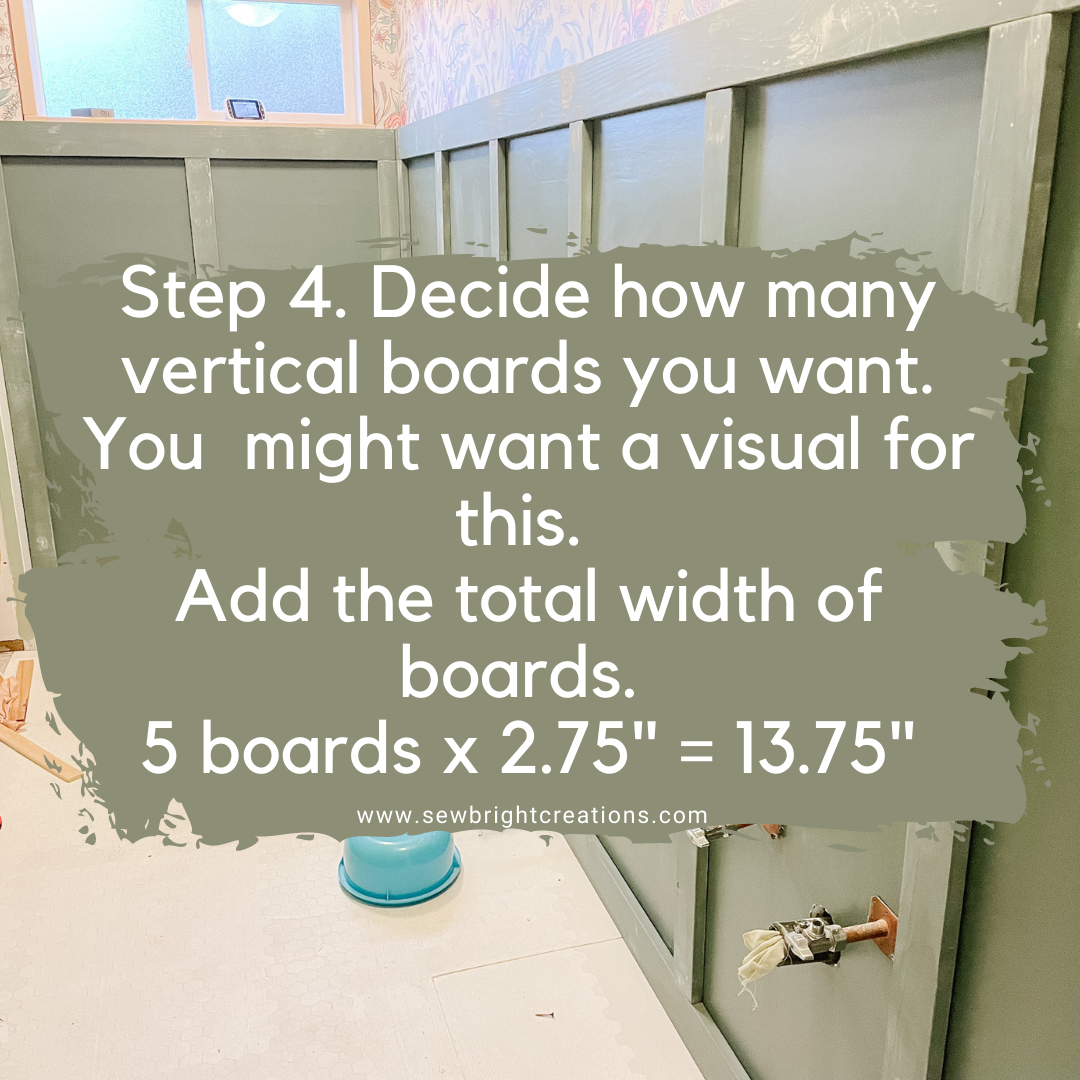
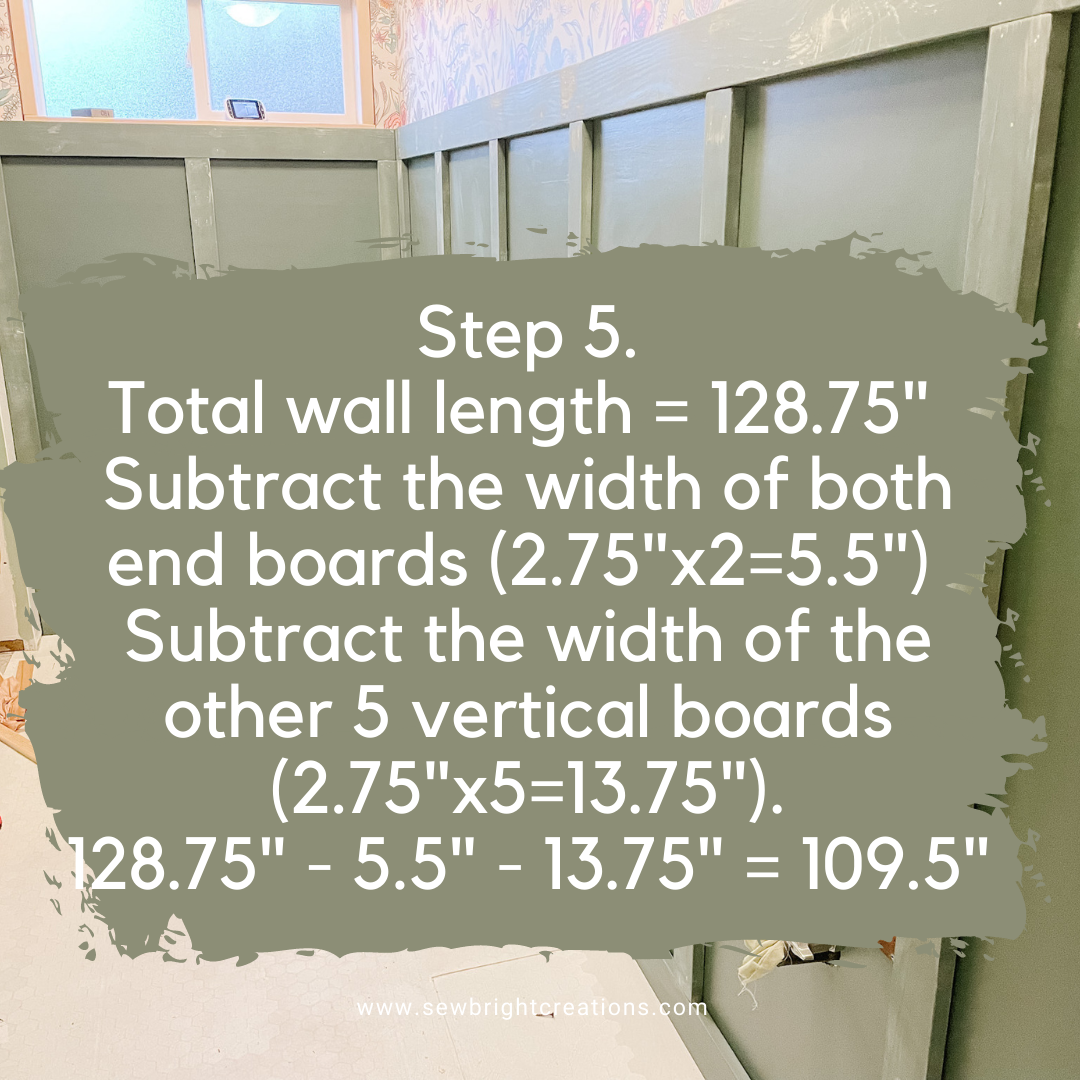
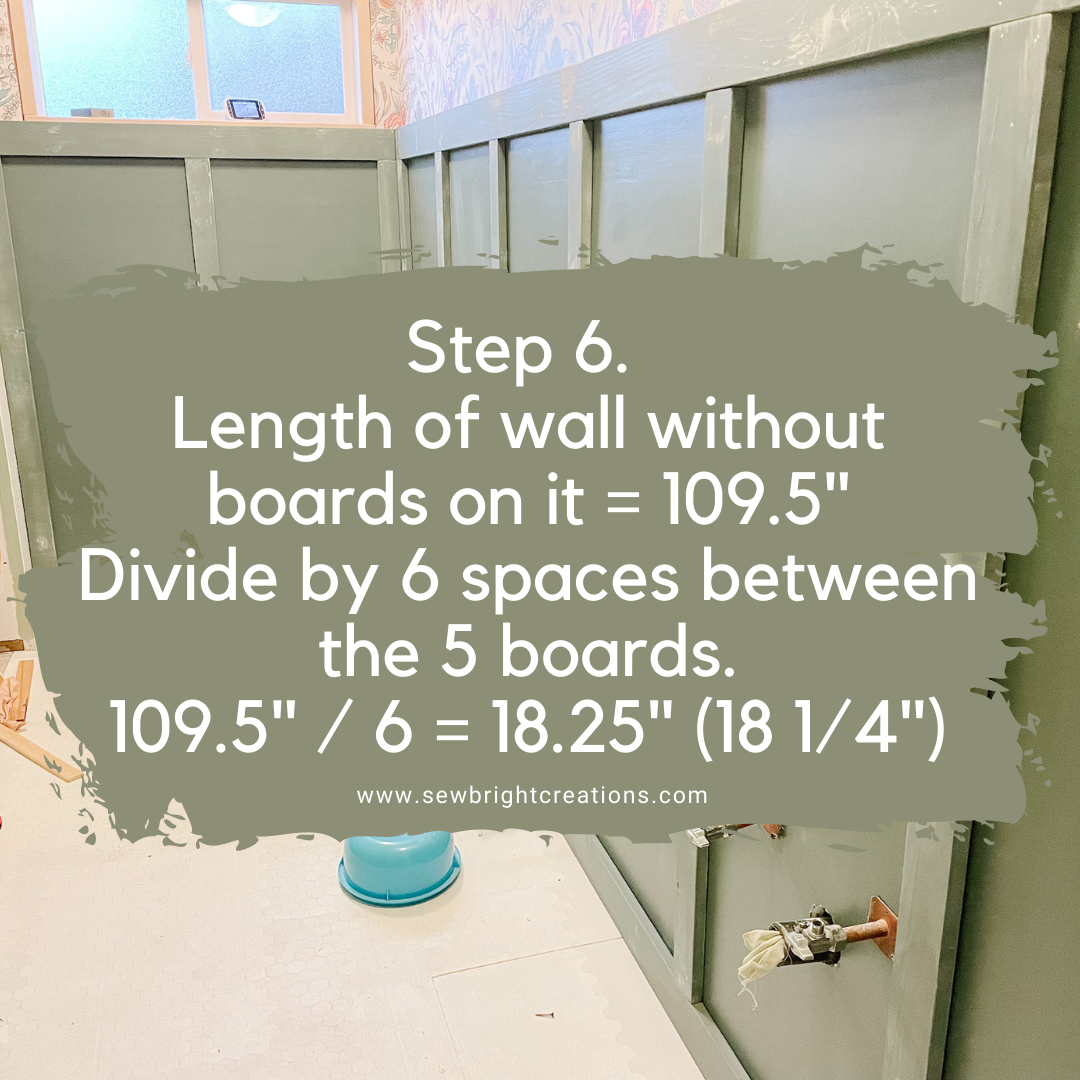
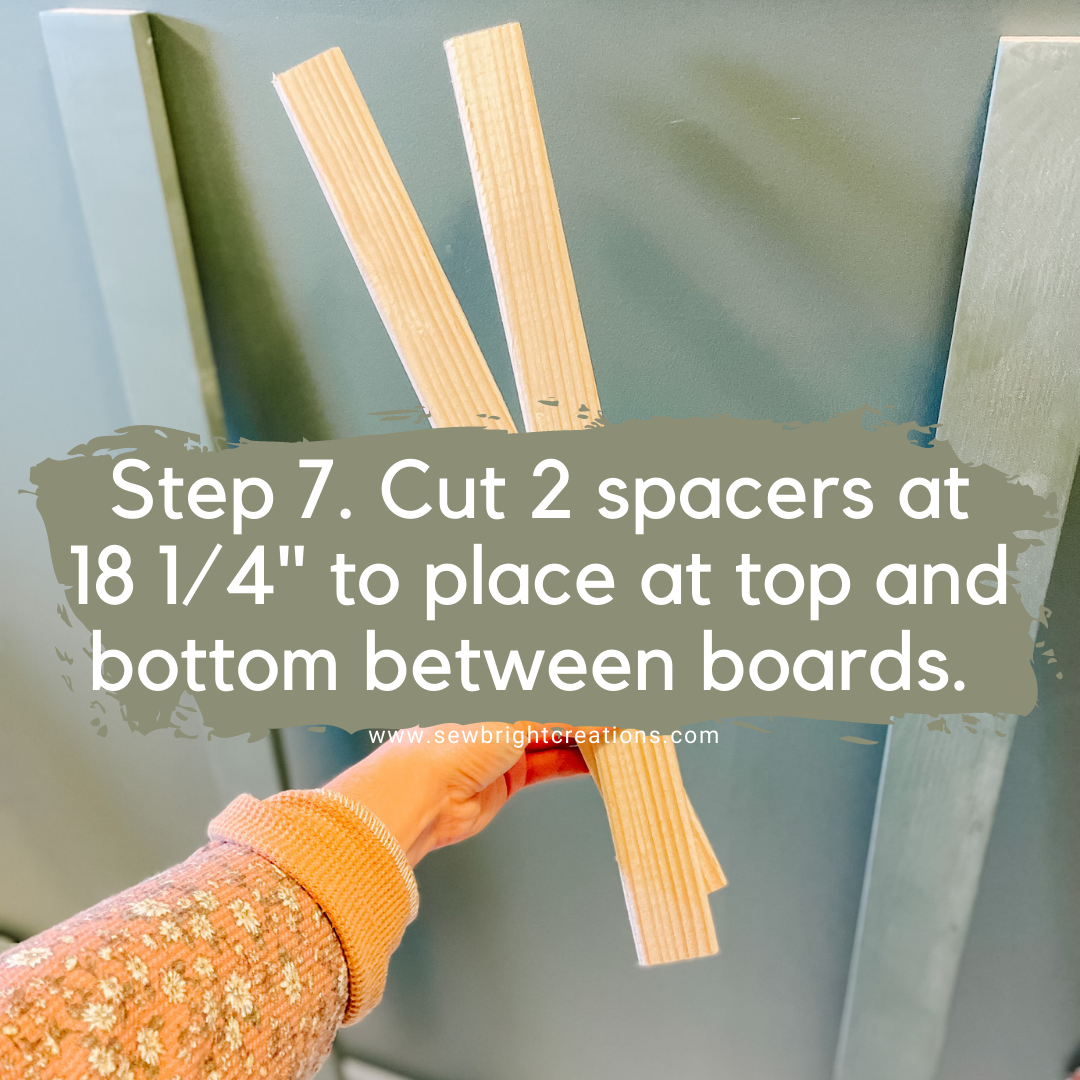
Overwhelmed with how to figure out the wood placing and measurements? I’m here to help! The photos below outline how I measured for our board and batten. You can place the vertical boards on the wall for a visual to help decide how many boards you want. At first I thought 6, but then I liked the look of 5 better. You can play around with it until you get what works for your space. Remember to consider other items that go against or are on the walls such as toilets, taps, electrical outlets, etc.
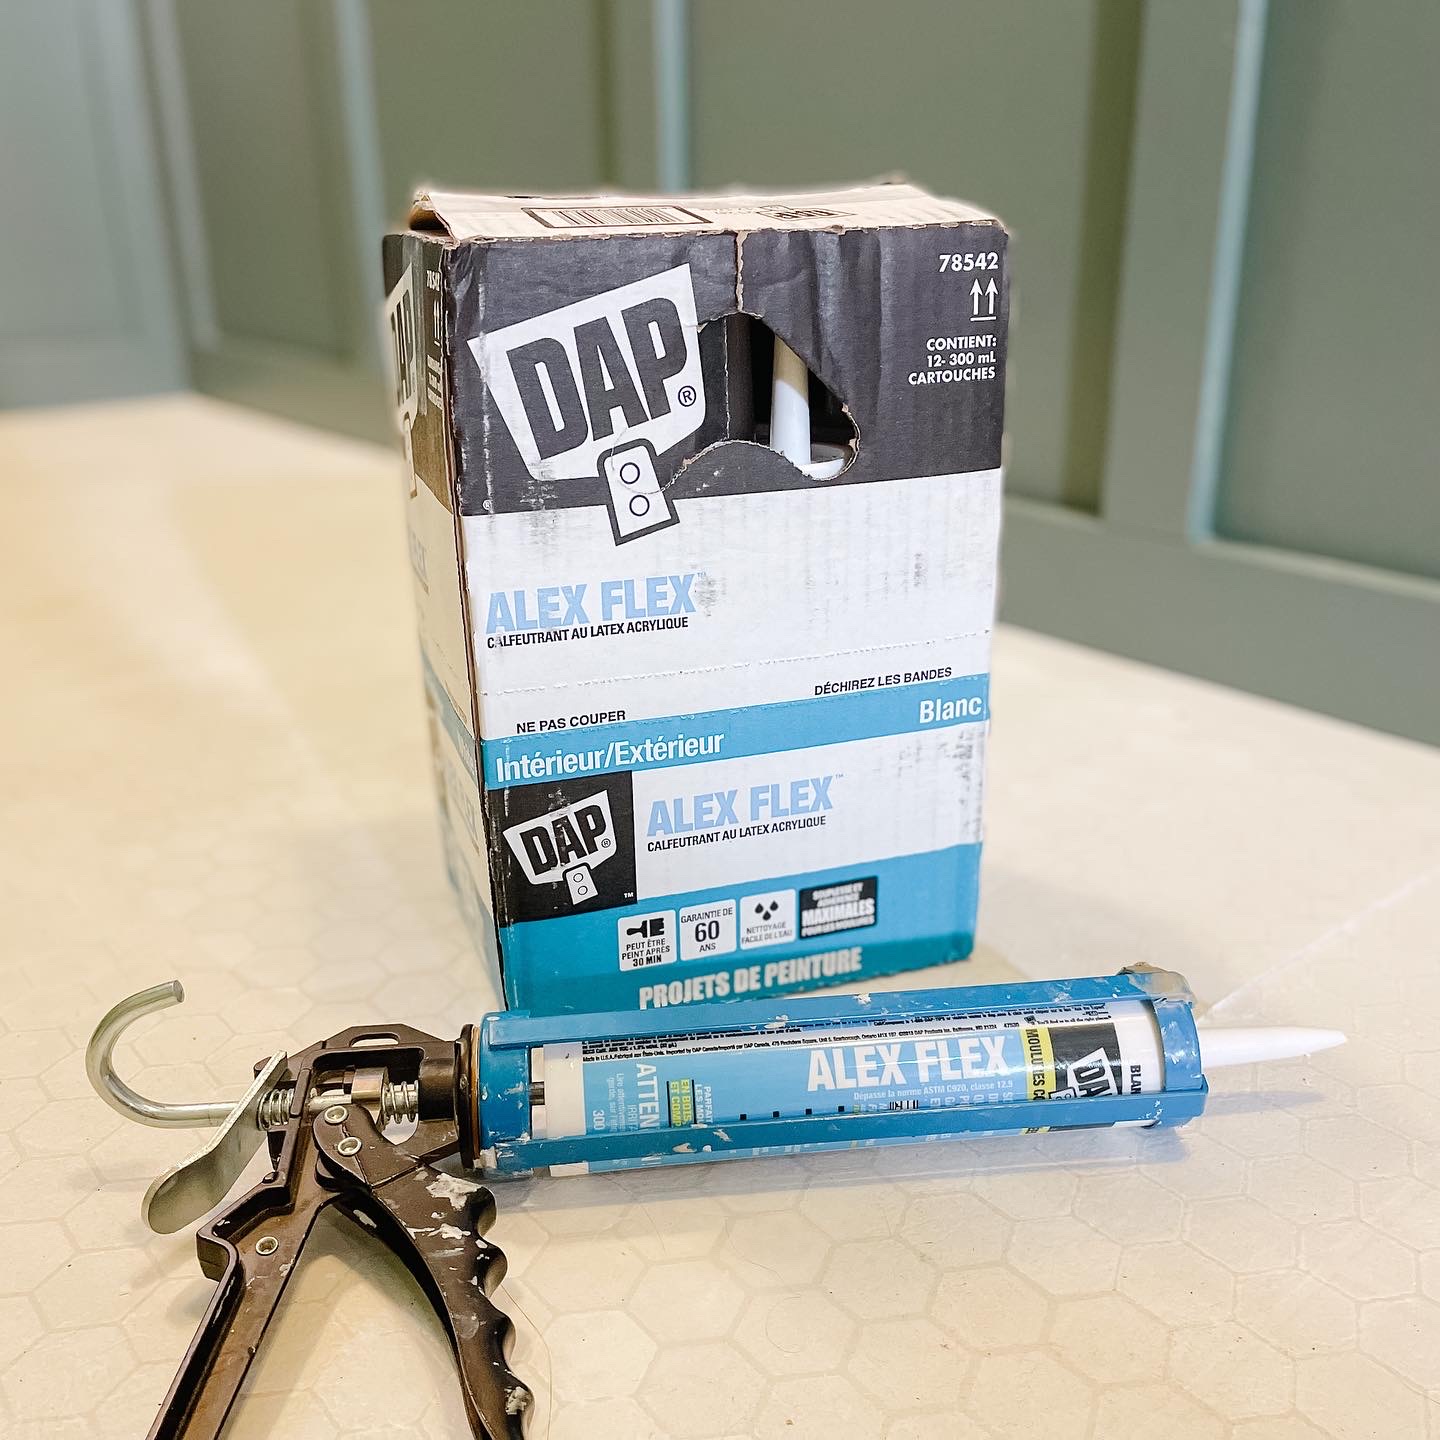
4. Trim
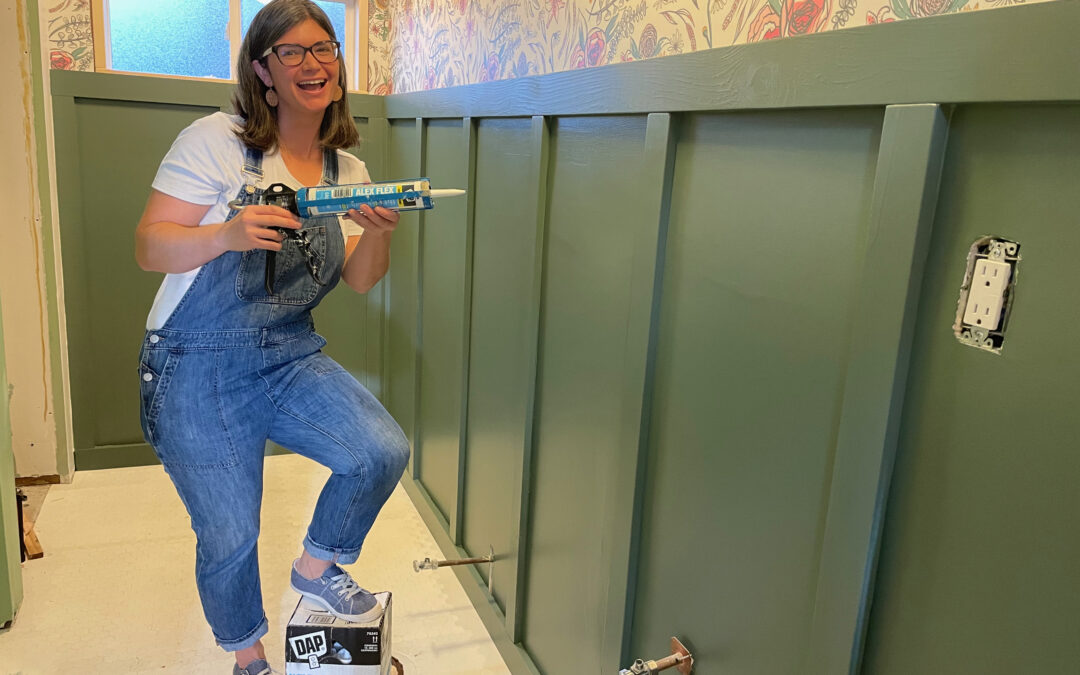
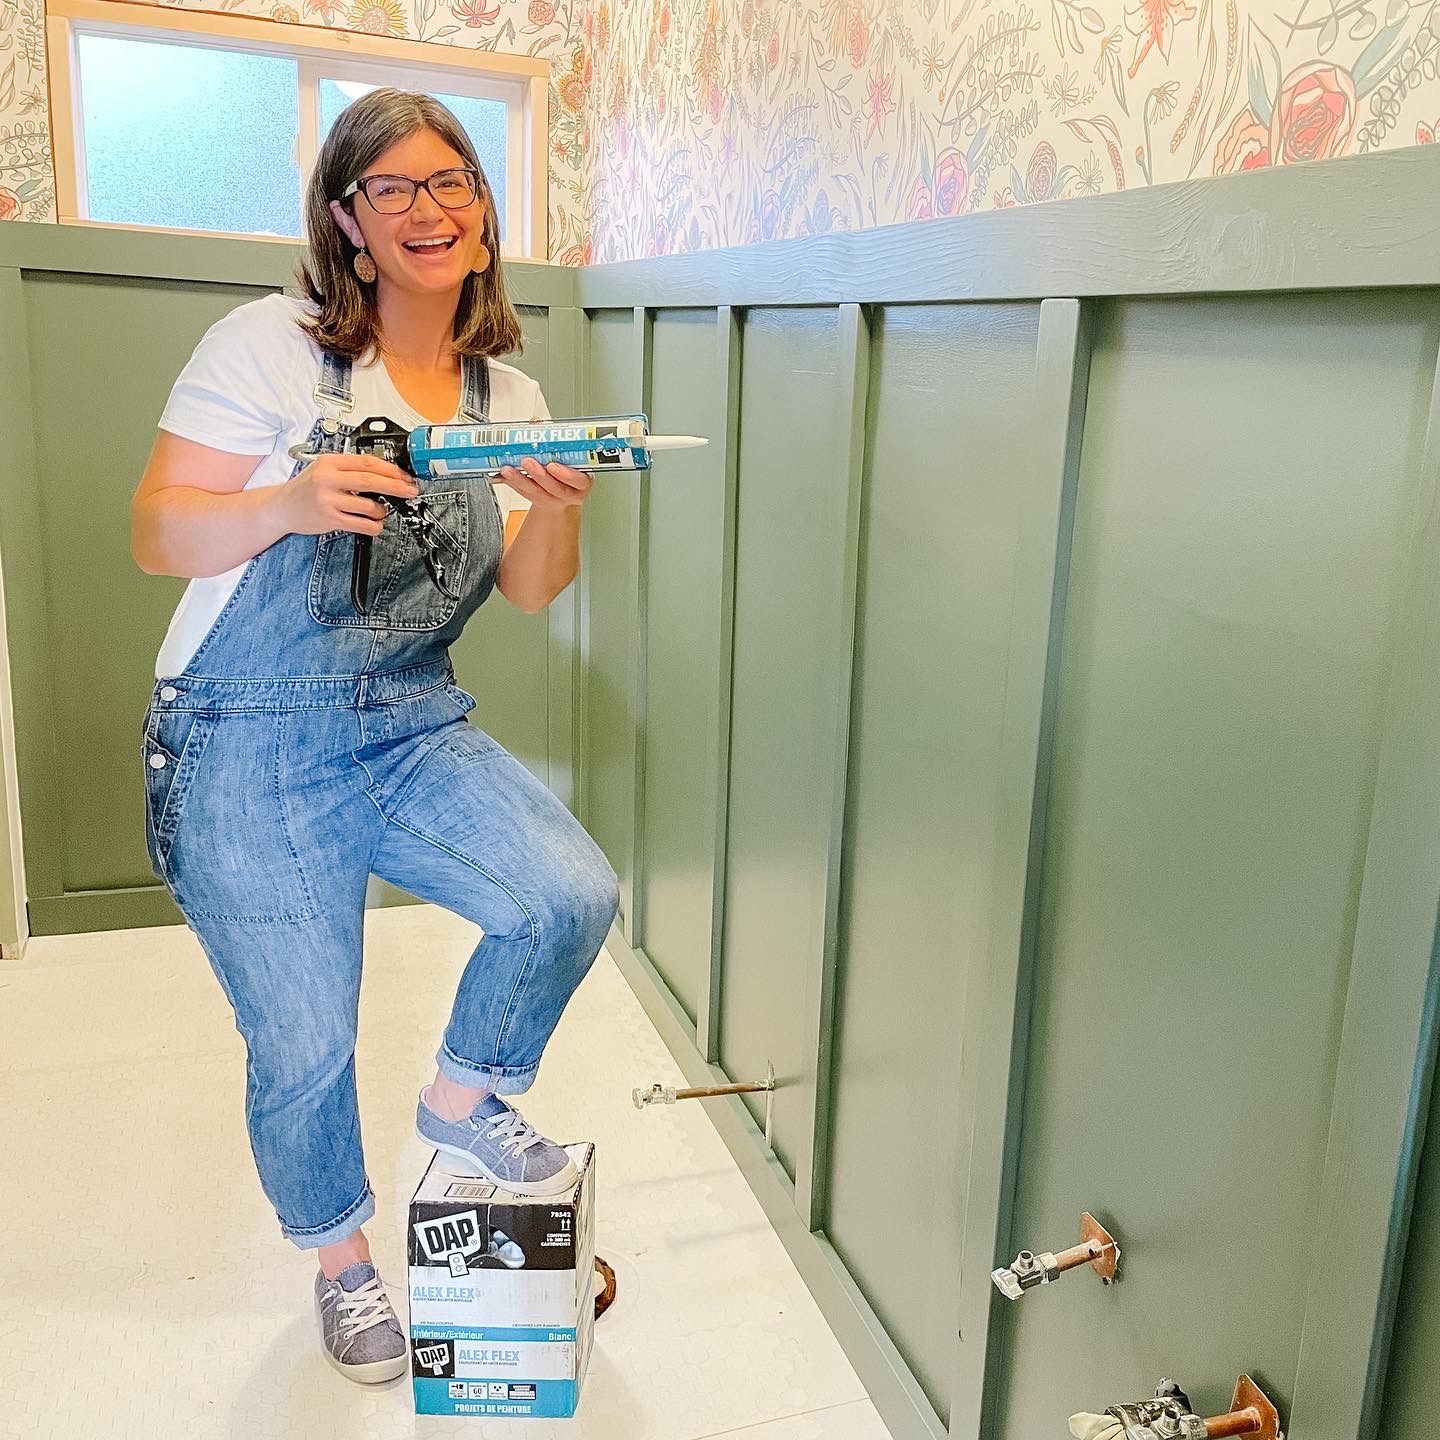
If you want to take your DIY board and batten, (or any trim related project) to the next level then you need DAP ALEX FLEX Molding and Trim Sealant. The ALEX FLEX is a step up from the ALEX PLUS (which I have used a lot in past projects) and it truly gives your project a professional finish. You can check my Instagram Highlights for installation details. Here’s a few tips for now:
- Cut (on an angle) a small amount off the end of the tube to start with. You can always make the hole bigger.
- Start slow and apply multiple layers (if needed) instead of putting too much on at once.
- Have wet paper towel/rags ready before you start and a container to put them in. Plan to throw them out instead of trying to re-use them. I re-use many things, but this is not one of them!
- Let dry fully before painting. This one only takes 30 minutes.
- If you paint one coat before applying the trim it helps to see the cracks and areas that need trim.
- Take your time! This is not a project to do when you’re in a rush.
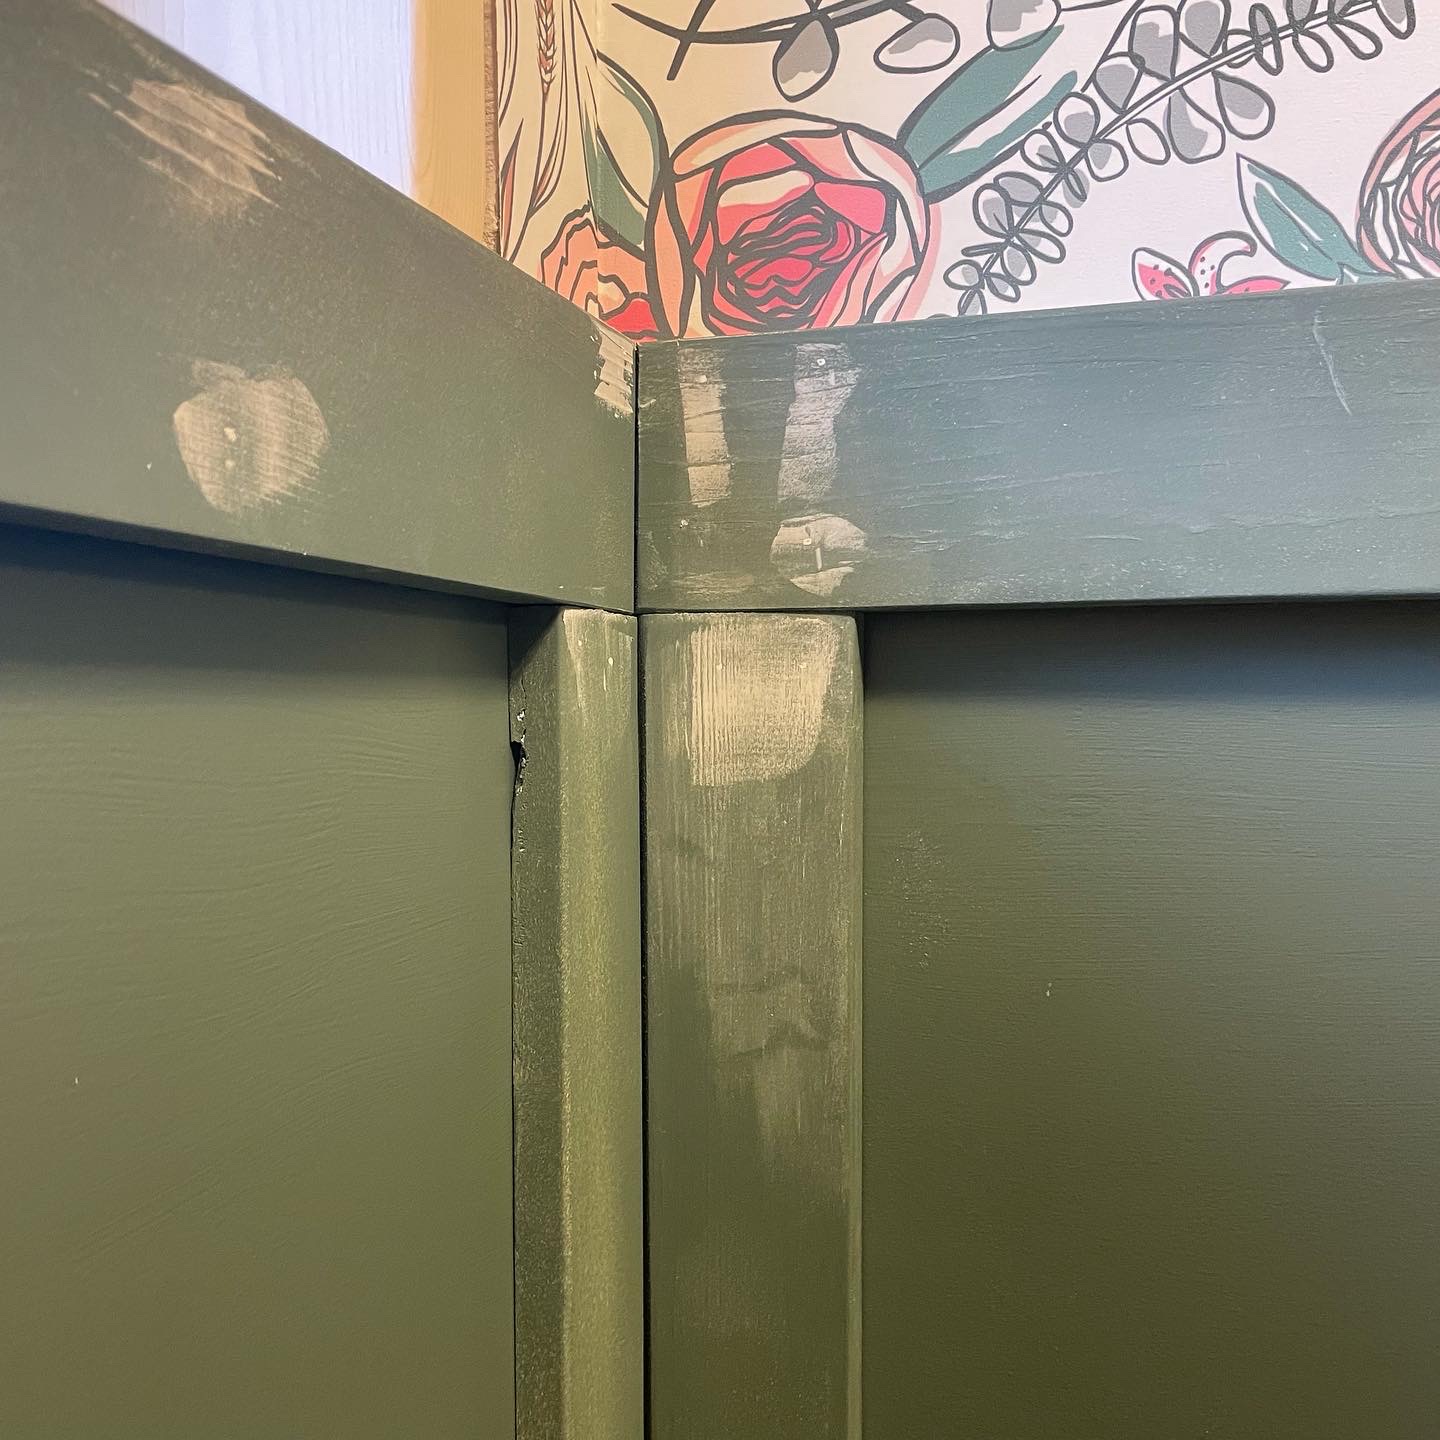
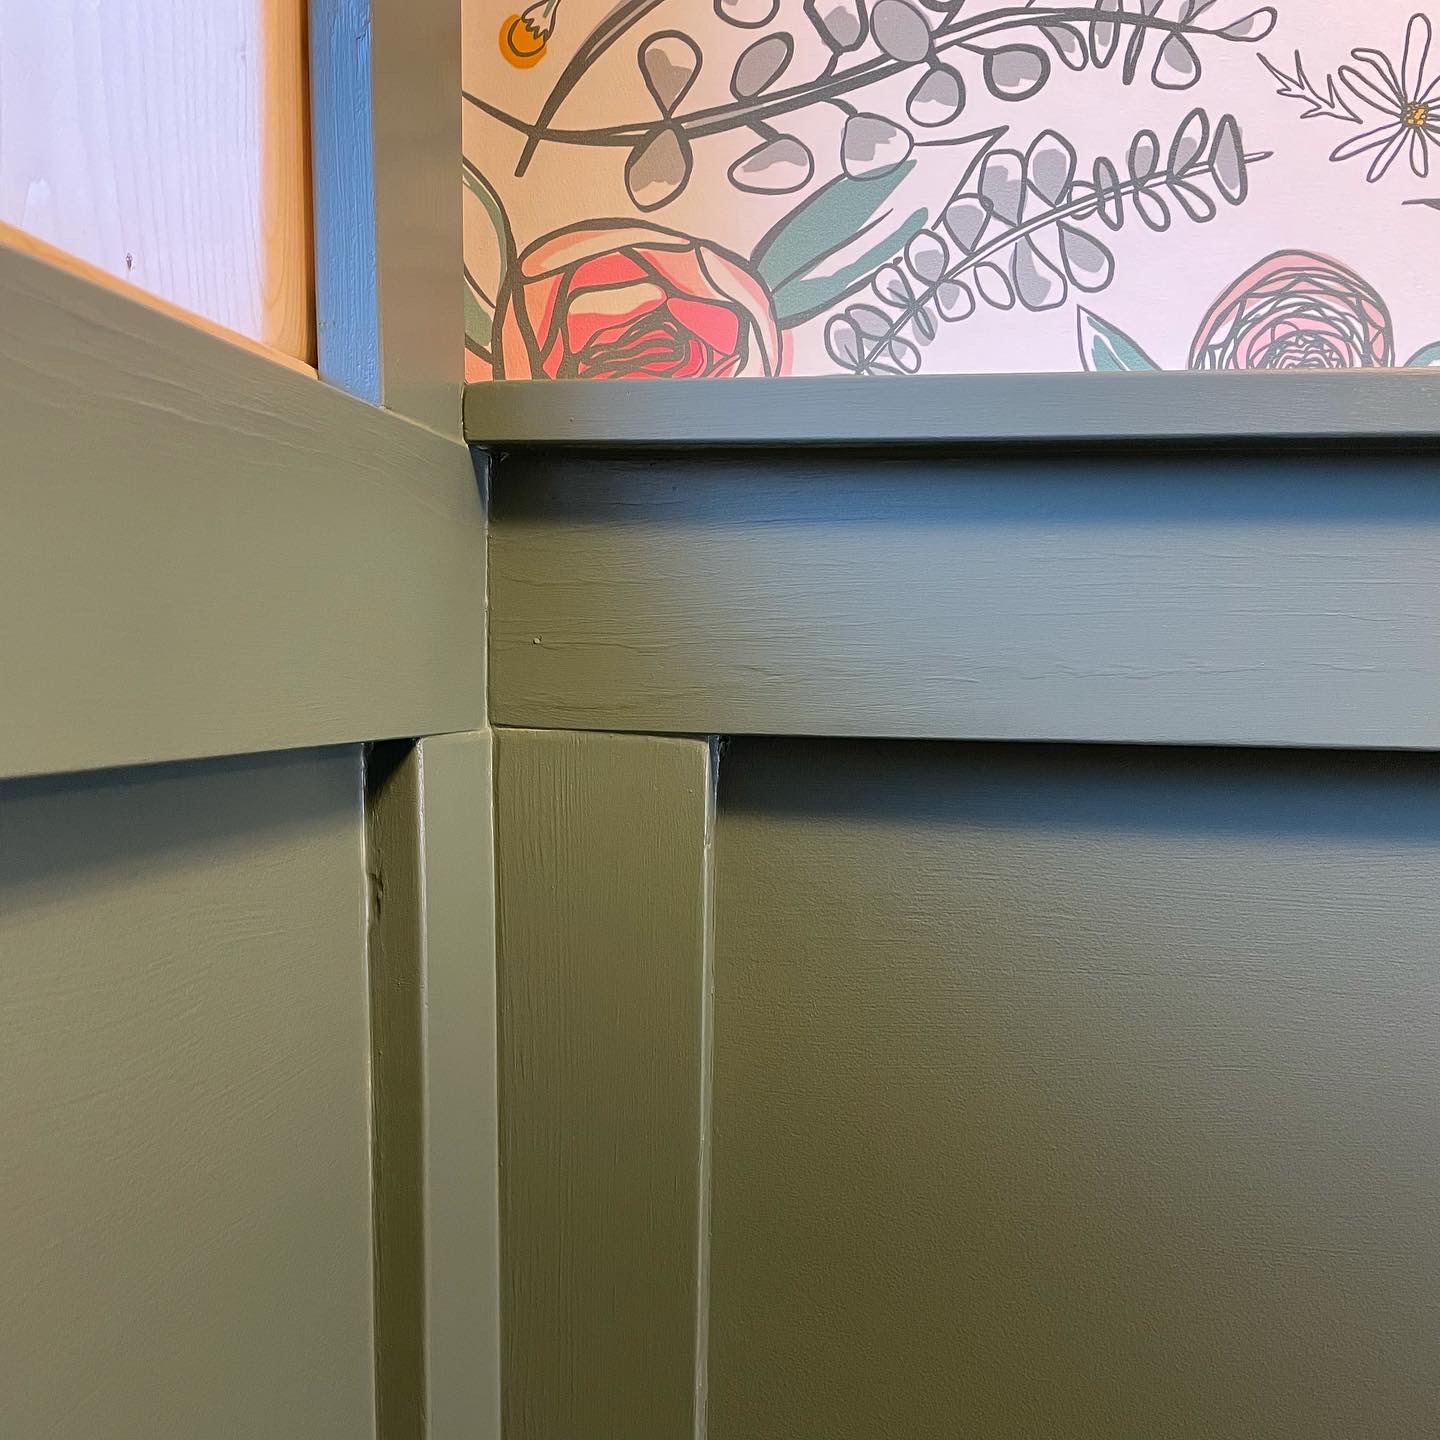
The photo on the left is before the DAP ALEX FLEX Molding and Trim Sealant was applied and the one on the right is after (and after it was painted). Can you see the difference?
I love the look of board and batten with or without a top board, but I do personally feel like the top board really takes it to the next level, especially for the bathroom. I used a 1×2 to put on the top edge and I think it really just adds a bit of extra character and finishes it off. What do you think? Would you have added it or left it?
Any questions! Let me know in the comments!
We would love to see your renovations so please share with us by tagging us on Instagram @sewbrightcreations or email them to [email protected].
Shop this post …
Here are some of the tools and supplies I used for the board and batten <<some links are affiliate links where I may earn a small commission at no extra cost to you, if you shop by clicking on my links. Your support is always greatly appreciated!>>


Click HERE for more of my Amazon Favourites!


