
To say my 3.5 year old is obsessed with her dolls is an understatement! She is so in love her all her babies (dolls and stuffed animals) and pretends to be their mommy all day every day. This includes bringing them with her wherever she goes. We have comprimised and depending on where we are going, she is often allowed to take one. She loves to take them to the park, but playing on the playground while holding a doll doesn’t always go over well and usually ends up with mom taking the baby. Of course I am told how to hold and care for said baby though!
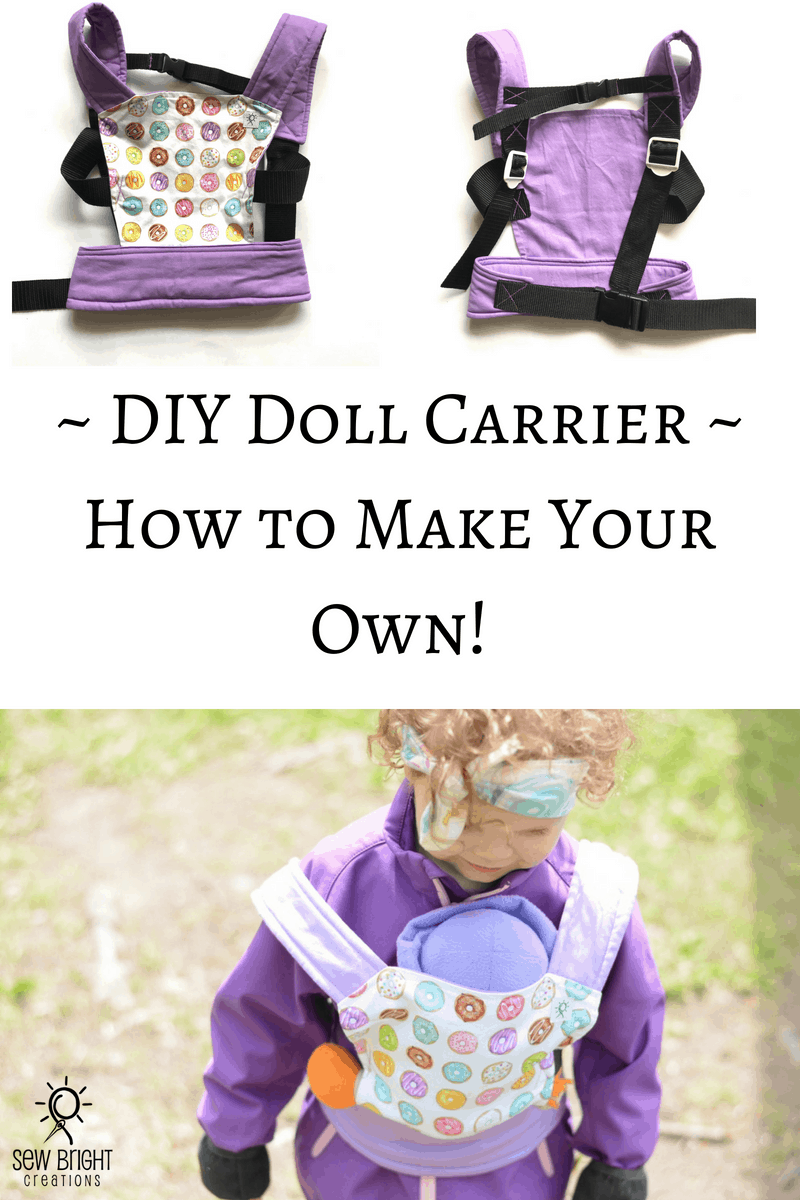
I decided she needed her own carrier (like my Tula) so she can take her own doll and hold it the whole time! I knew I wanted to make one, but wasn’t sure which style would be best. I spent too much time scrolling on Pinterest and didn’t see a pattern that I loved. I liked the simplicity of sewing the Mei Tai Carriers, but I didn’t like that they had to be tied up. I figured I would be tying and untying that thing more then I wanted to and I could see my daughter getting frustrated with it being tied in a knot and not being able to get it undone easily. After not finding what I was looking for on Pinterest, I decided to just make my own pattern and follow my Tula, since I liked the idea of the buckles.

Although I don’t have a legit pattern to share, I thought I would go through how I made it and if you’re like me, you’ll be able to fill in the blanks! If you’d rather just purchase your own, then you can do that too! I have decided to take custom orders, as time permits, until Christmas (2018). Just send me an email and we can work out the details 🙂 [[email protected]]
How to Make a Doll Carrier
1. First you need to make your own pattern. I used parchment paper and followed the general pieces of my Tula Carrier. I also measured on my 3 year old to make sure the size was appropriate. Once you think you have the right shape and piece, make sure to fold the parchment paper in half and cut again to ensure it is symmetrical.
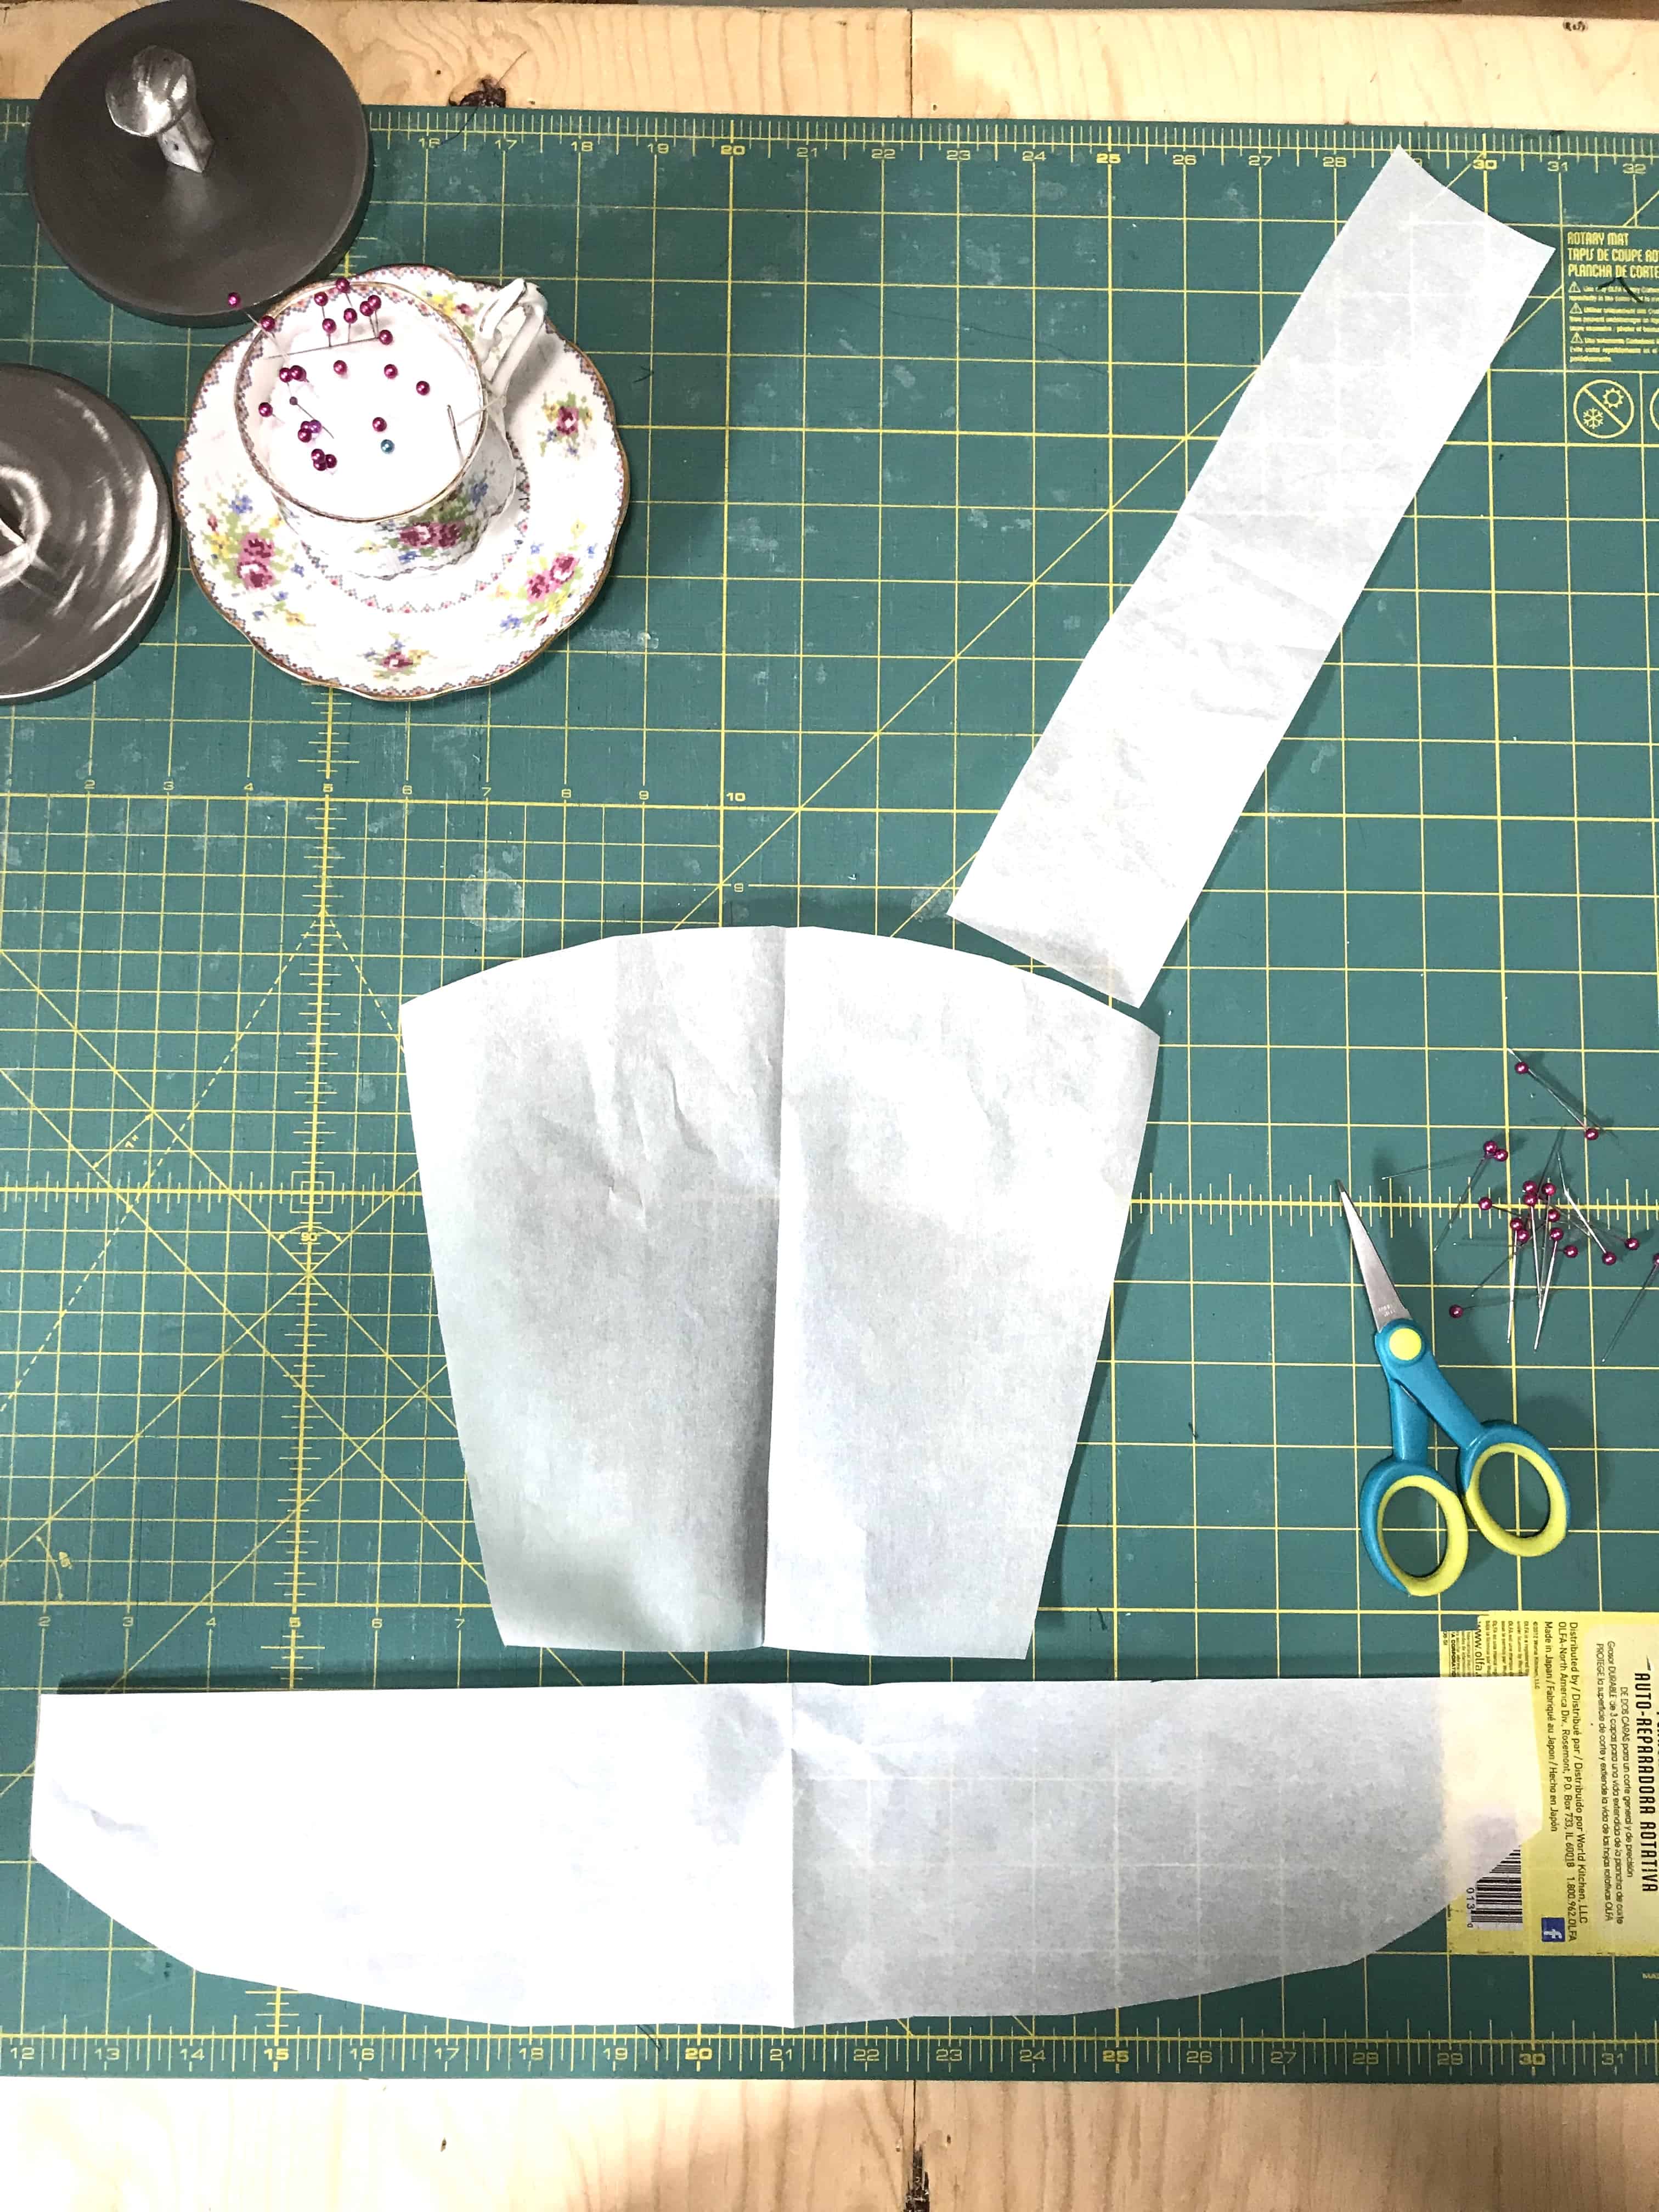
2. Next you’ll need to cut your fabric. I used cotton for each piece. You need 2 of the main panel on the back, 2 for the waist piece and 4 for the shoulder straps. You could also cut out 2 pieces of fleece (1for each shoulder strap) and 1 for the waist piece. I sewed the fleece inside just for added padding and to make similar to the Tula.
3. Once your fabric is cut you can pin and sew. Make sure to sew the shoulder straps first, leaving one end open. Sew everything right sides together and flip out when finished. Next sew the waist part and leave the part open that will join with the back panel. Also make sure to iron each part once flipped the right away around, after sewing. When the shoulder straps are done, flipped the right away around, ironed and top stitched on the edges, then you can place on the inside of the back panel. Sew back panel and leave the bottom part open. Flip the right away around and the straps will be facing out. Iron then place inside the open seam on the waist panel and top stitch all the way around the waist piece. I even added a second row where the back panel joins the waist piece.
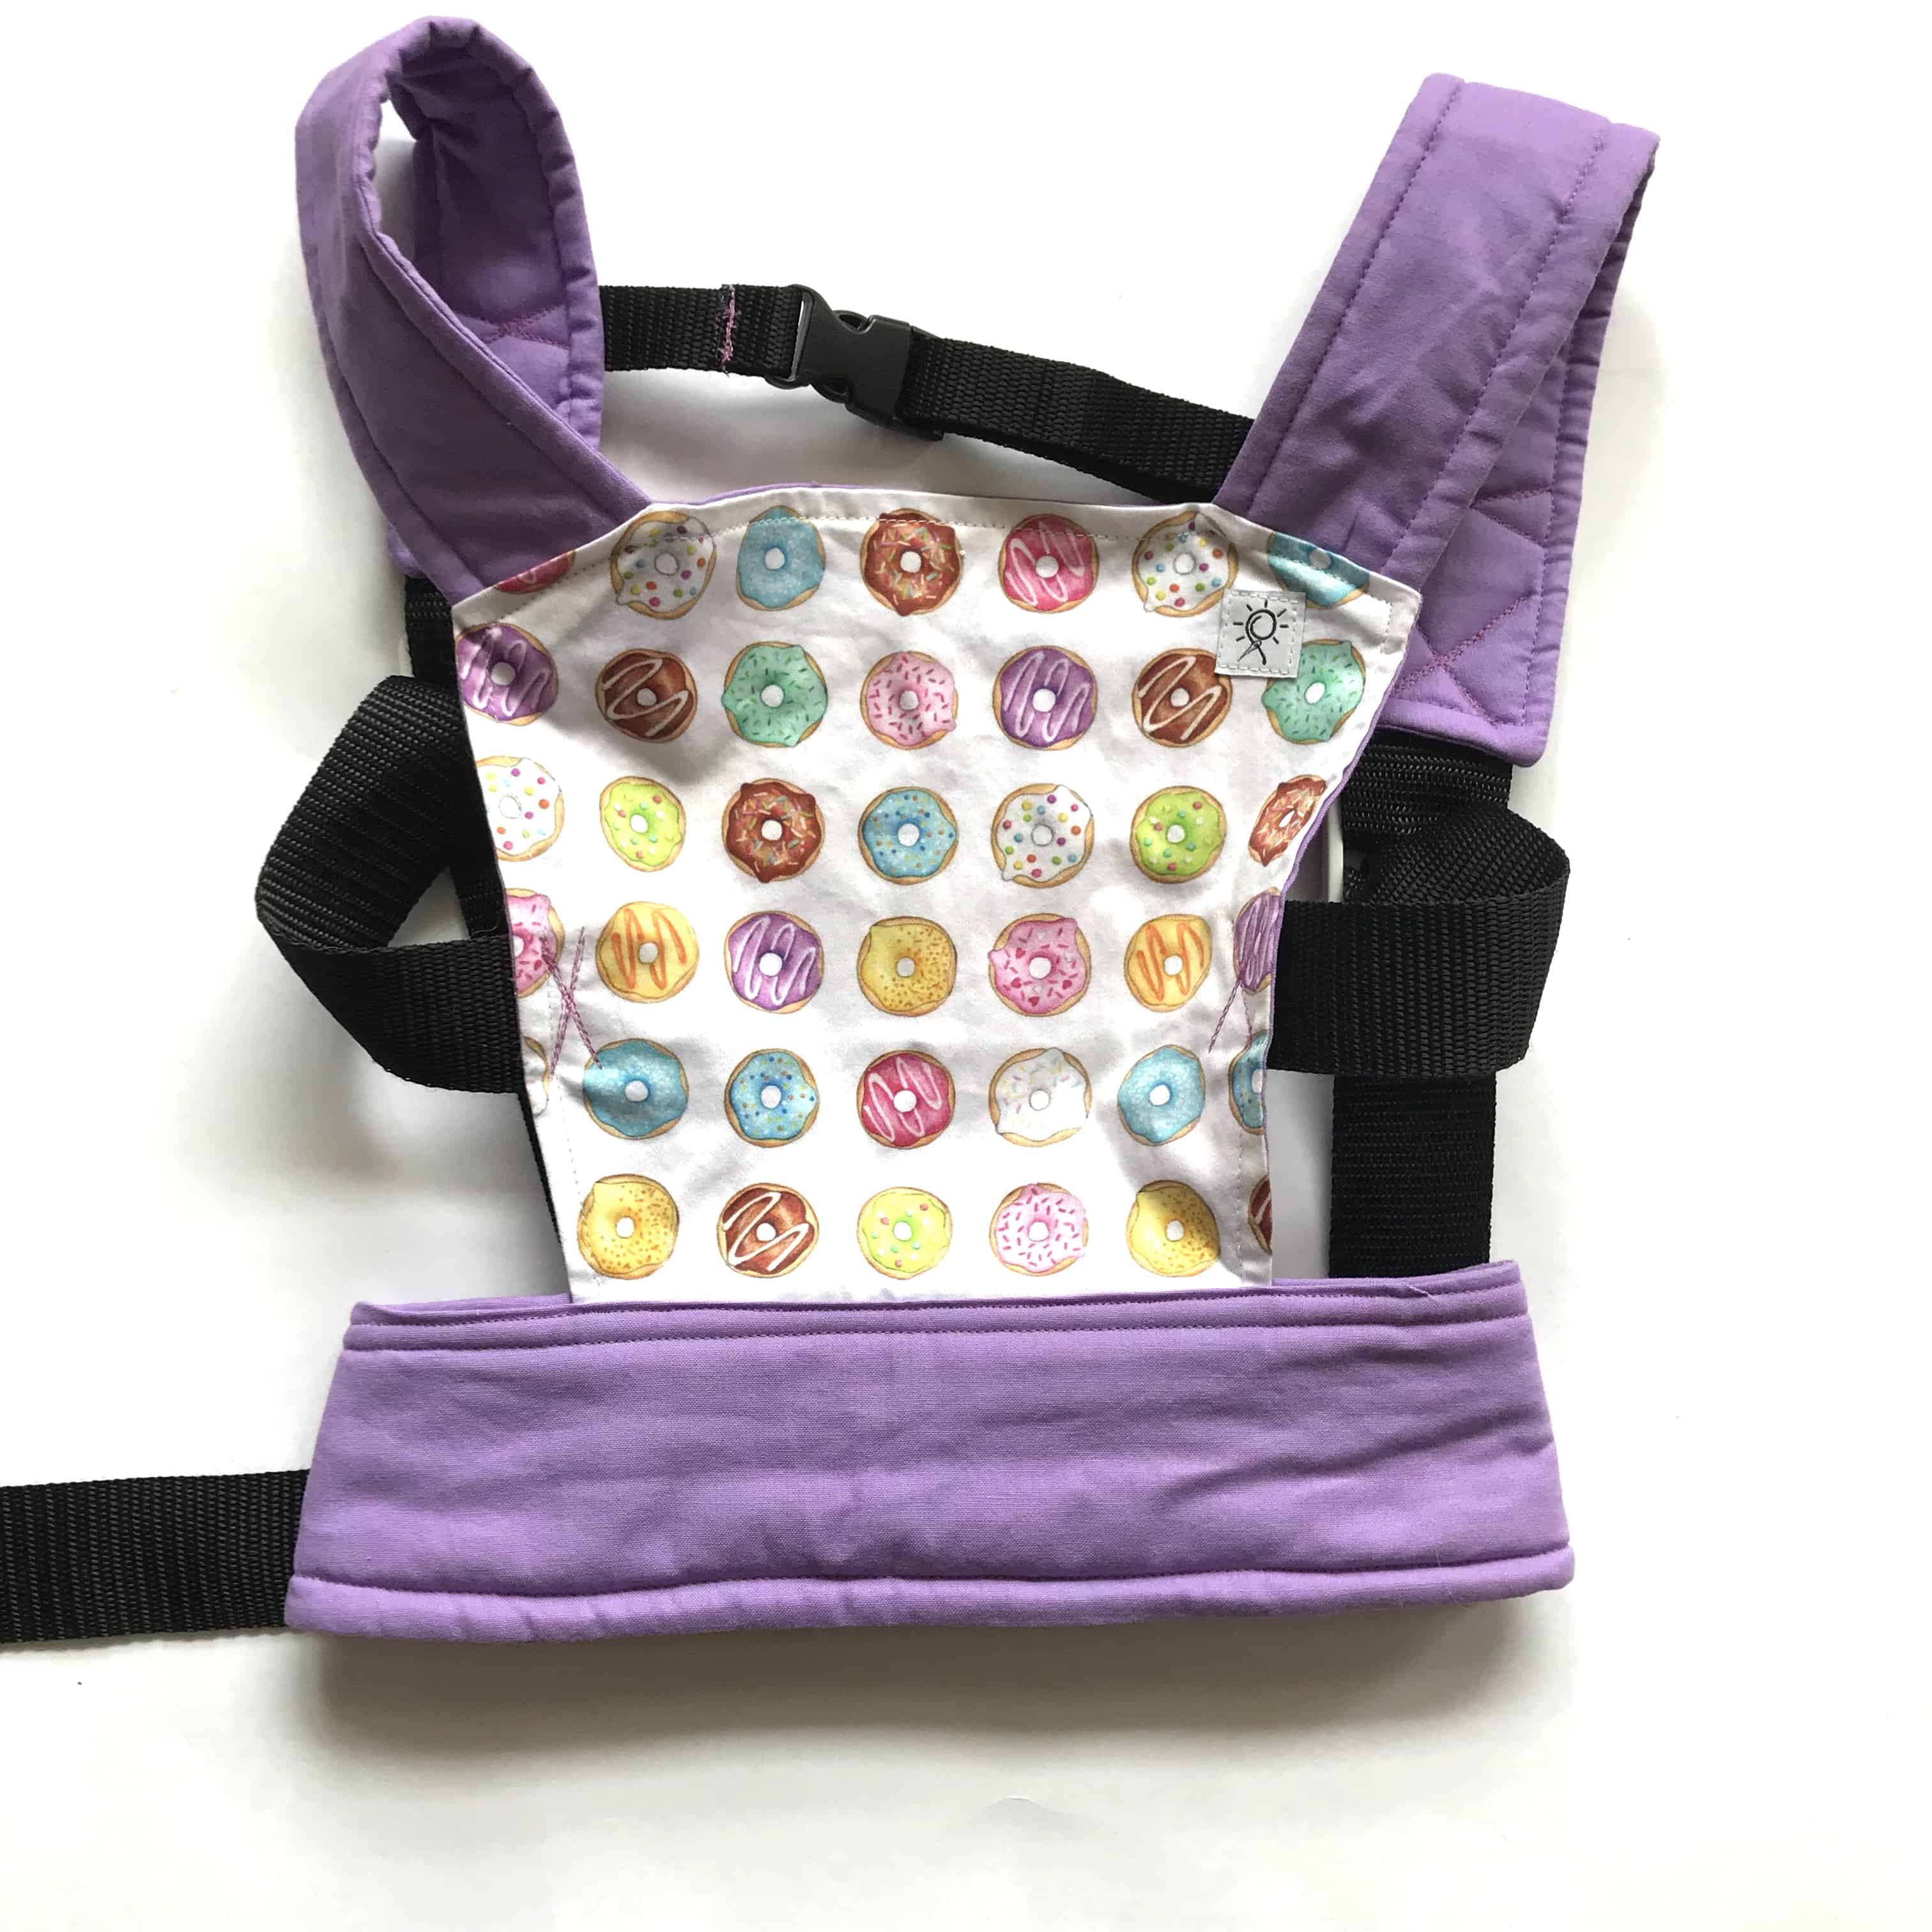
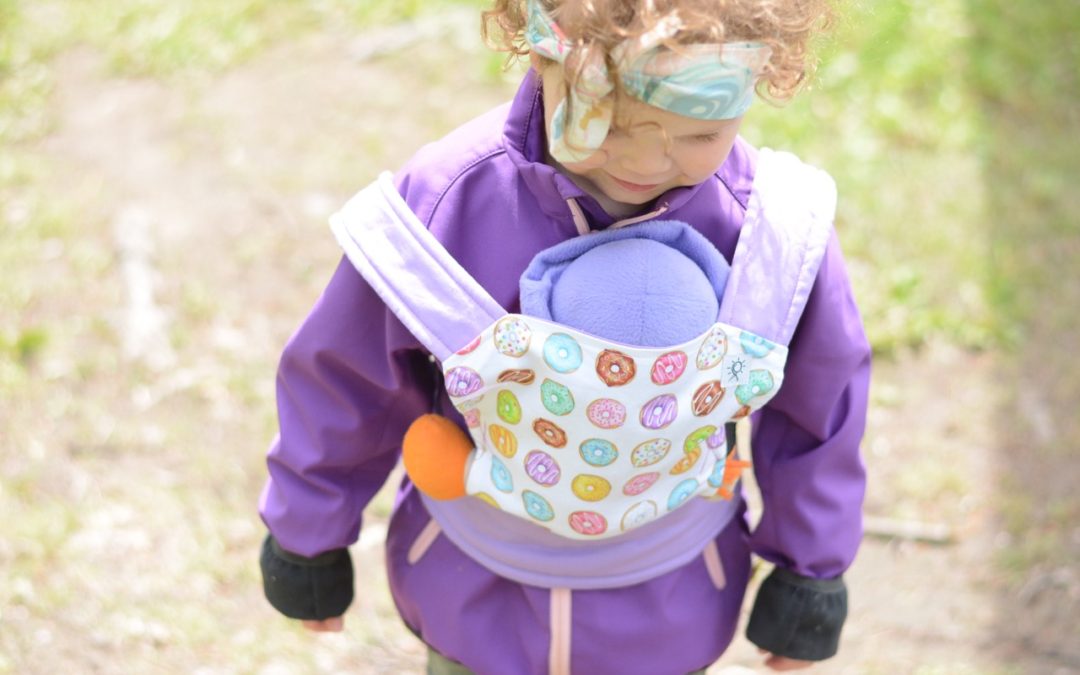
My daughter picked the donut fabric, of course! If you love this fabric too, it is also available as a bib in my Etsy Shop. Click HERE to see!
4. Lastly you’ll want to cut and sew the straps on. This was the hardest part for me, not because of the sewing, but because I didn’t have the right buckles or right amount of straps. It took me 3 trips to the local fabric shop, but eventually I got it! The arm straps are thicker then they really need to be, but it is what we had available.
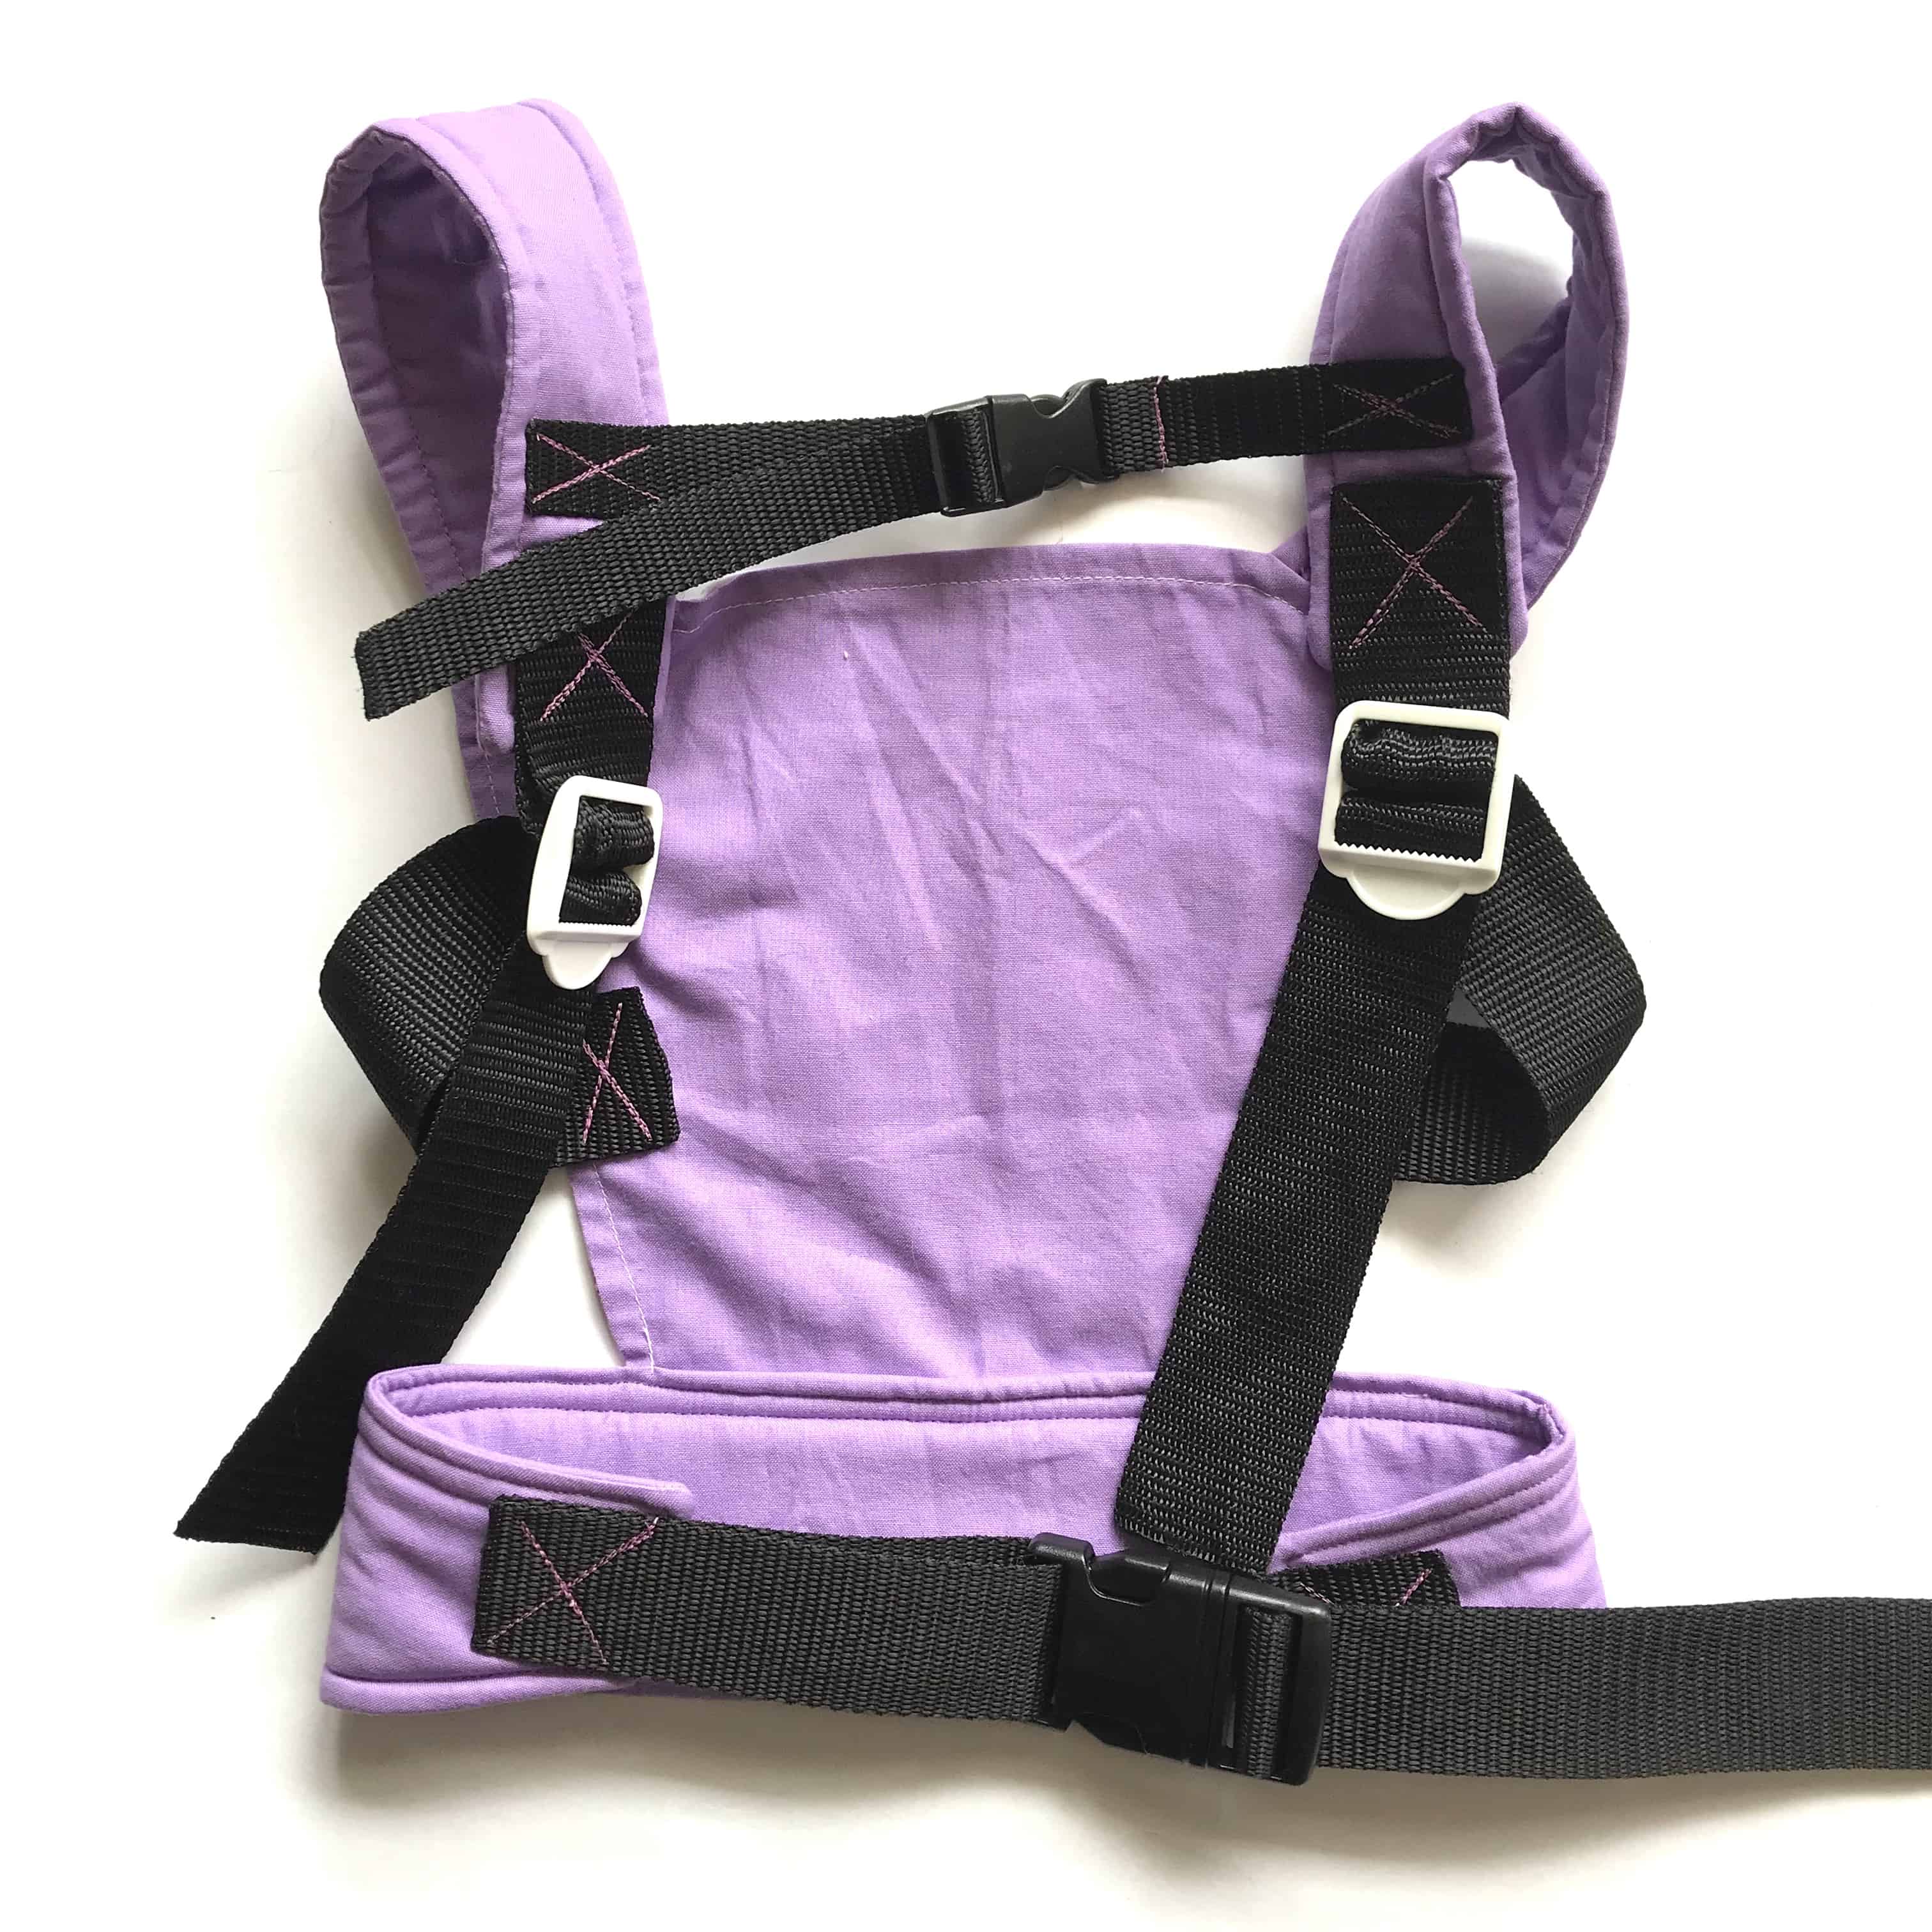
Instead of trying to explain, I think it just makes more sense to check out the photos to see the strap configuration. I sewed an X each time I secured the strap to the fabric and I made sure to melt the end of the nylon strap to make sure it would not fray. I also just measured on my daughter as I went to check for sizing.
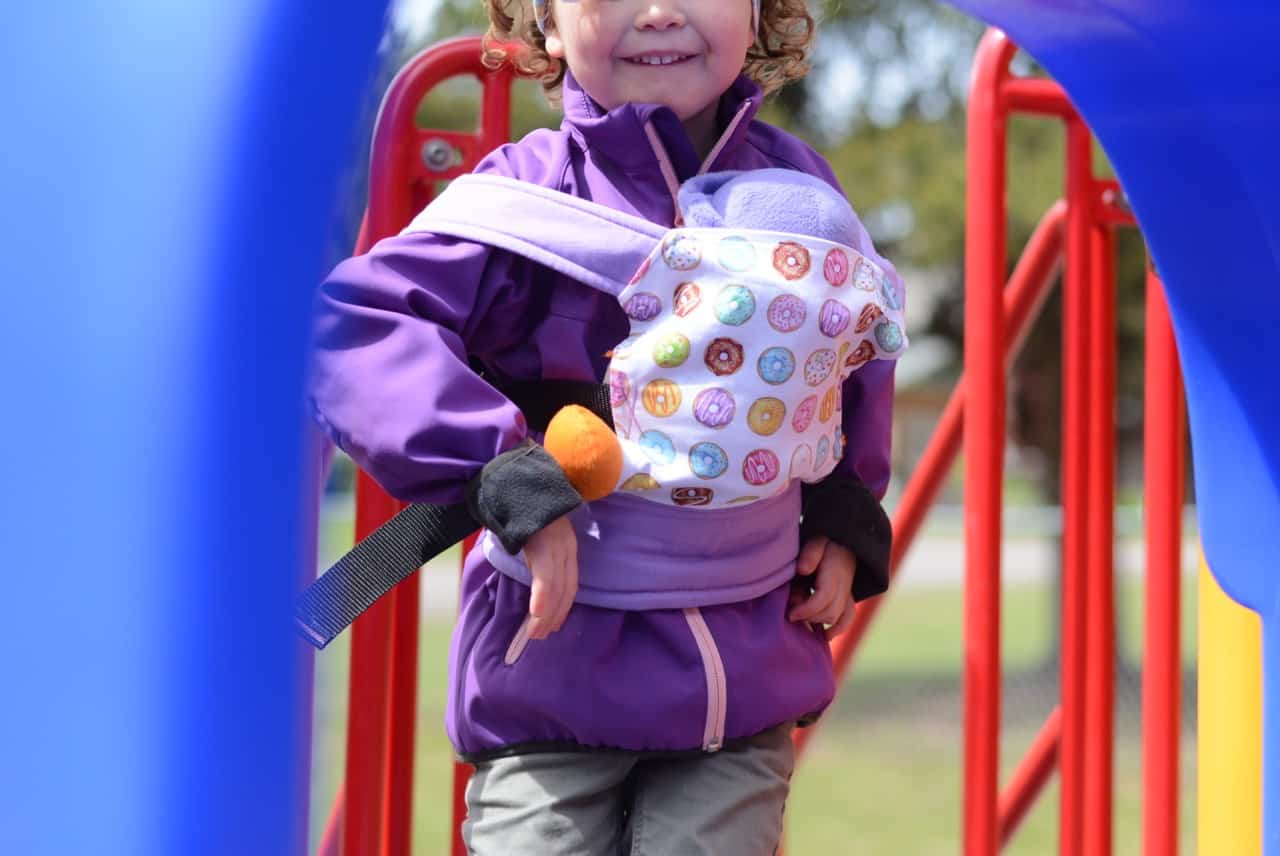
You’ll notice that in some of the photos there is no chest strap buckle. At first my daughter was too excited and just wanted to wear it before I could get that strap on, but I did put it on after she was sleeping that evening because it is needed to hold the shoulder straps together, especially while playing at the park!
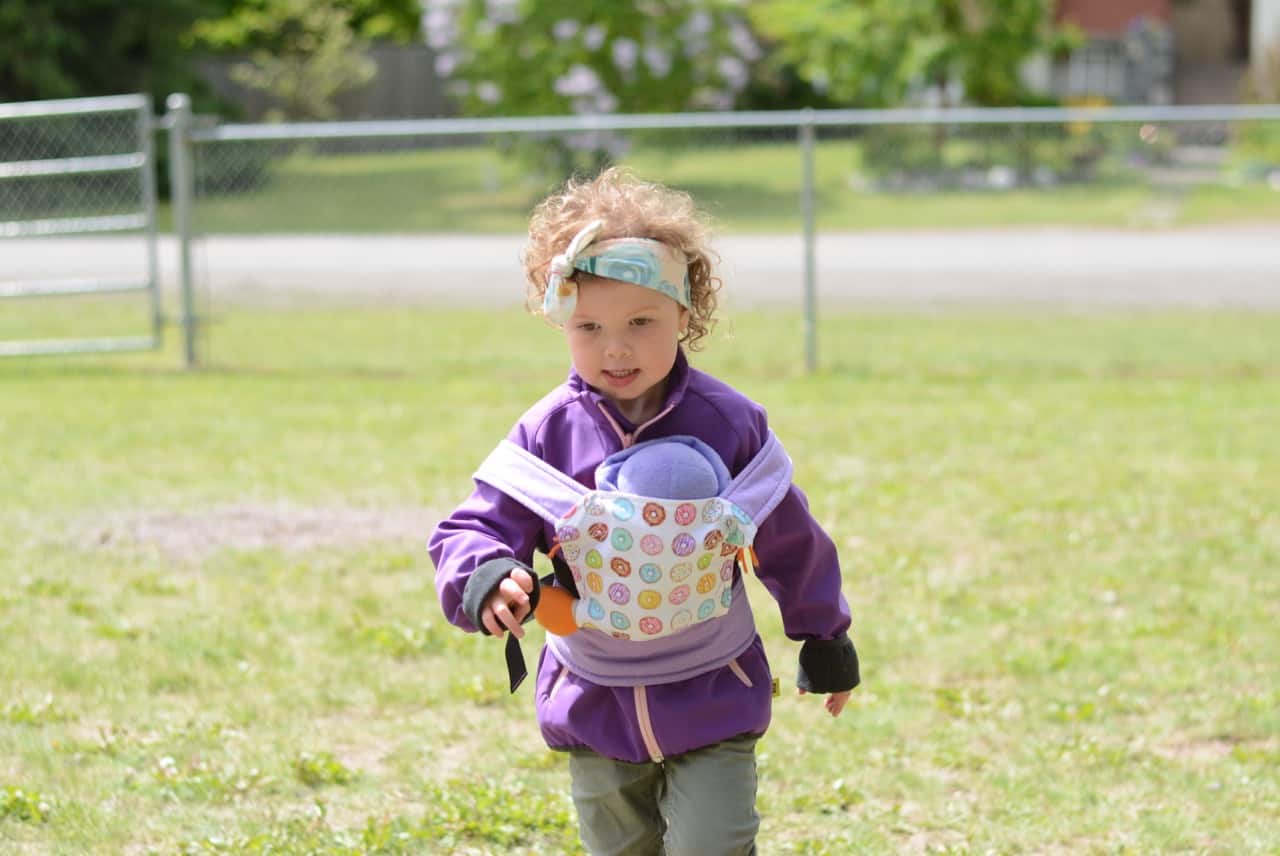
I hope you enjoyed this informal pattern! Don’t forget, just message me if you’d like to order one! Here’s a few more photos that capture just how much my girl loves her new Dolly Carrier!
Would your child like a Doll Carrier?
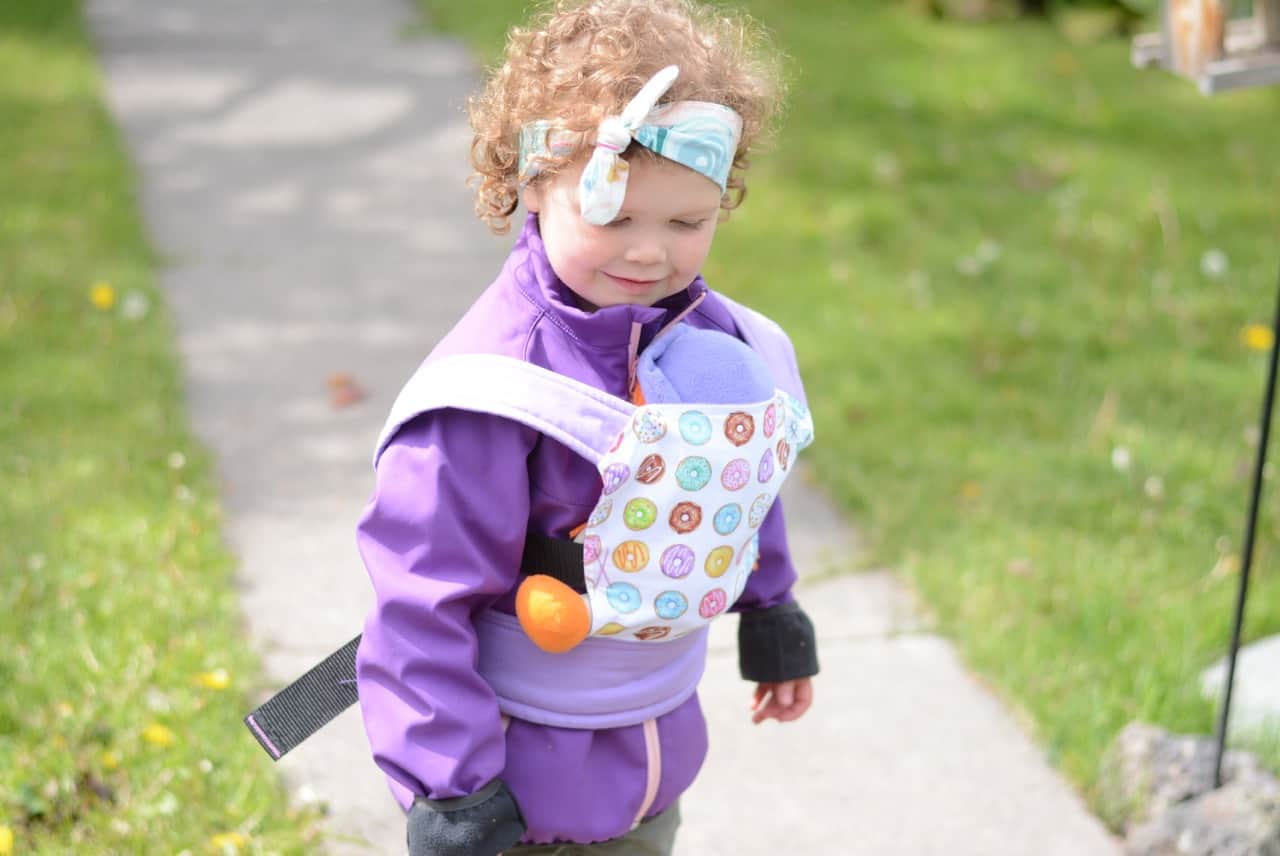
Cute headband hey? Check out all the different fabrics of this style headband in my Etsy shop HERE!
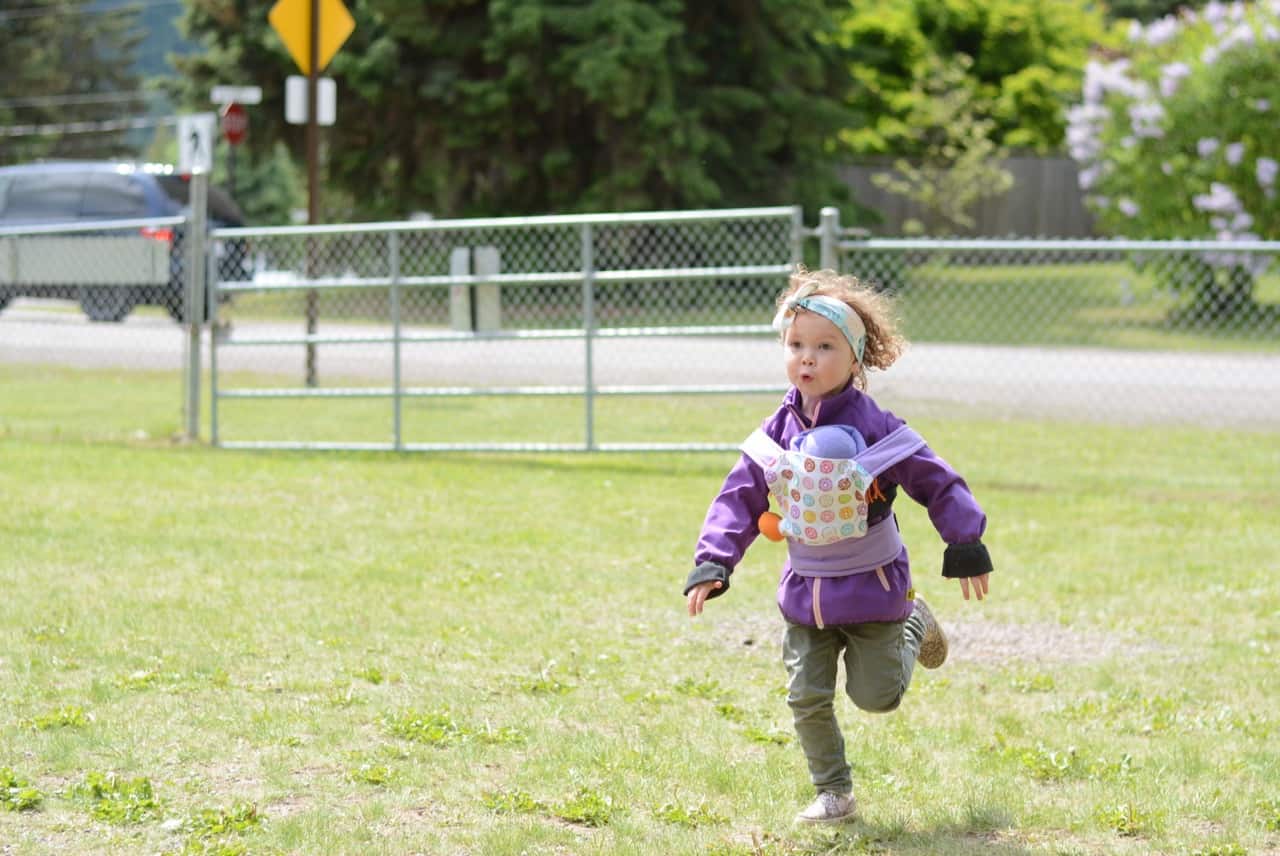
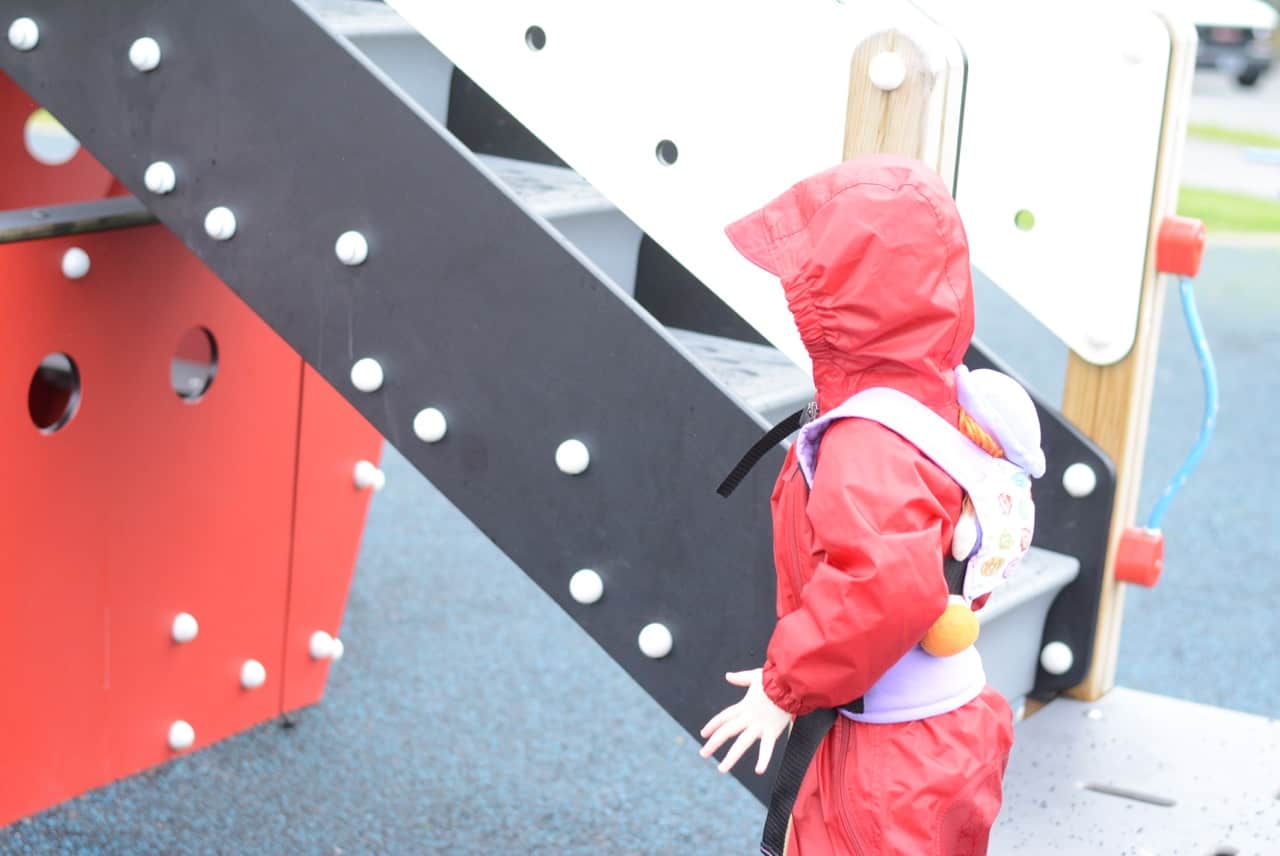
The next couple photos are playing at a playground in Prince Rupert (after the chest strap was added) and dolly was much more secure! Make sure to check the blog next Sunday to read about our adventures in Prince Rupert!

If you enjoy reading my blog, please consider sharing this to your Pinterest, it really helps a gal out!
Just hover over the top left corner of any photos and click on the Pinterest Icon!
Thank you so much! xo Jackie
This post is NOT sponsored. The opinions and photos are of Sew Bright Creations’.
Want to collaborate? Email Jackie at [email protected].


