
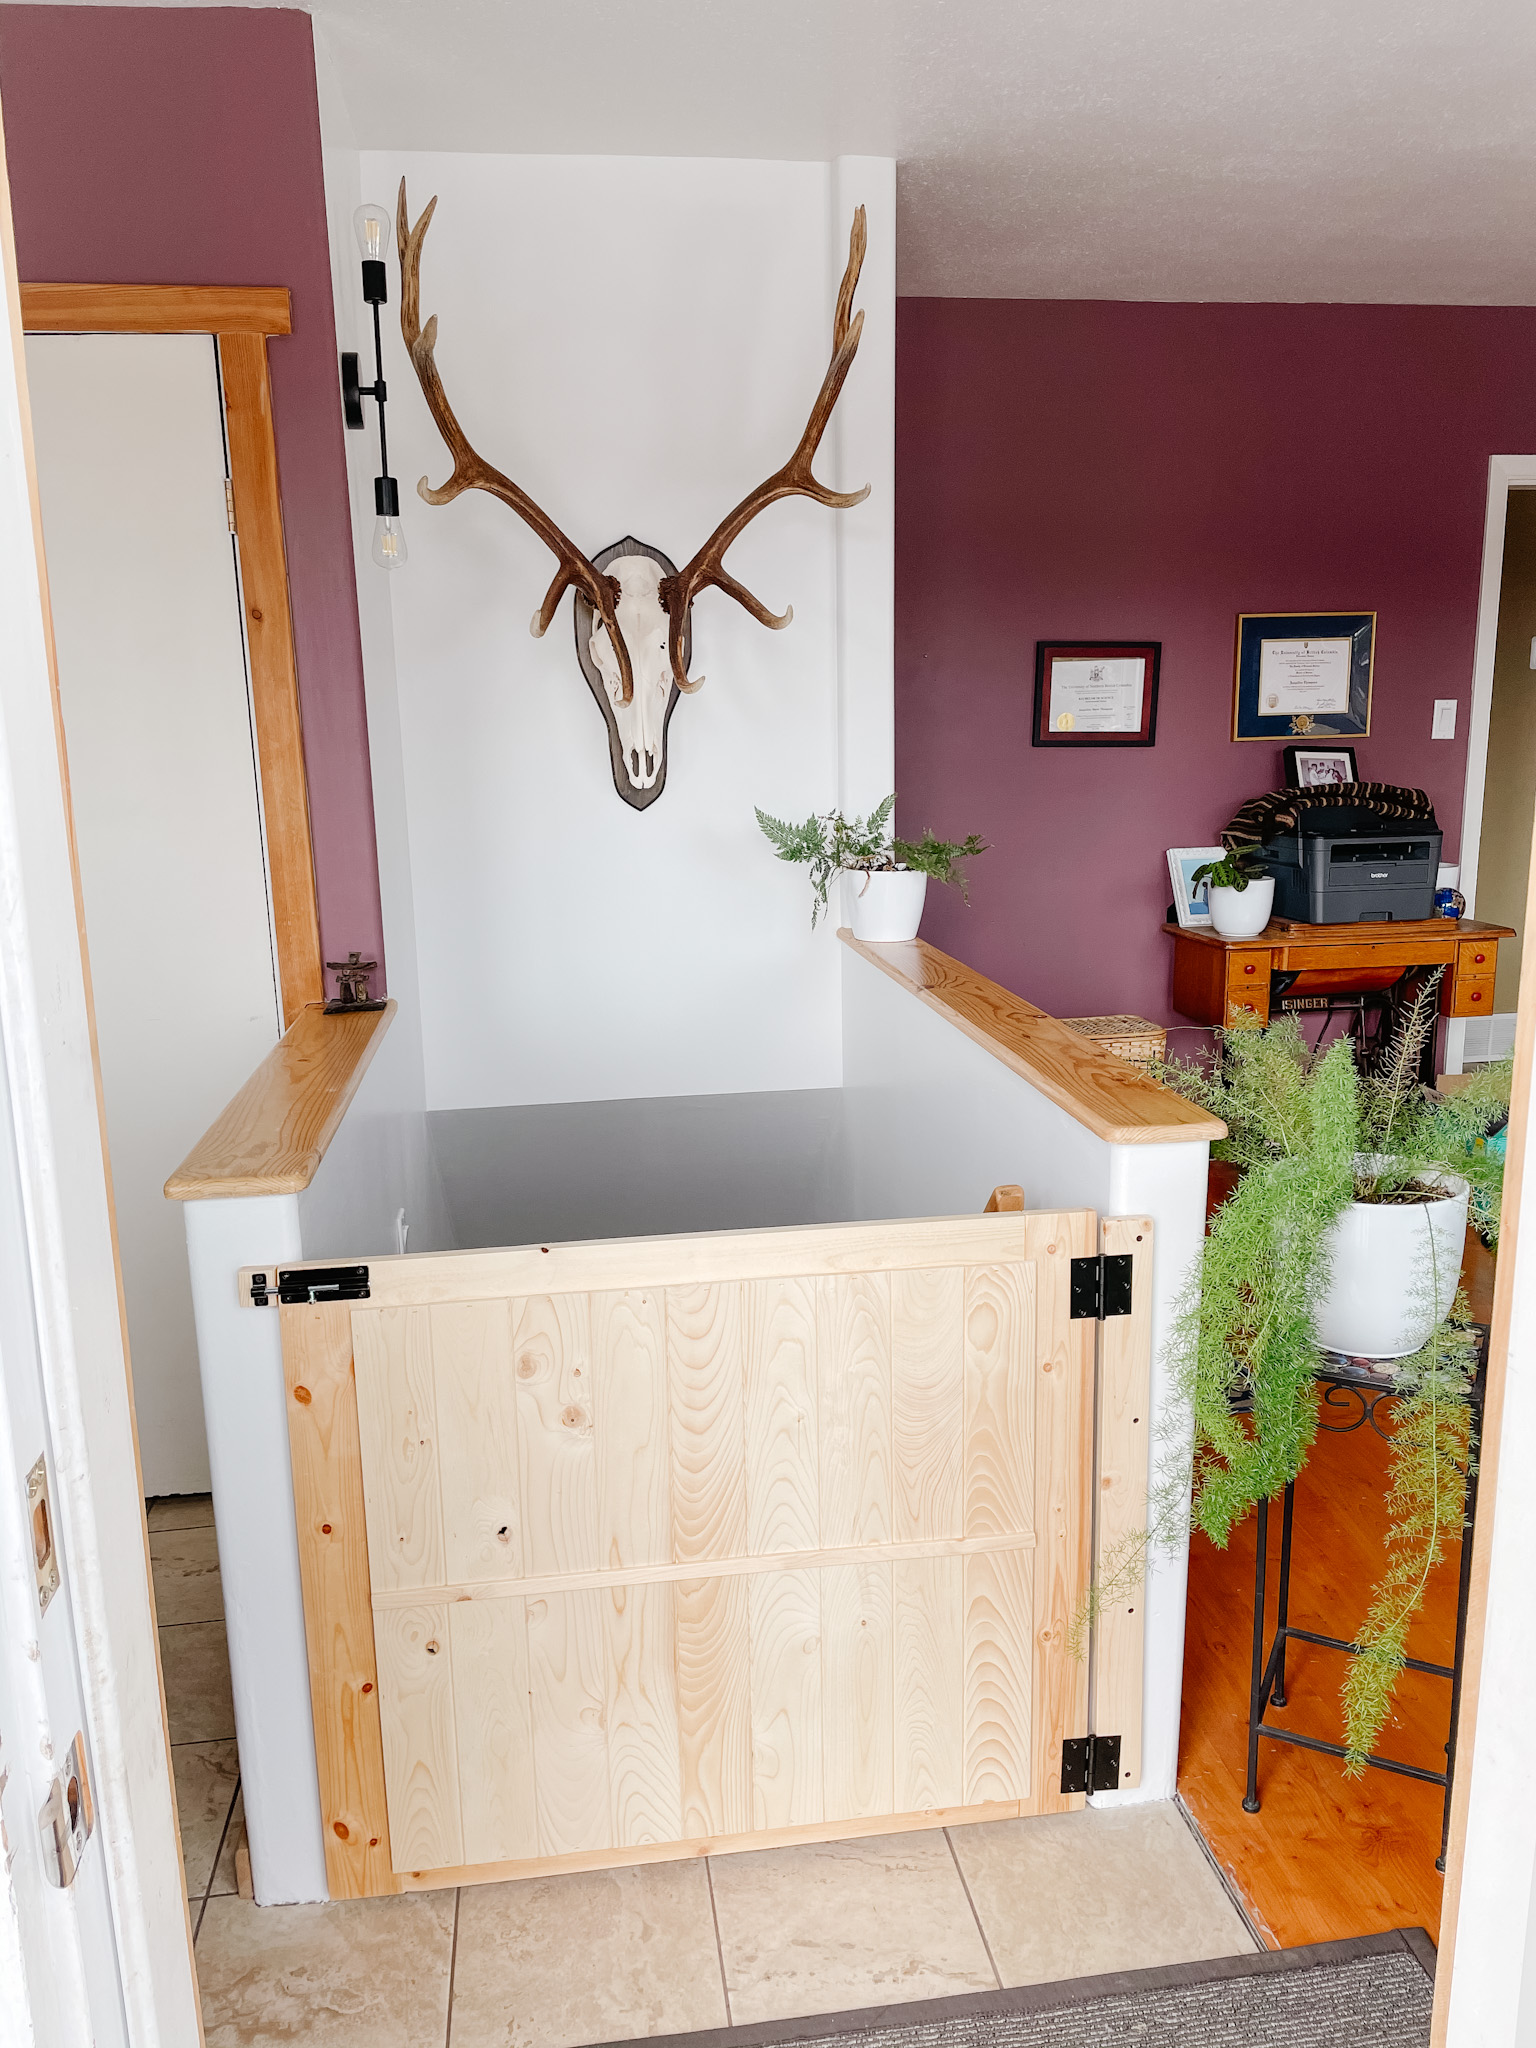
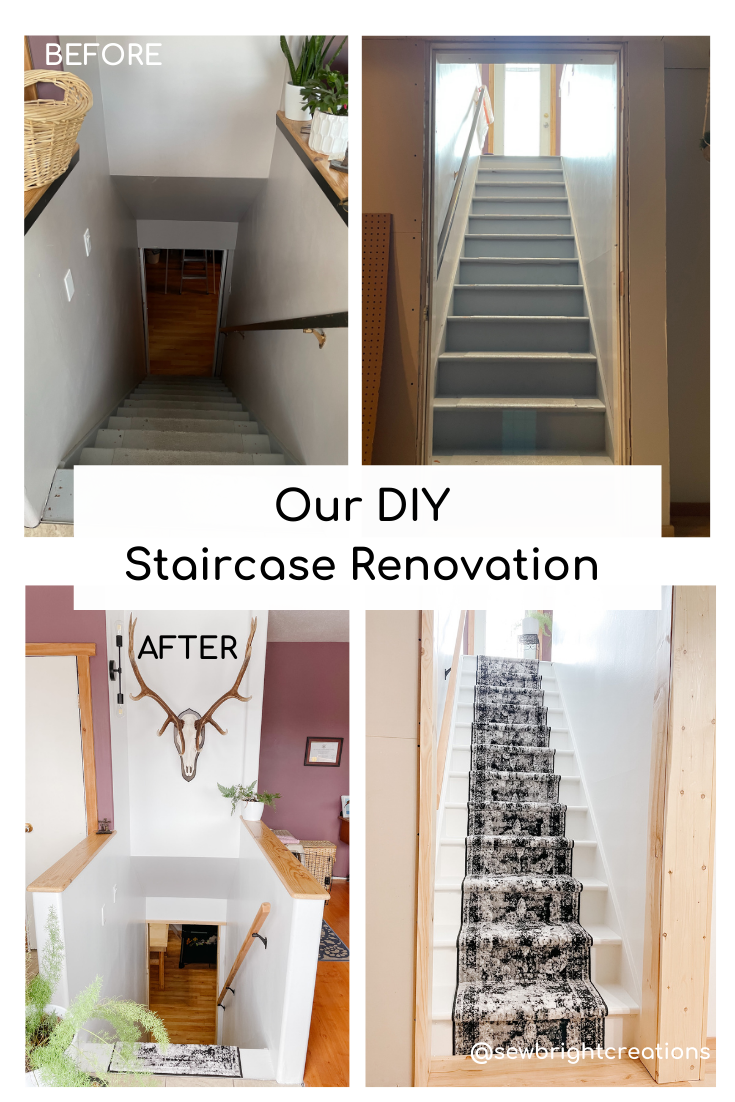
The reason for this project was to install a baby gate that my dad and I built. I brought it home, looked at the staircase and thought, “well I can’t just put that up as is, I’ll do a quick paint job and cover it all white.” Then I kept starring at it and realized part of the rubber stair threads was coming off and I thought, “well I surely can’t just paint over that crap, I better do this right…”
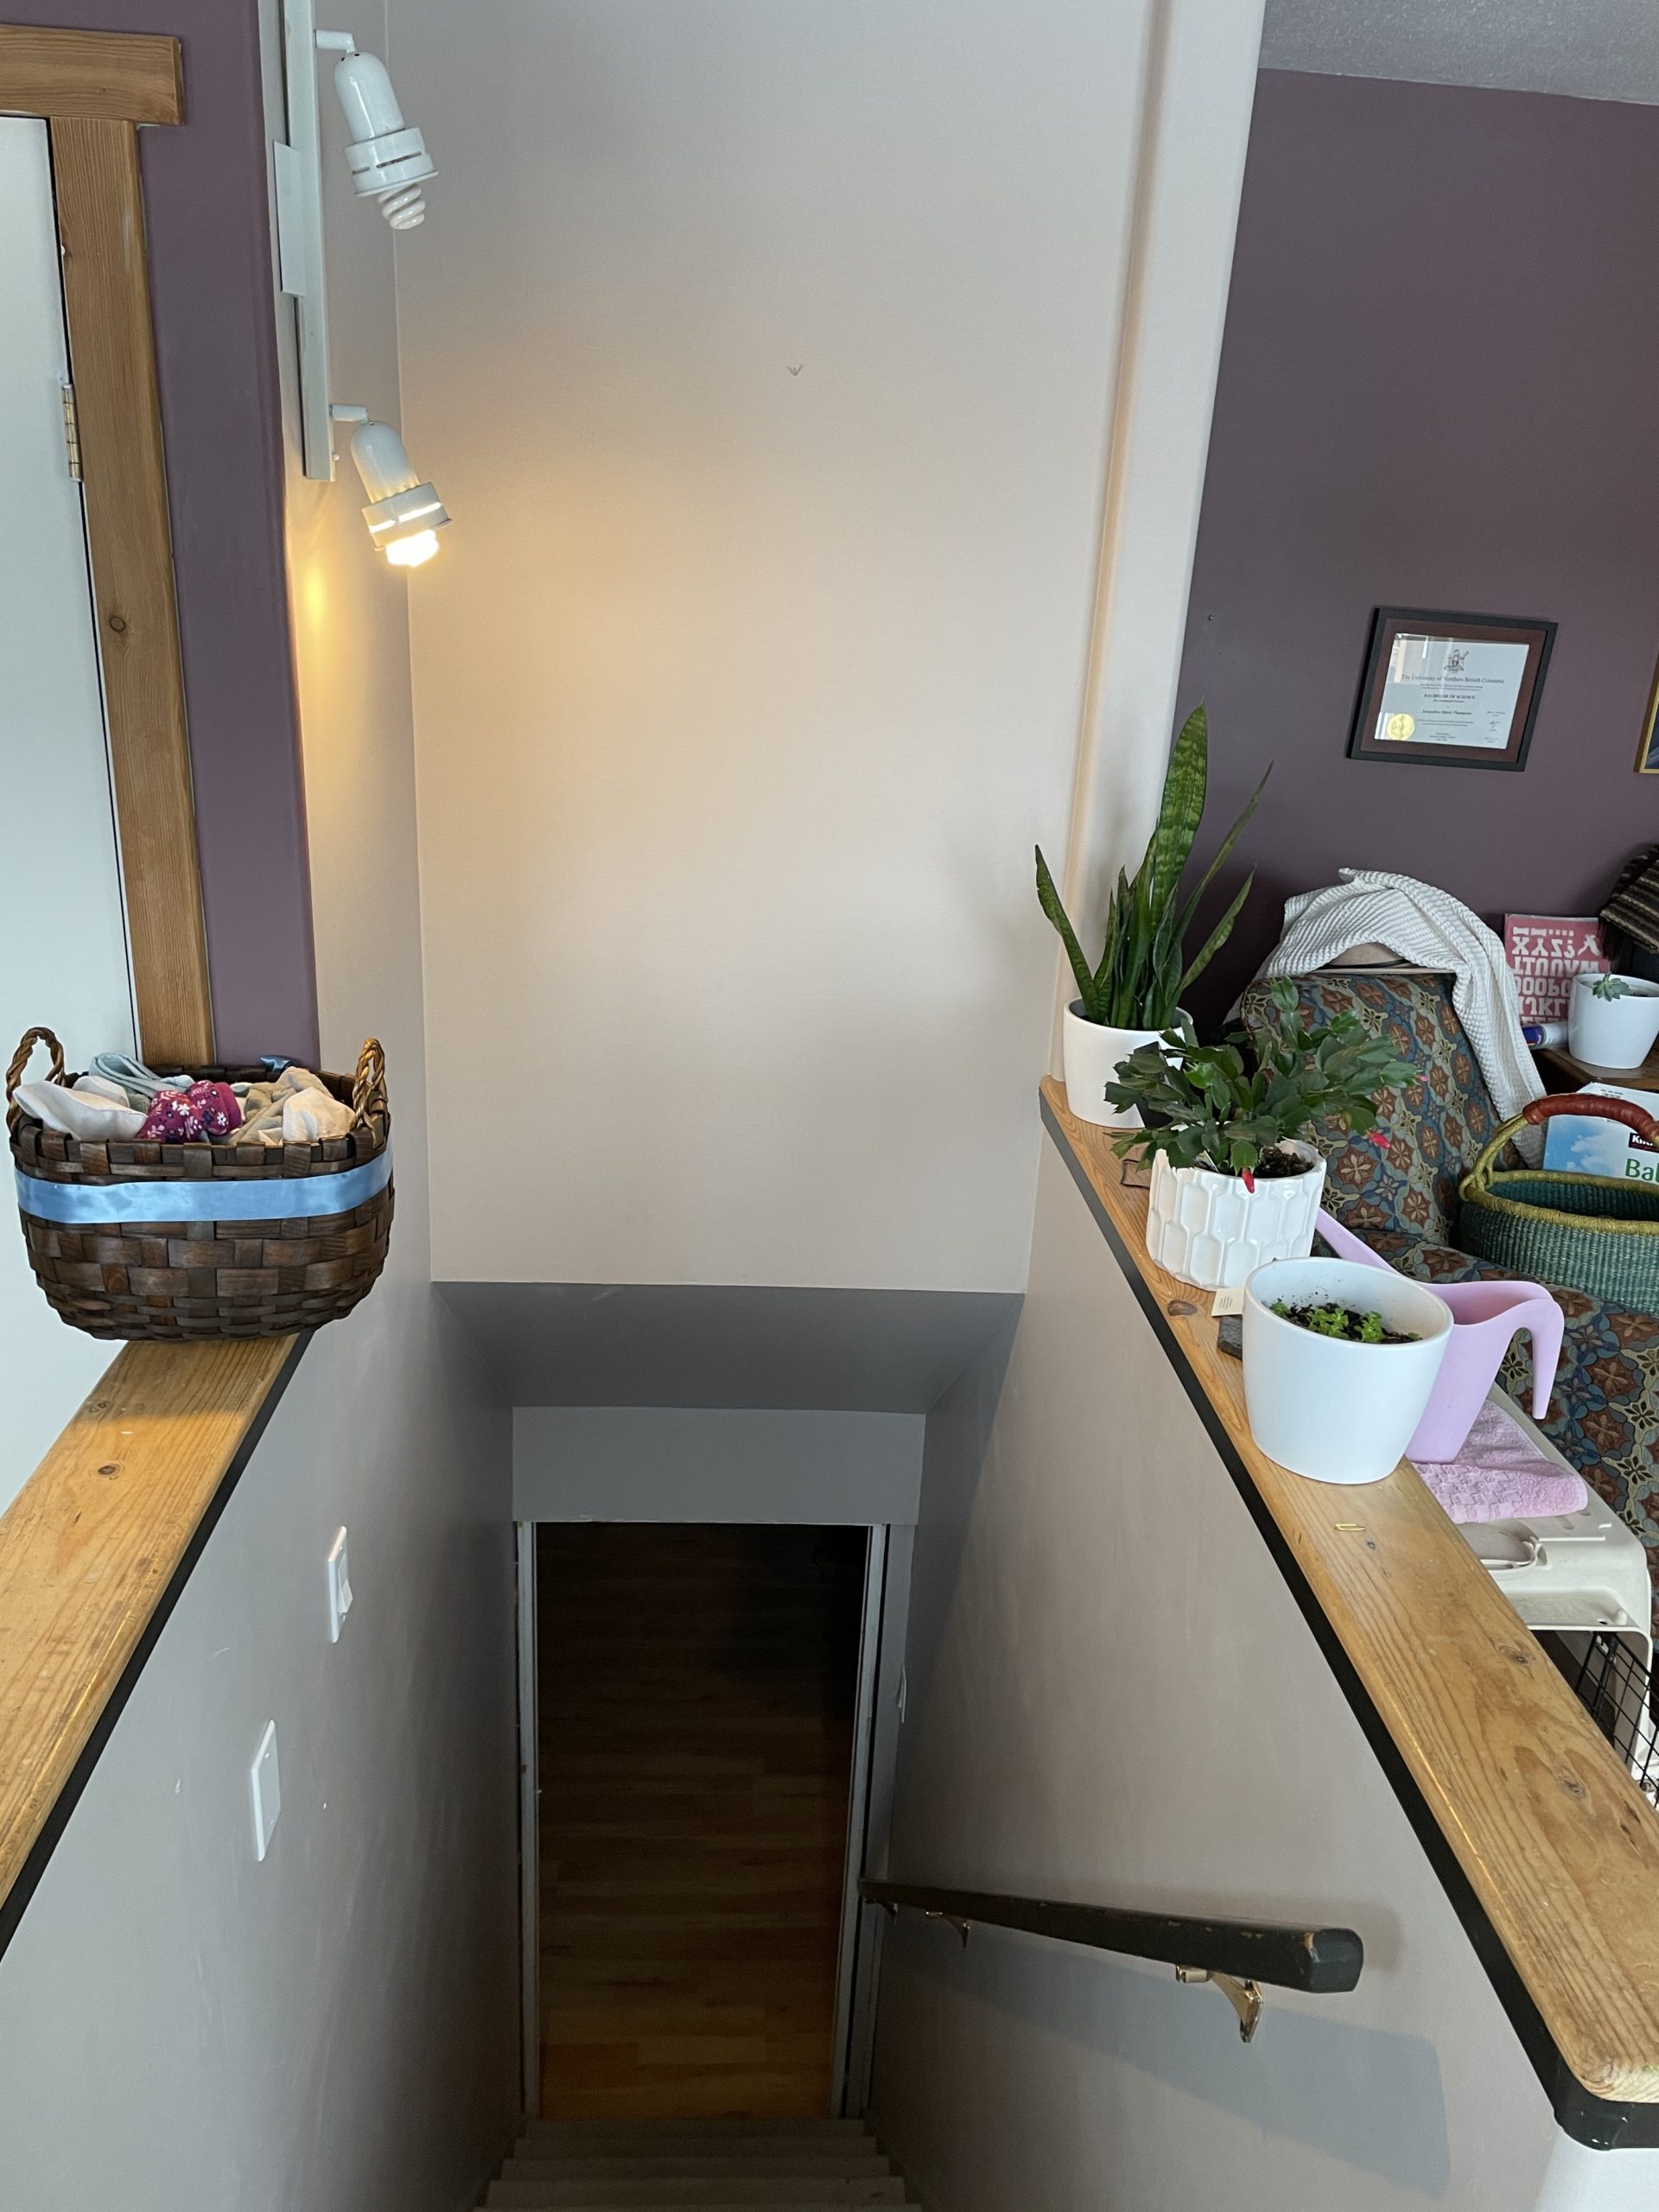
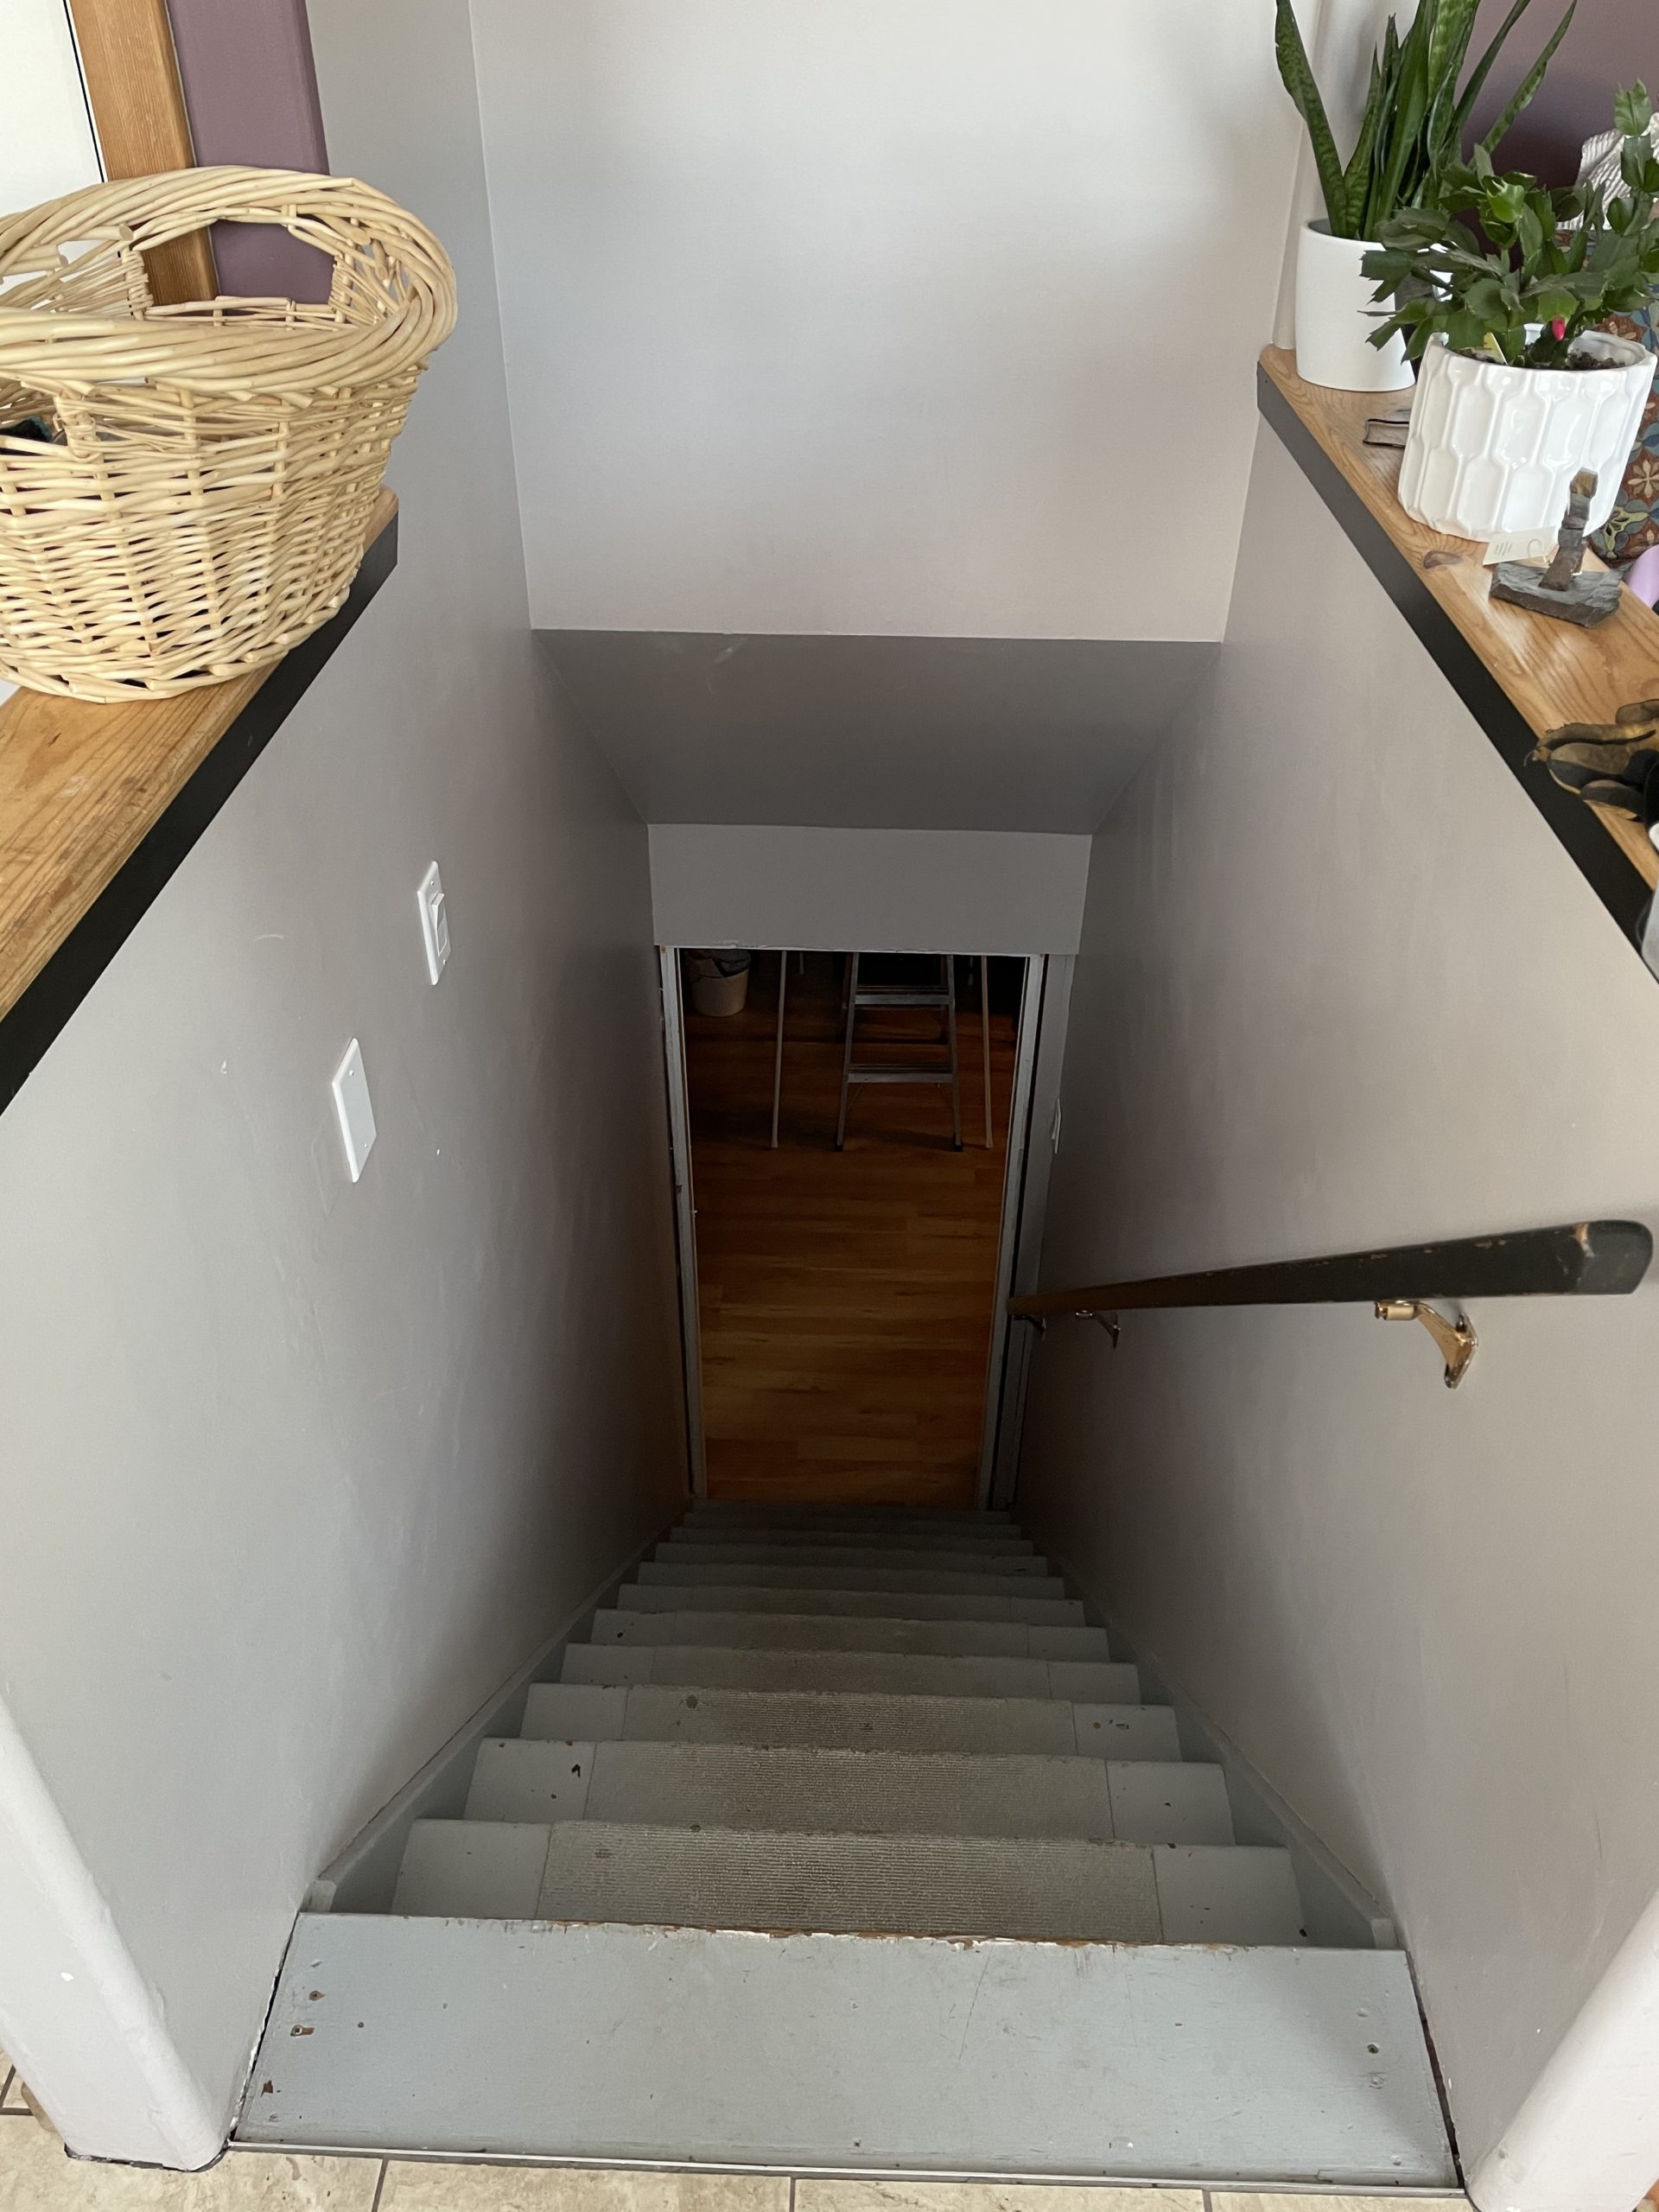
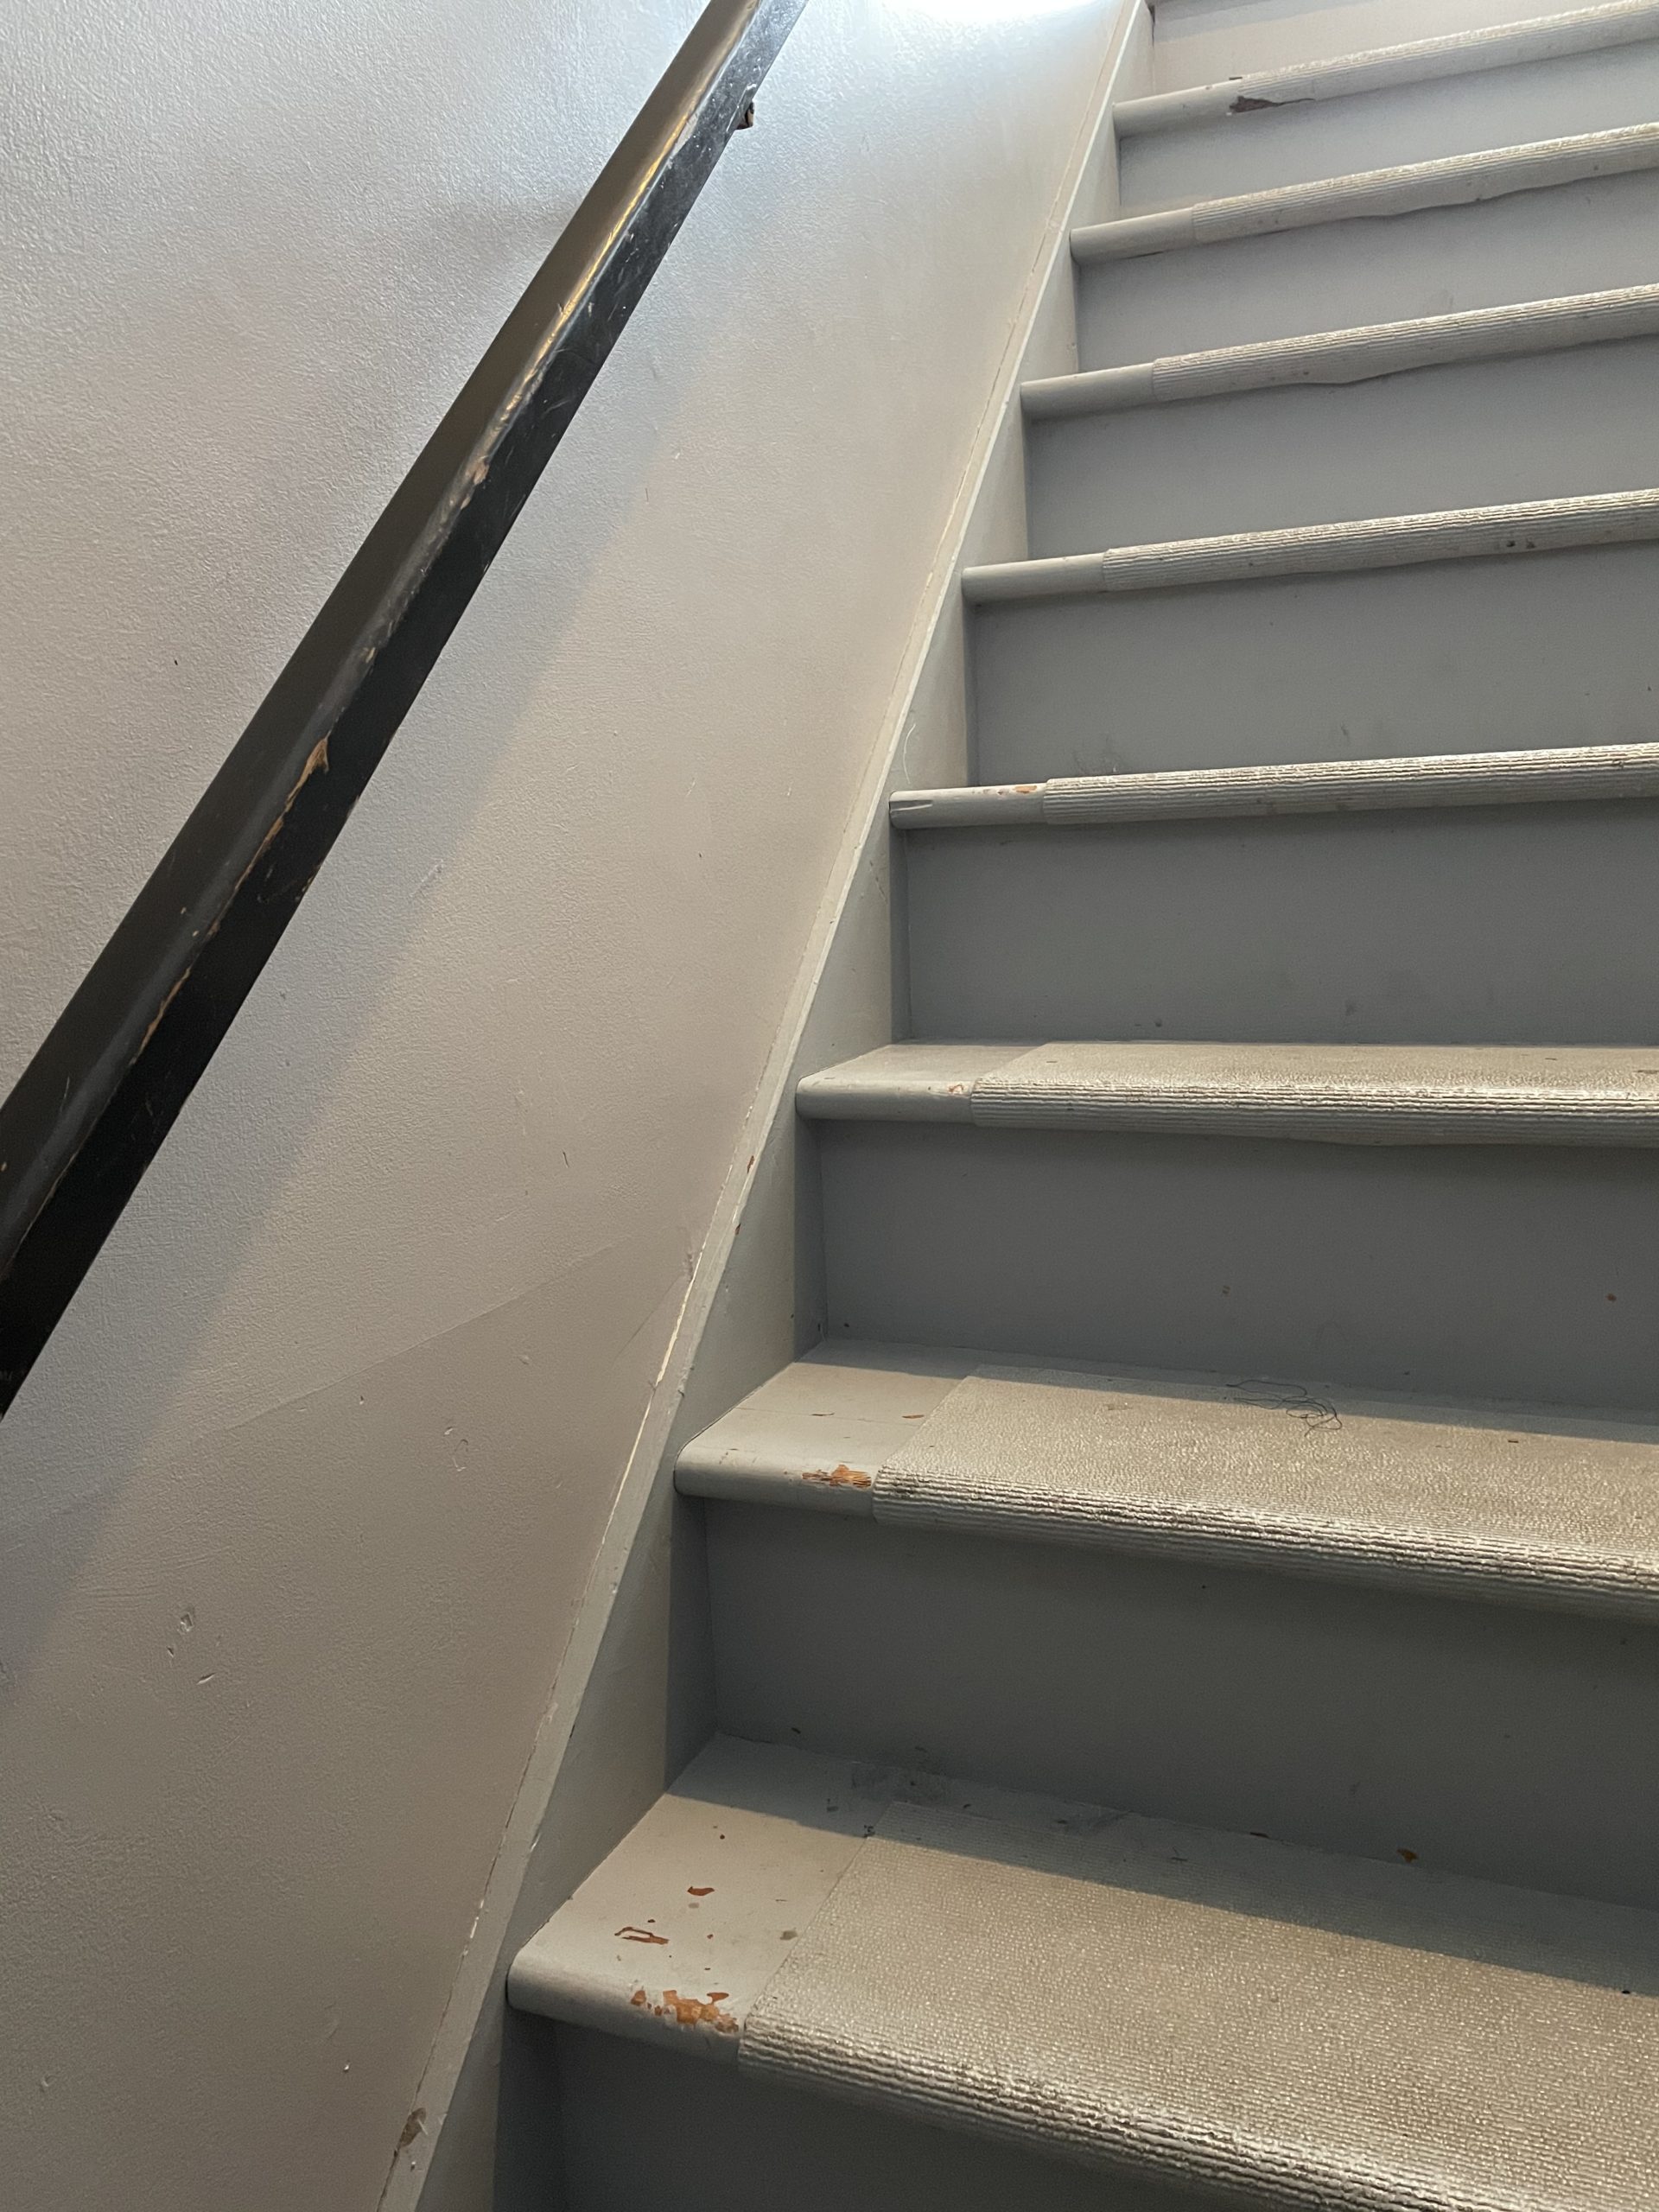
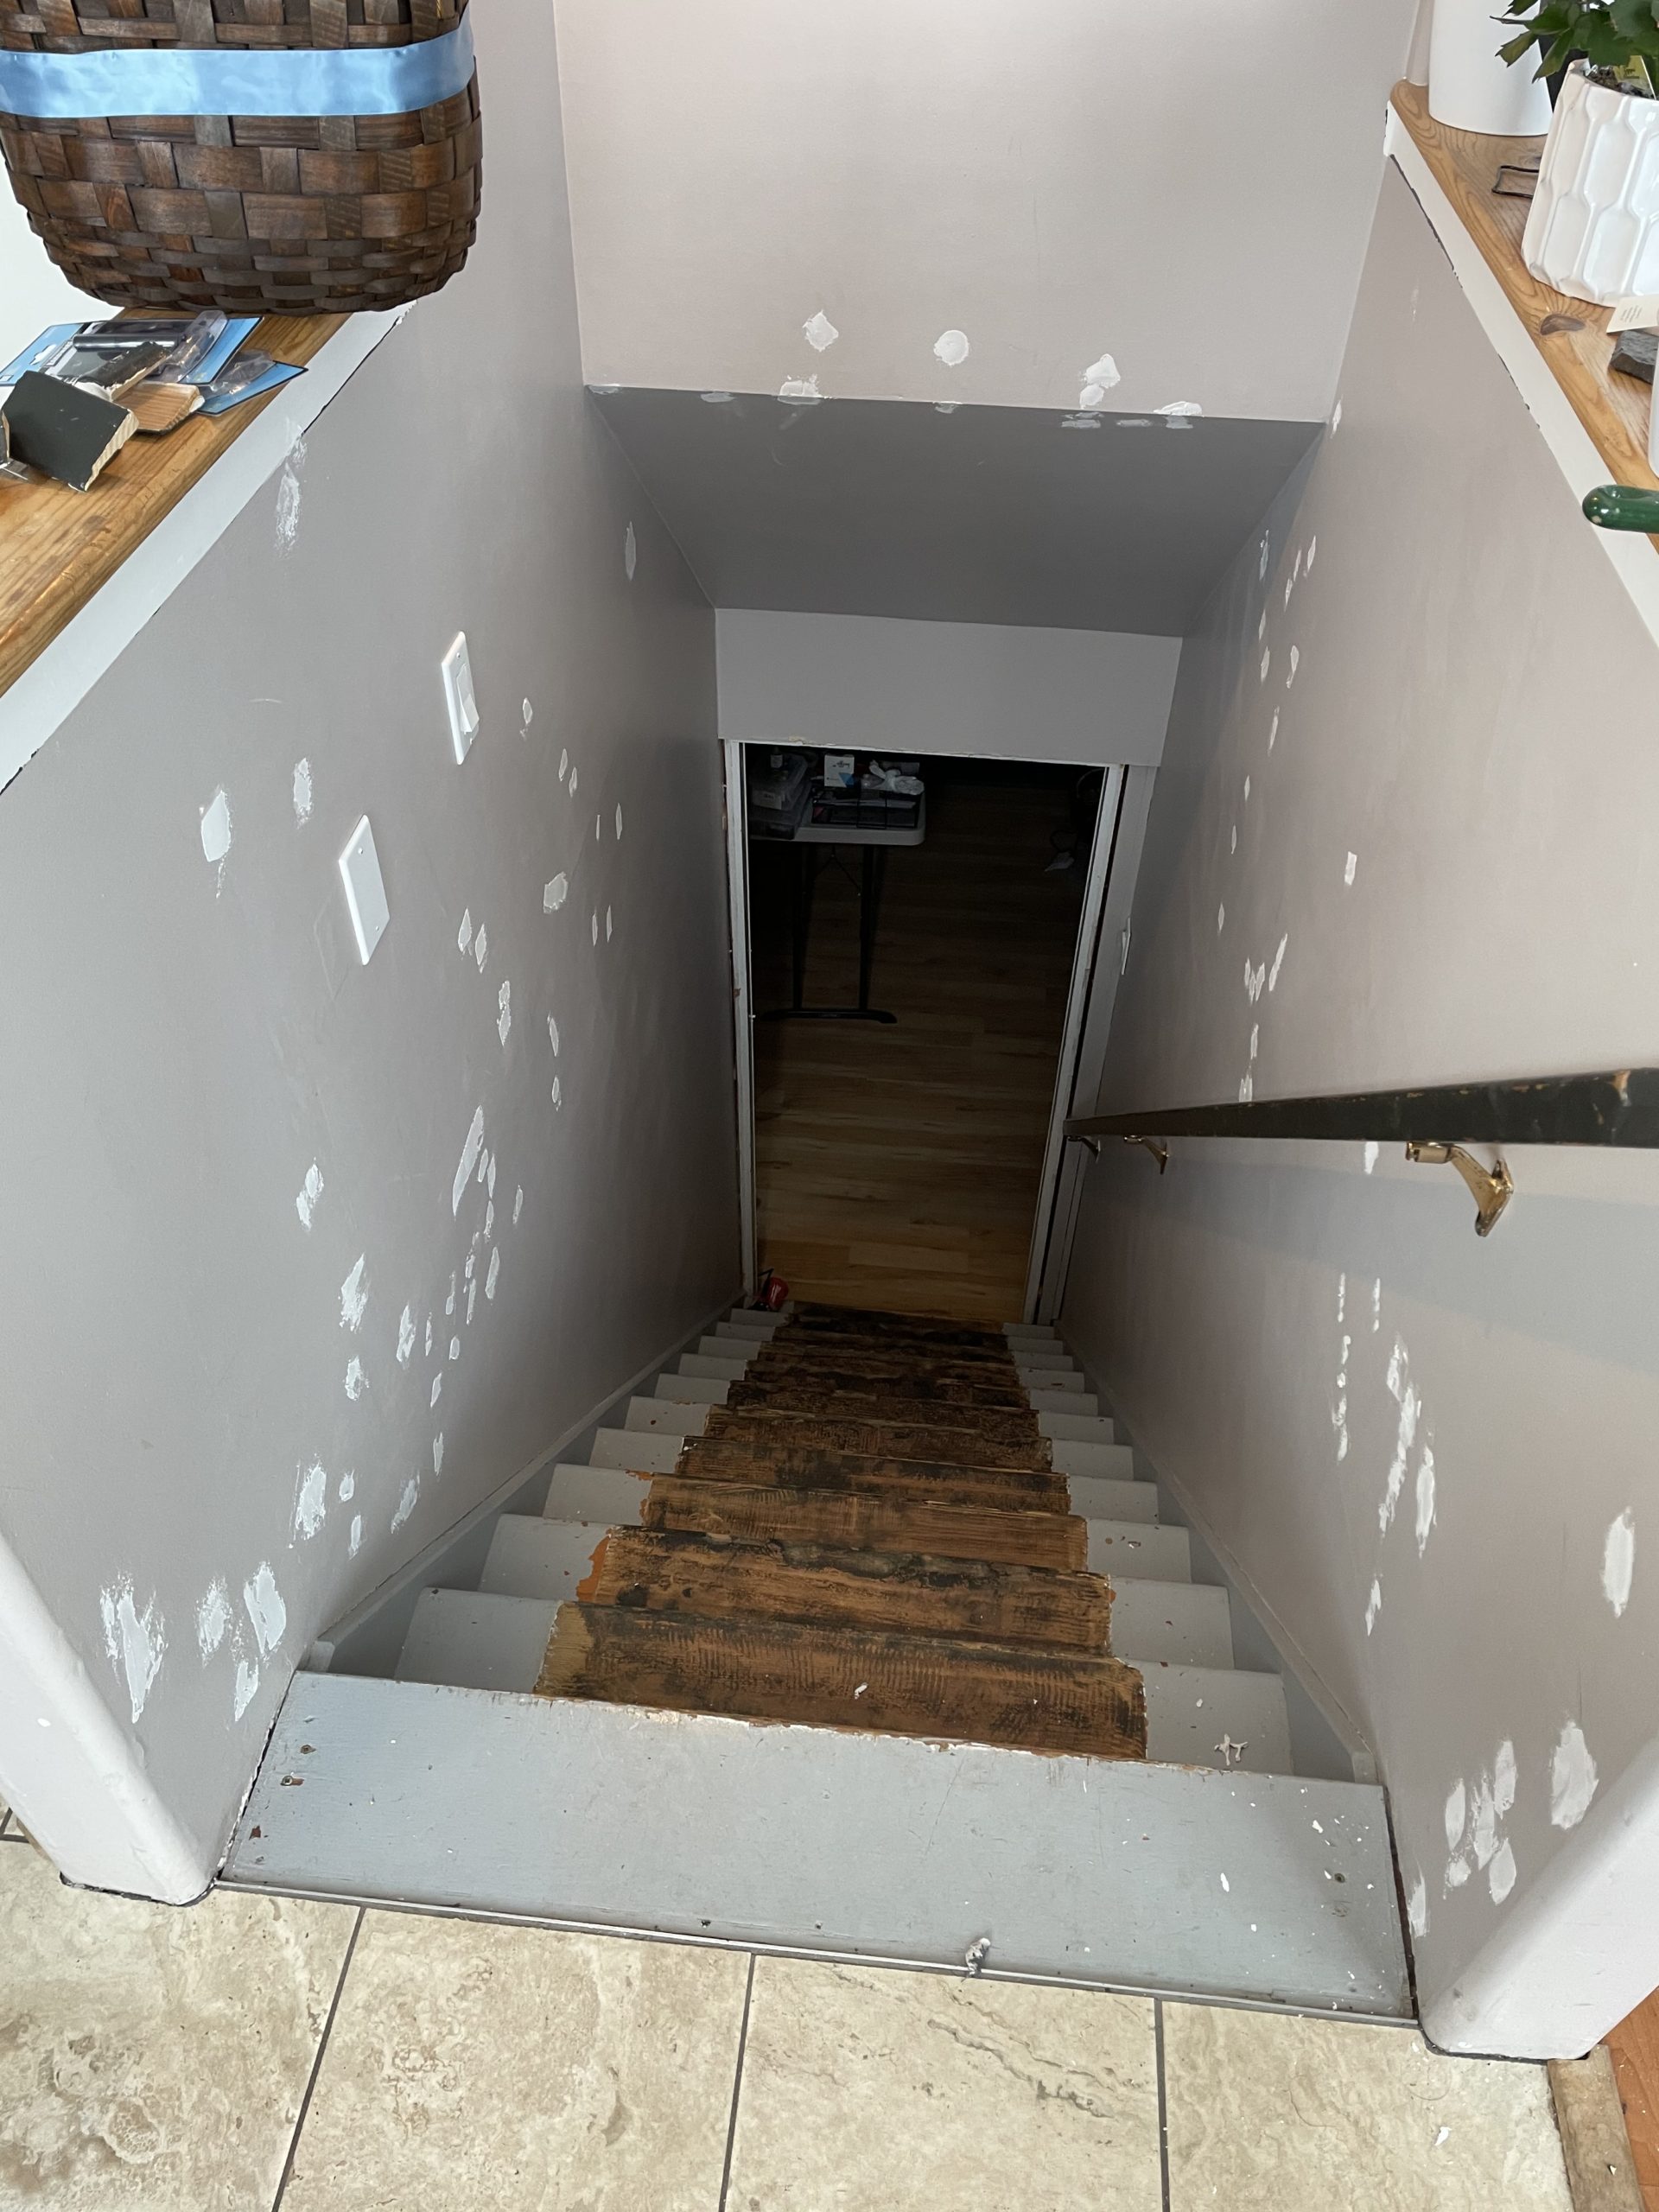
BEFORE –
It always helps when you had really bad (or “good”) before photos to make the end result look that much better 😉 >> We have lots of these in our house, haha!
PROGRESS –
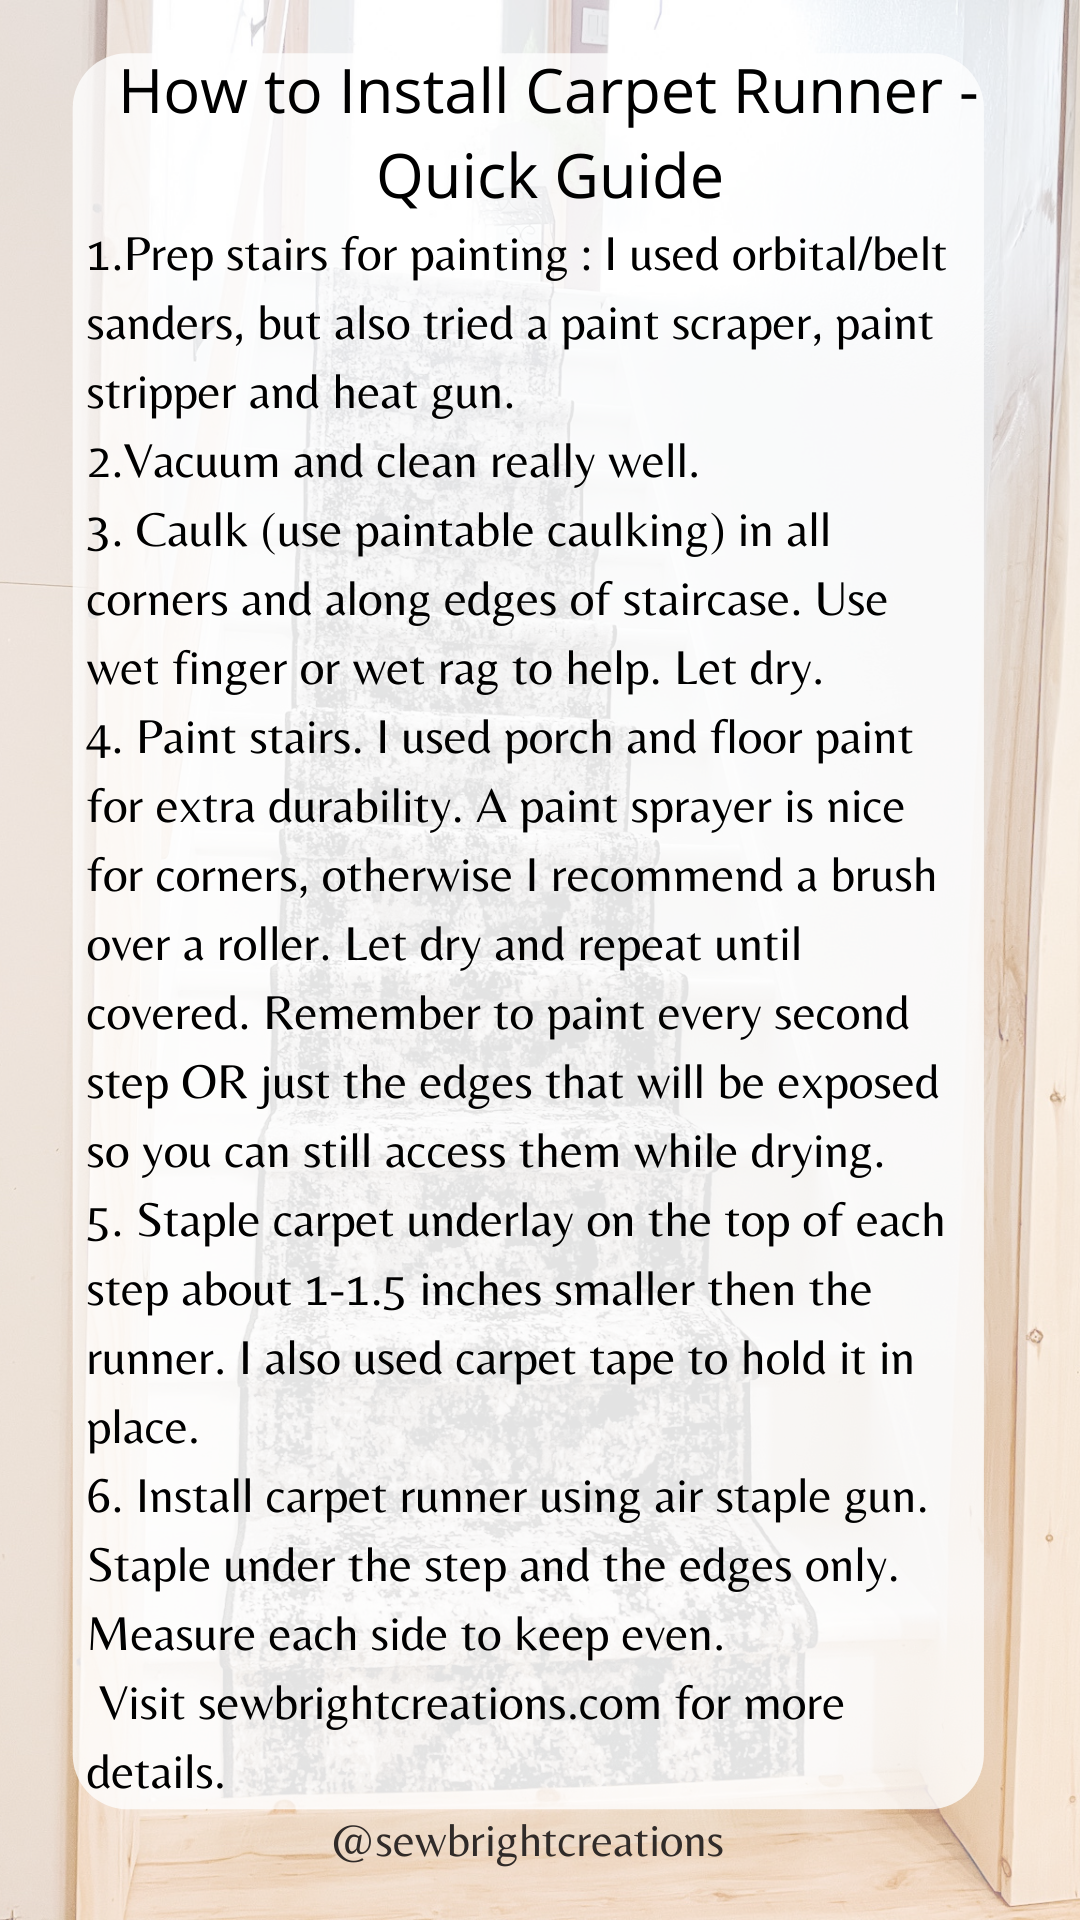
I’ve shared in a graphic below my quick guide on the steps (in order) that I’d recommend doing things. I didn’t quite do things in this order because I usually just get started on a project and then figure things out as I go, but this is definitely how I would do it if I ever had to do it again, but let’s hope I don’t!
For the purposes of this blog post I’m going to focus mostly on the stairs, but we also painted the staircase and did some trim around the doorframe at the bottom. I also re-finished the top ledges and handrail.
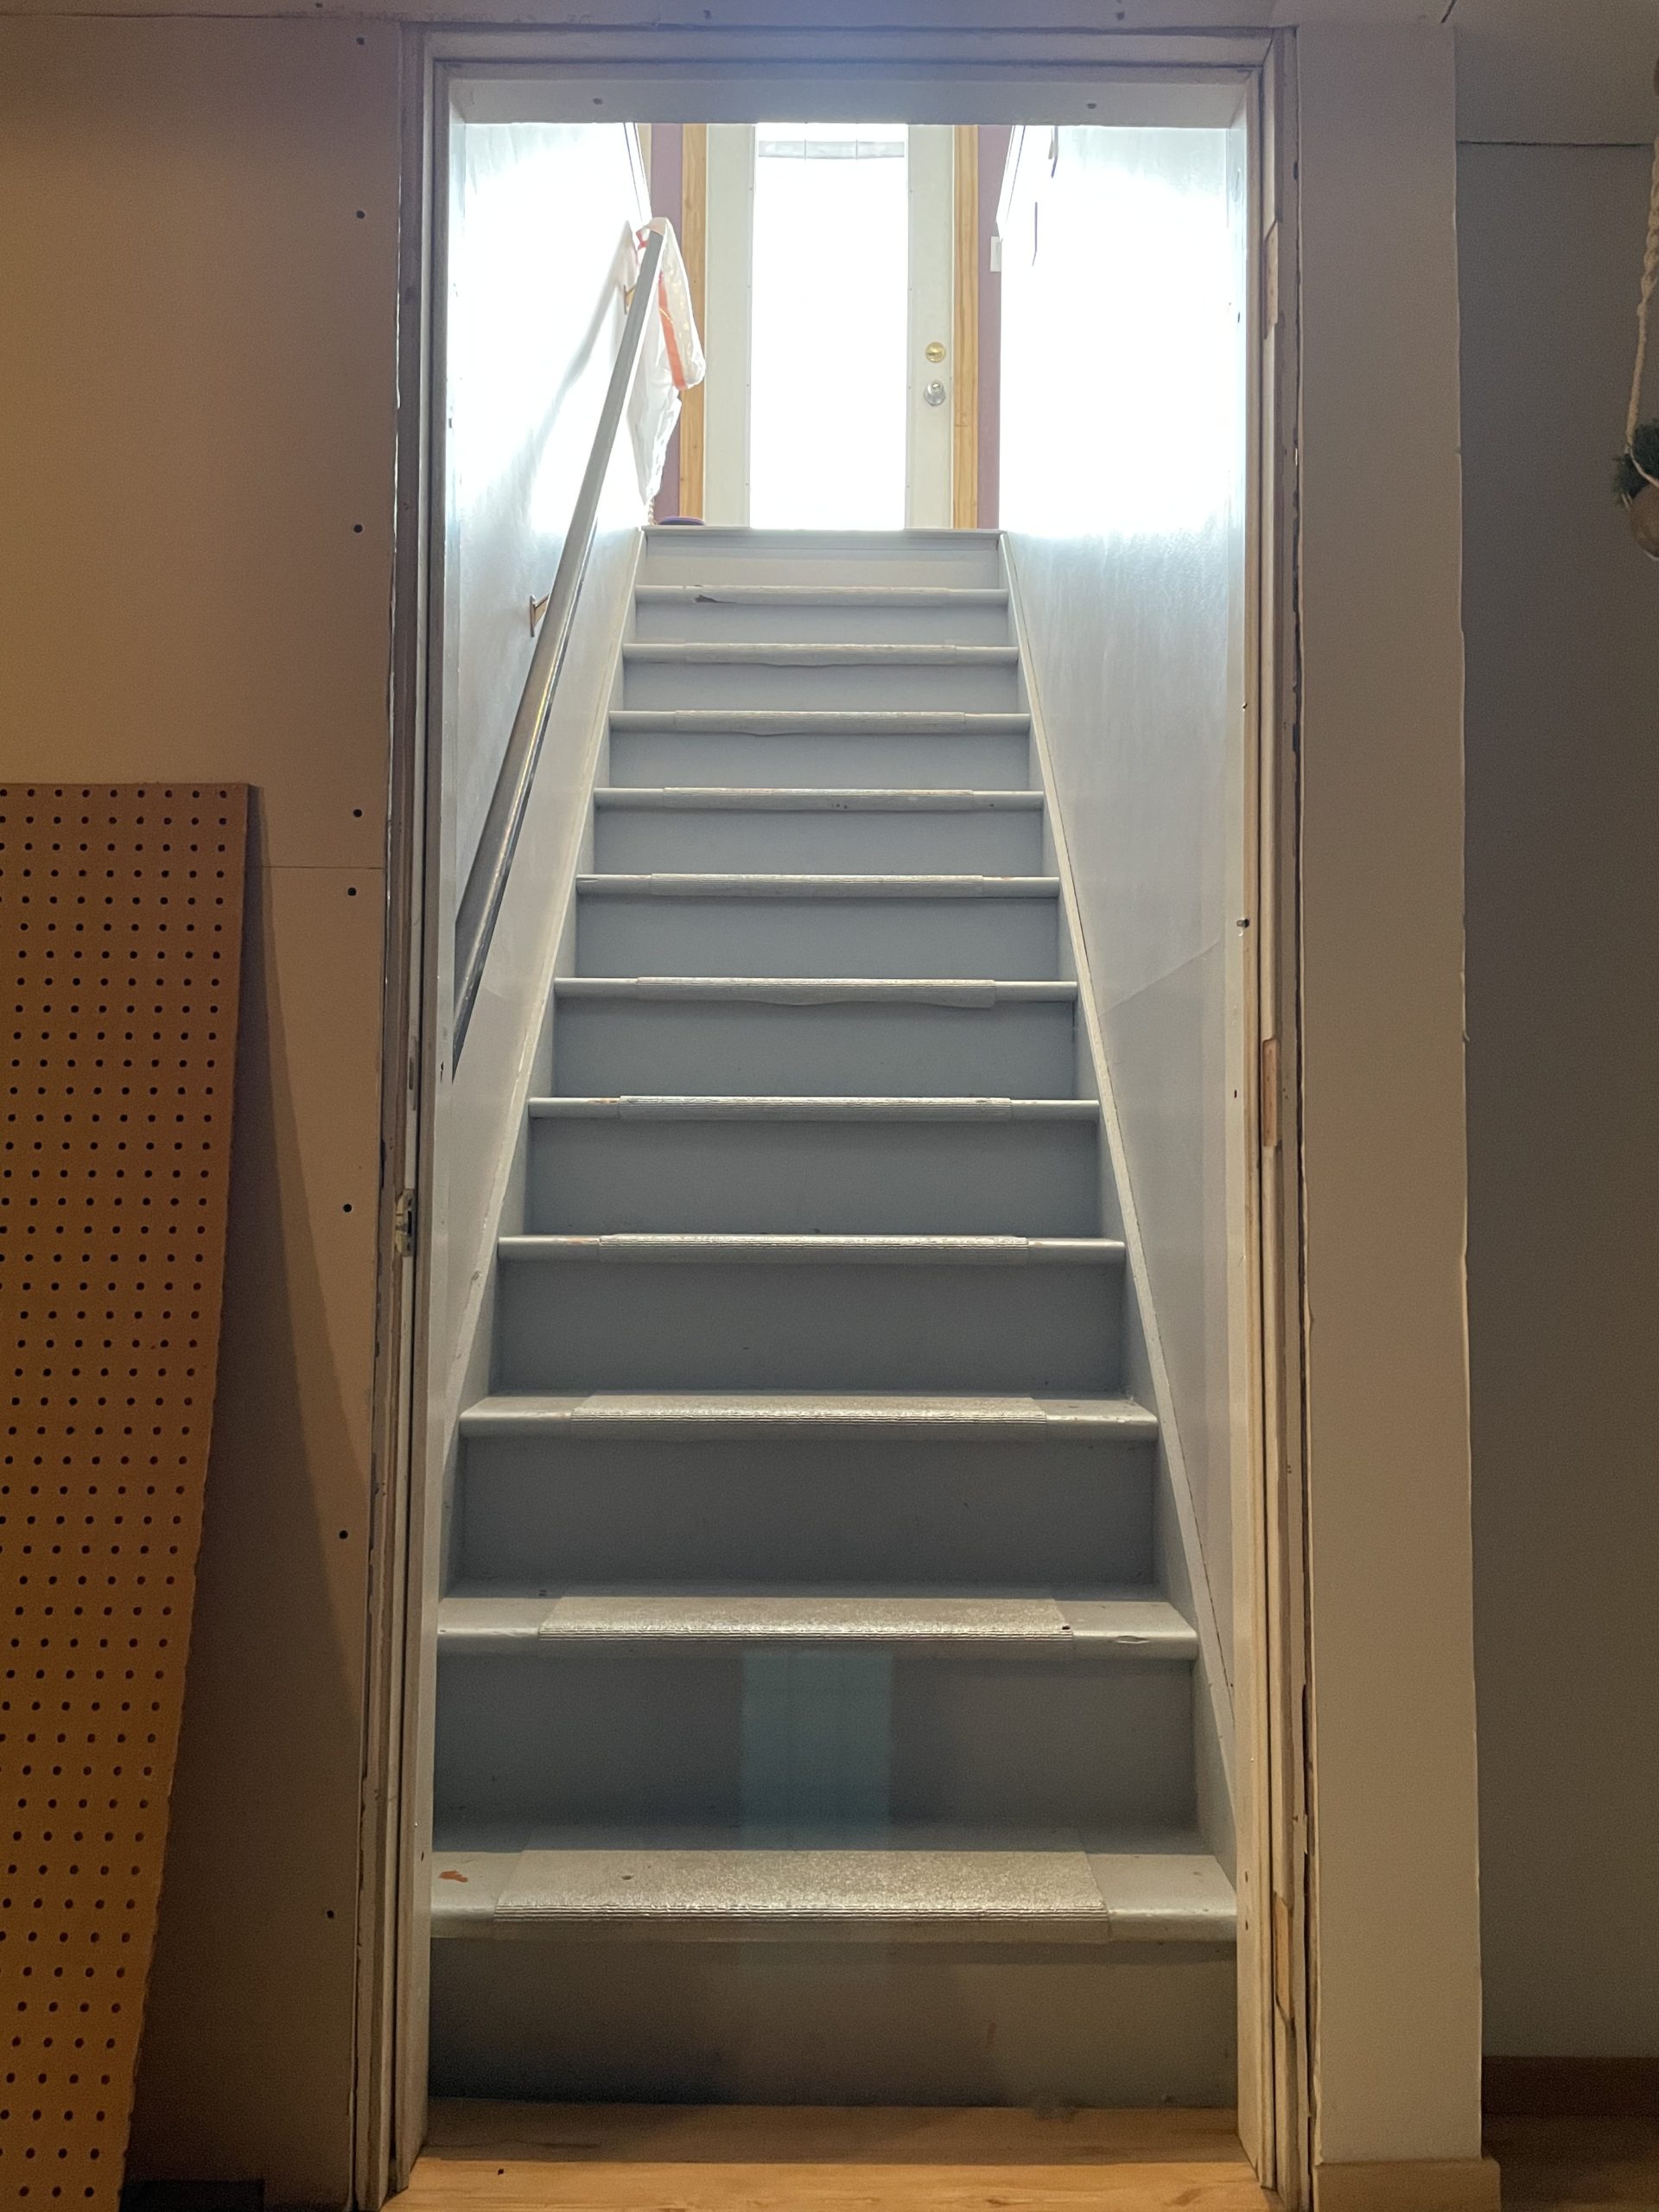
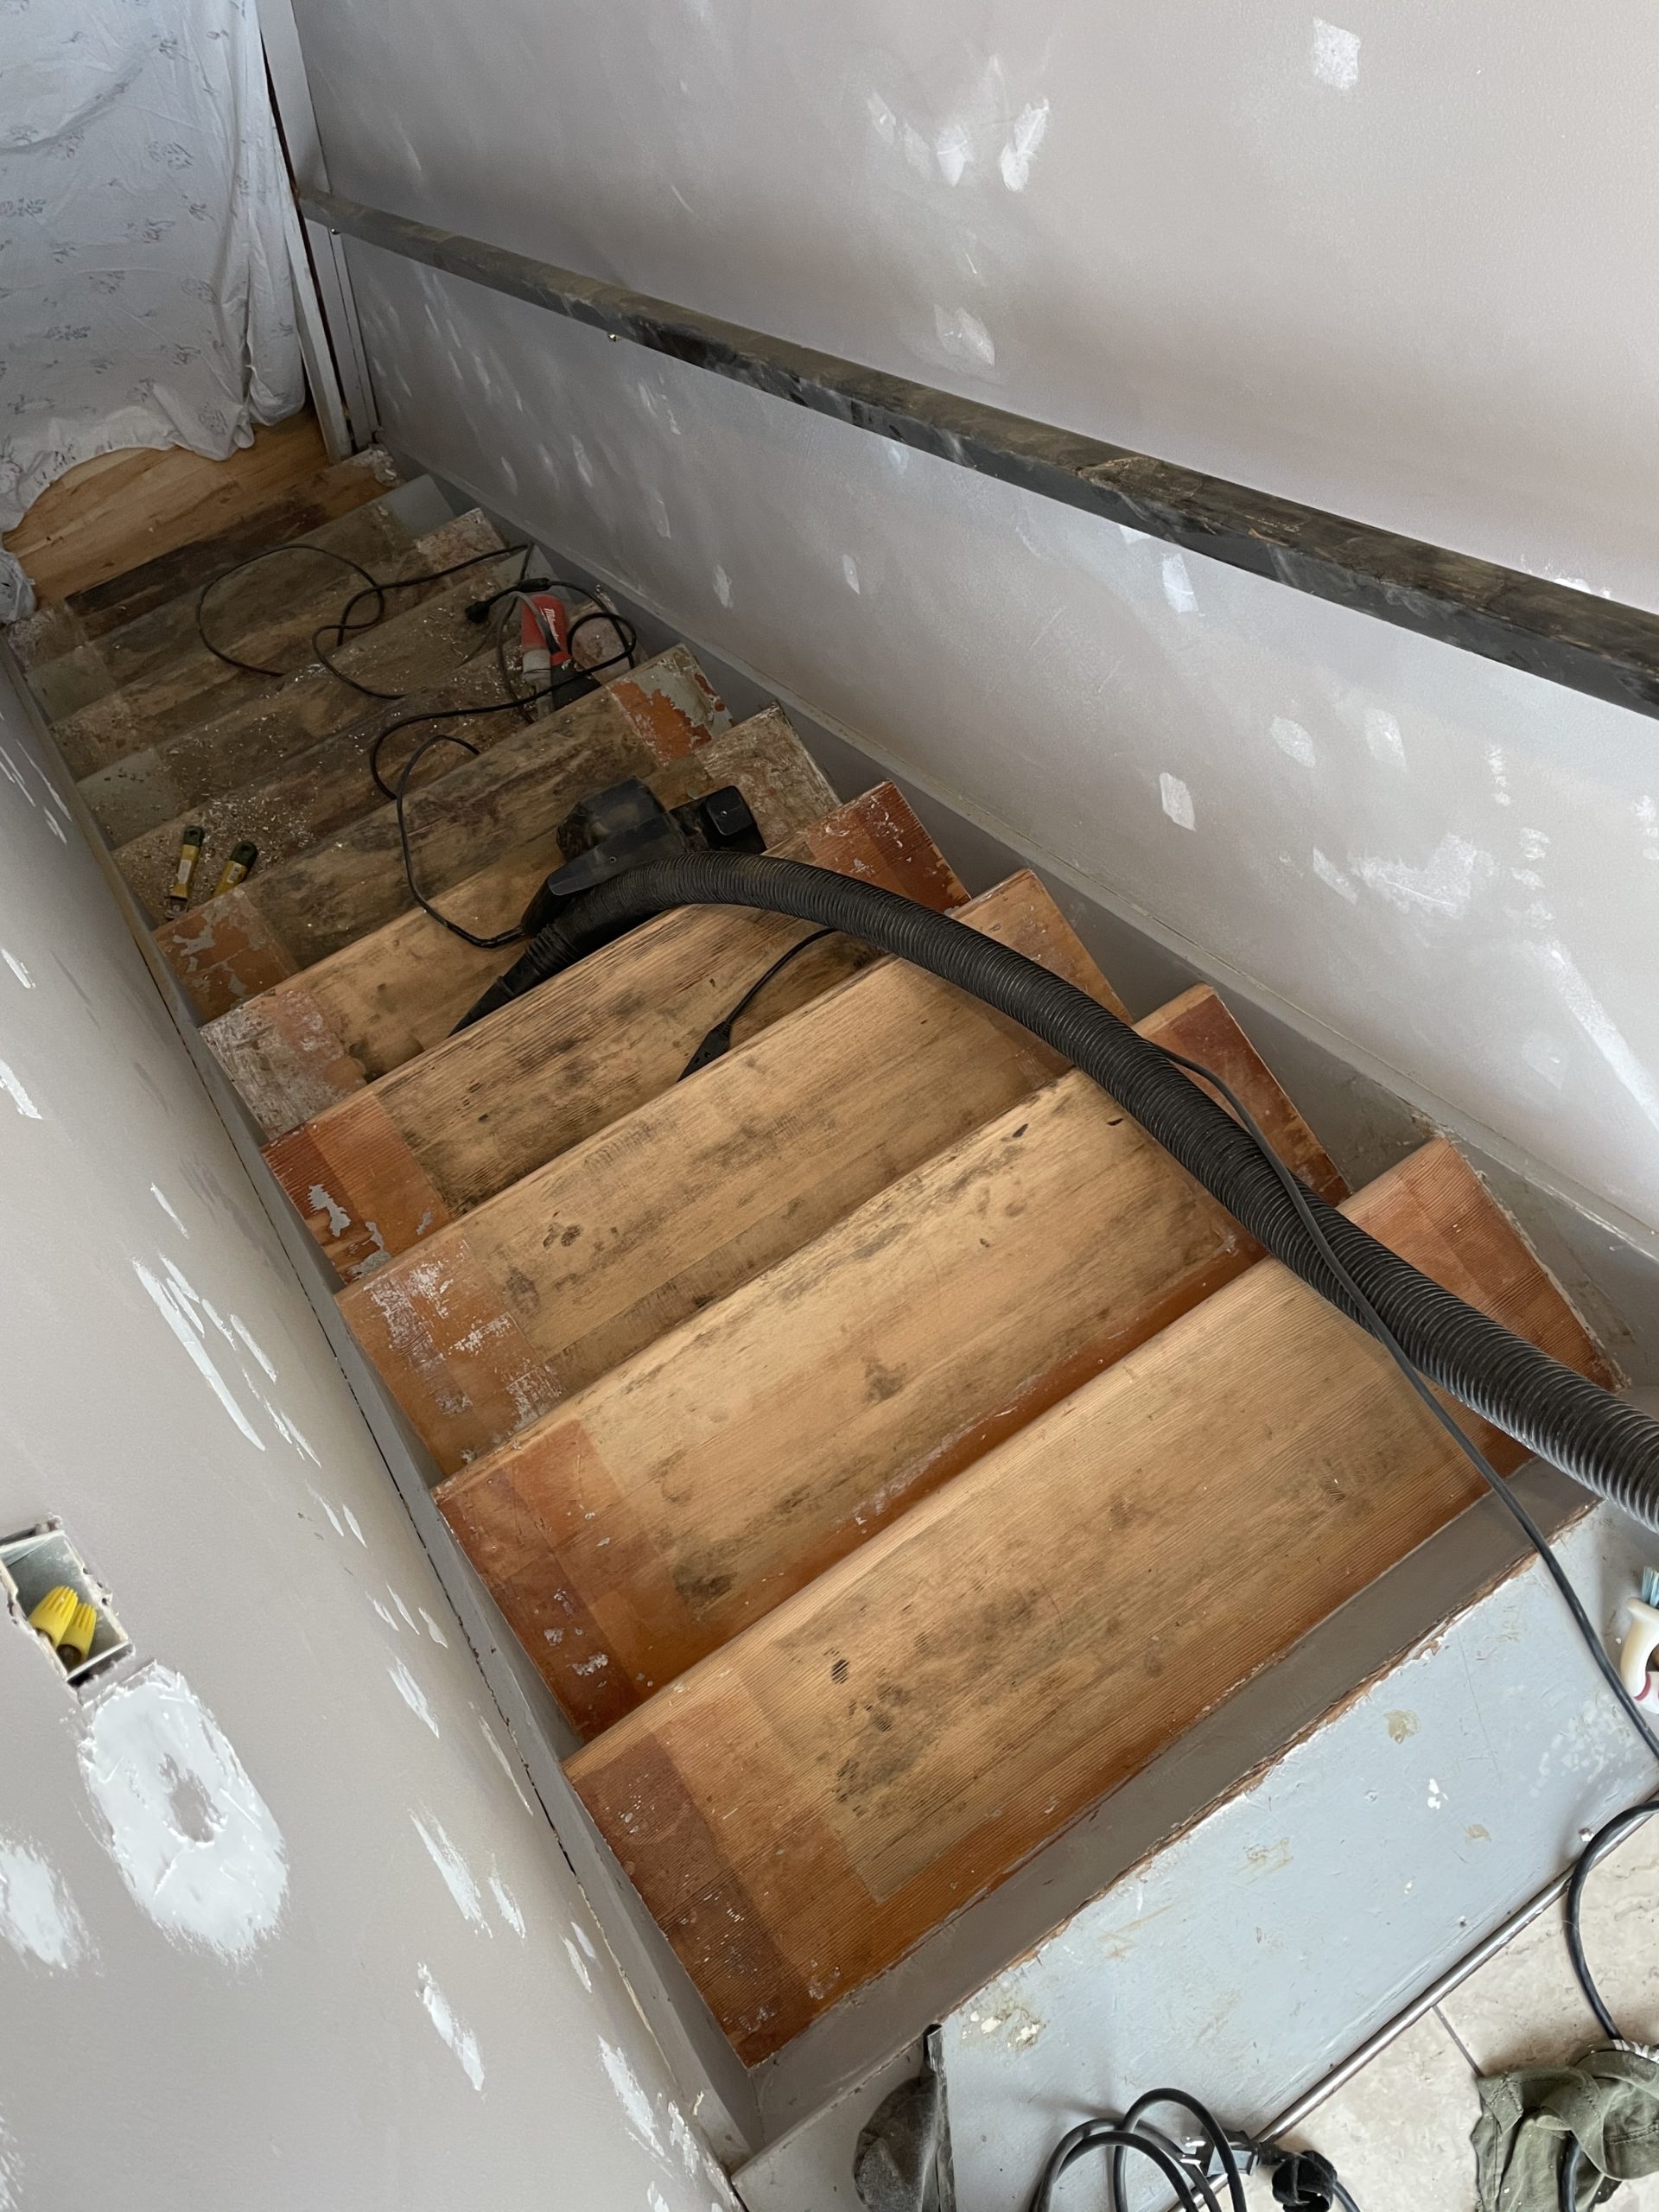
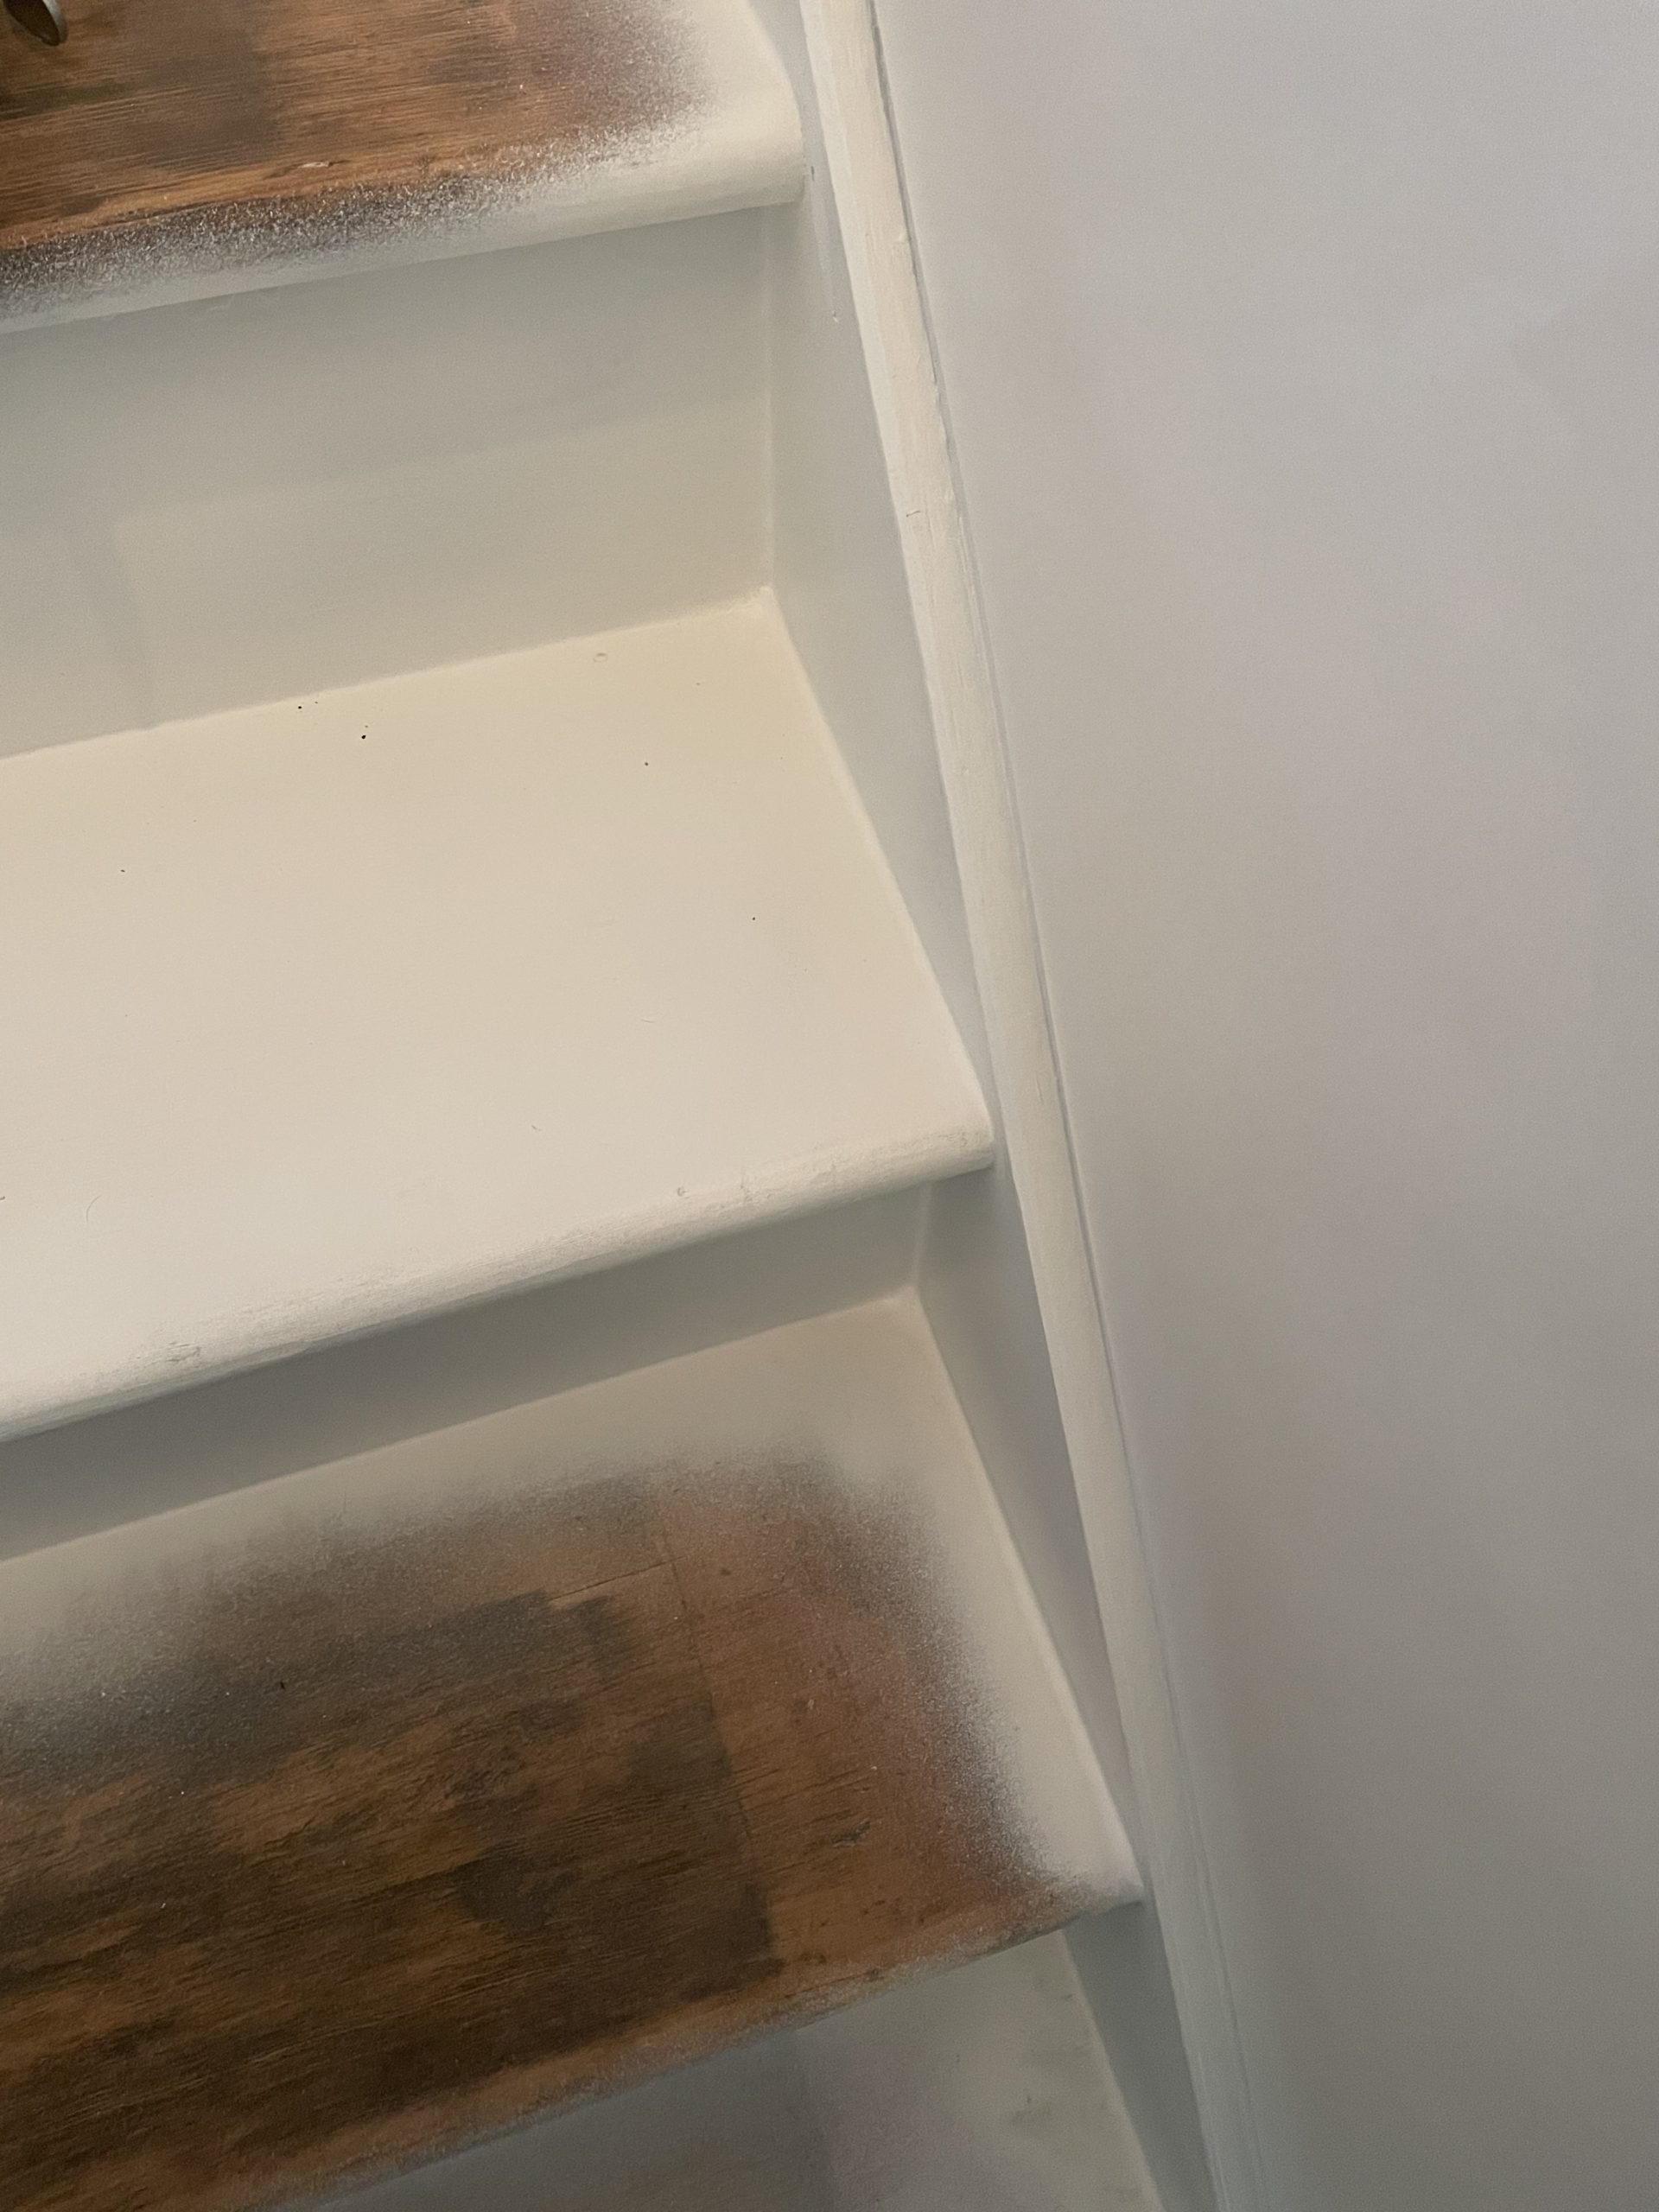
As shown in these two photos below, this is what the stairs looked liked after sanding and before painting.
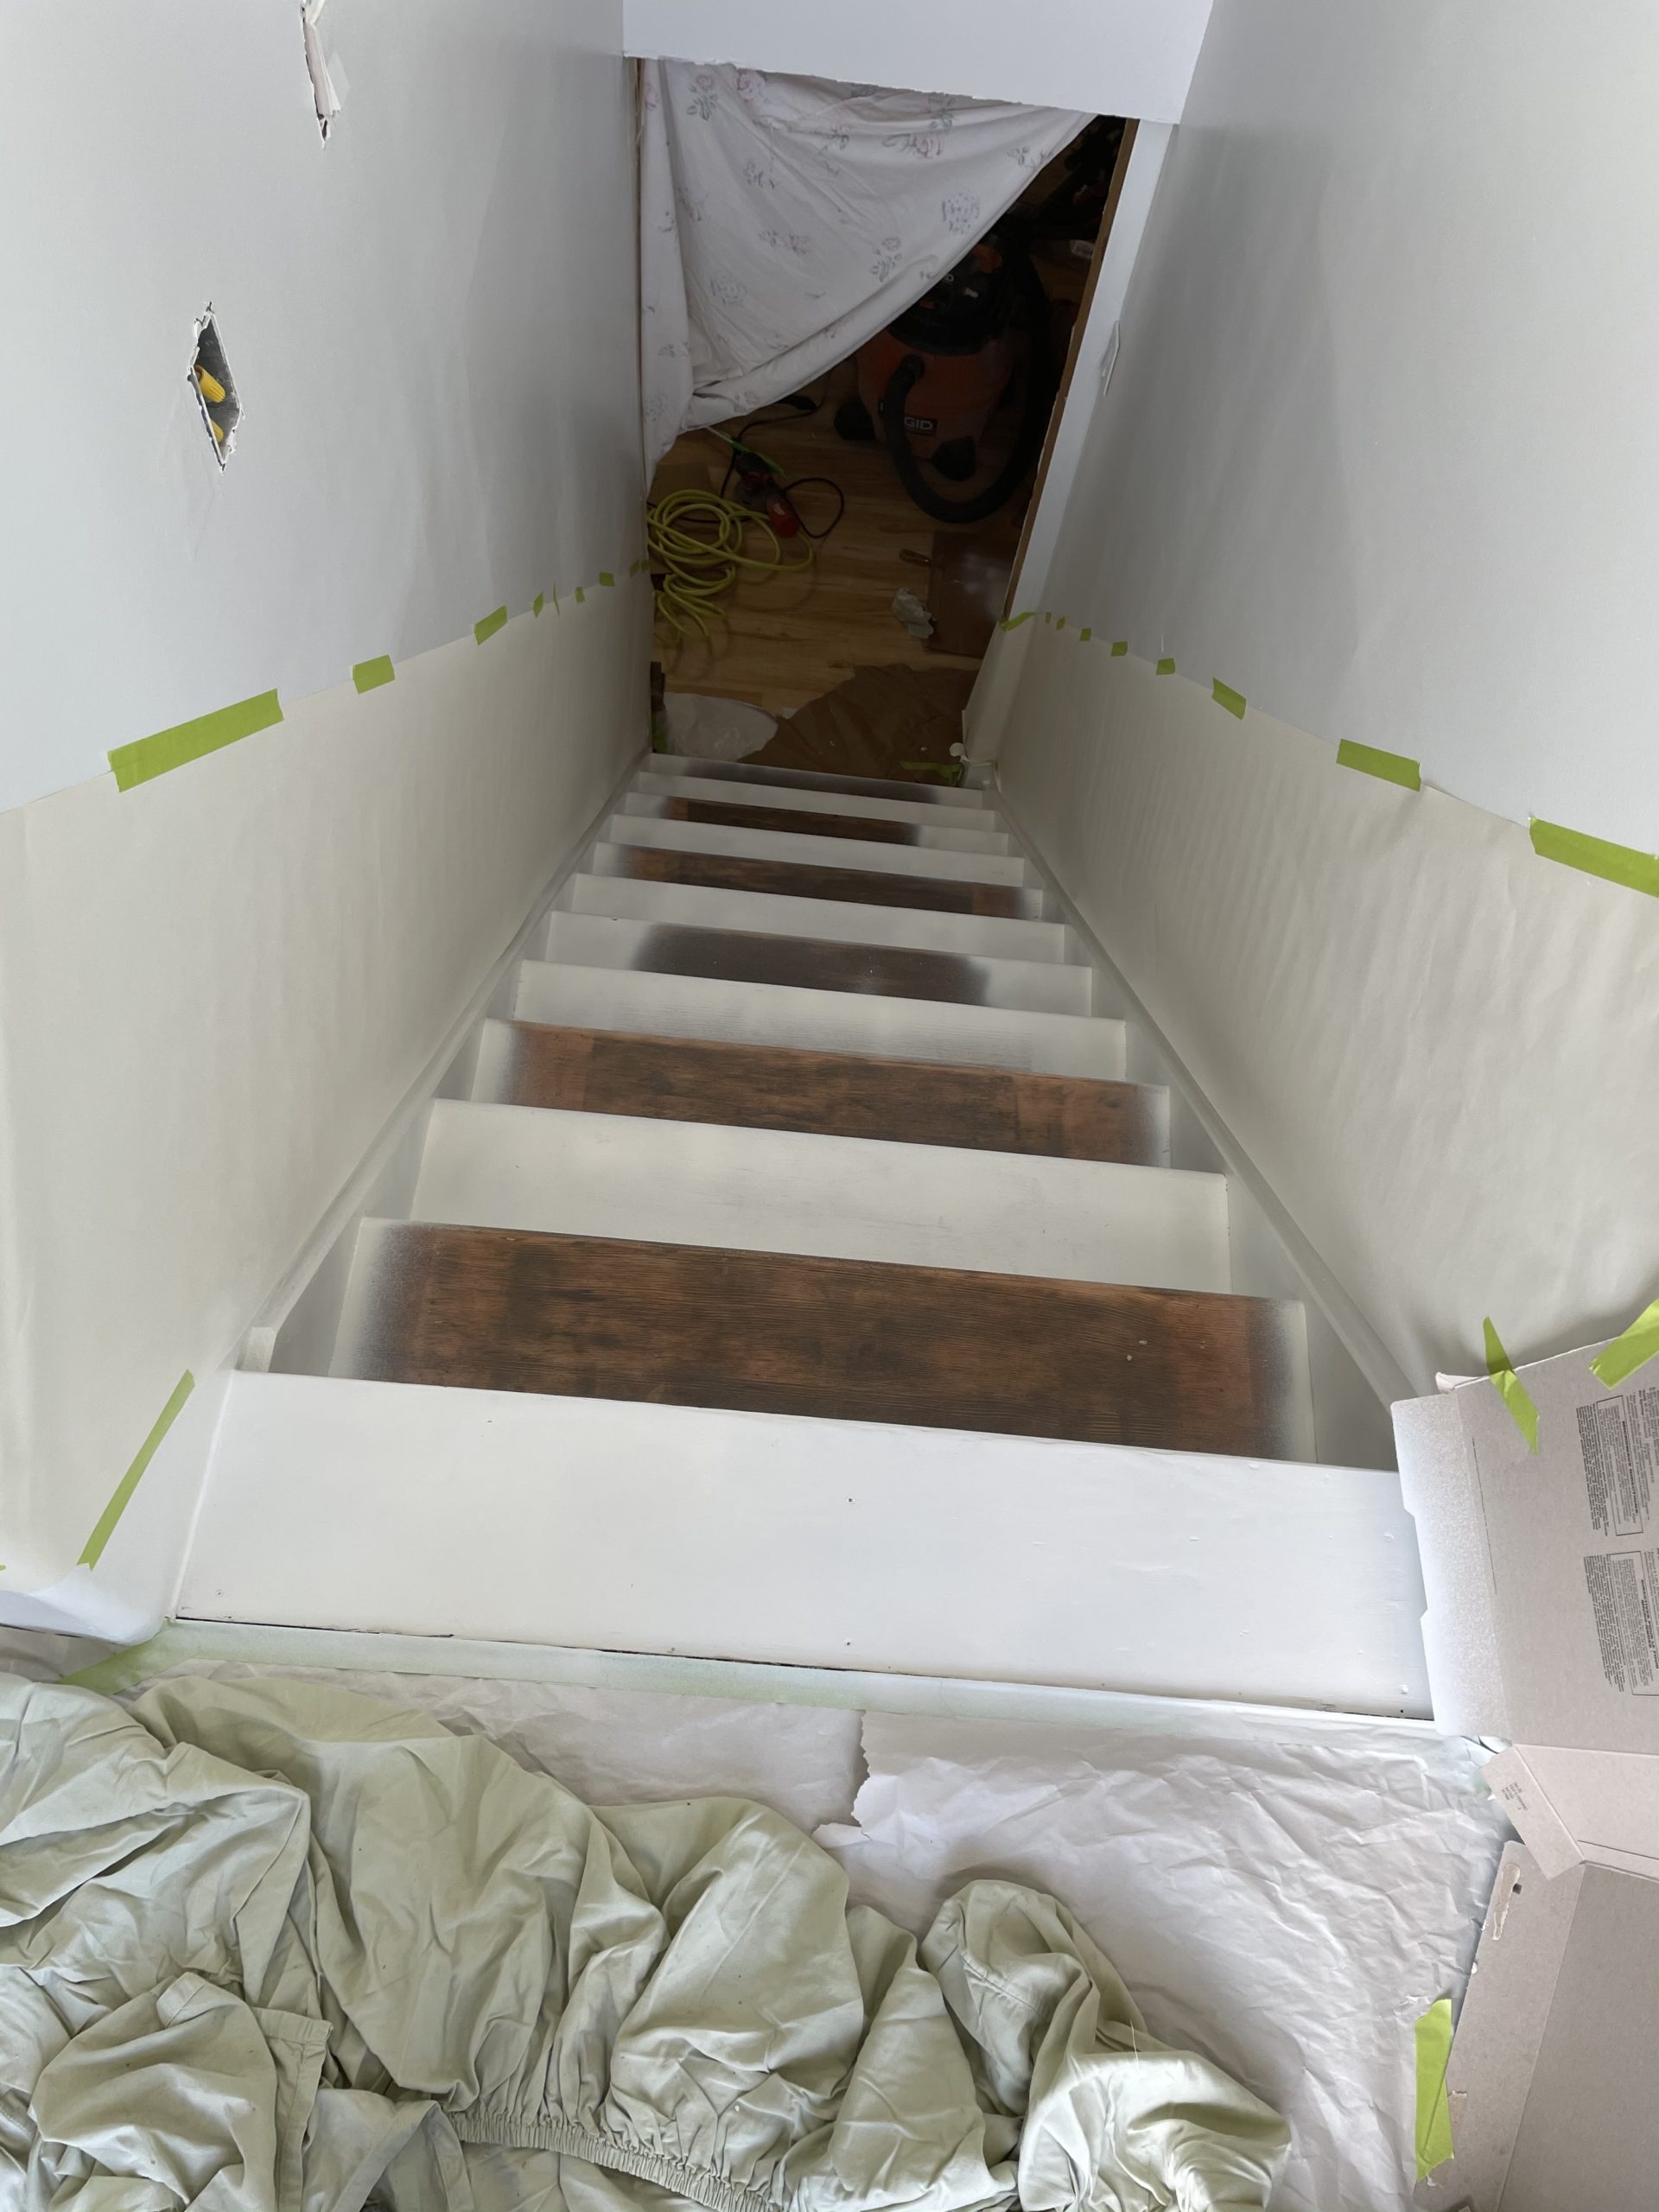
The paper on the sides was used to prep for painting. I used patio and floor paint by Benjamin Moore in white and did 3 coats on each step. Some coats I only painted the part that would be exposed after the carpet runner was installed.
The next photo shows the caulking in the corners. It made a huge difference, don’t skip this step! Remember to use paintable caulking. If you are new, try wetting your finger or using a wet rag, it helps a lot. Also, always make sure to use clean rags (you’ll go through lots, but it’s worth it), otherwise it can make such a mess if you’re just learning. Another tip – I use old sheets, or t-shirts for rags. They work great and then you don’t have to feel bad about throwing them out when you are done.
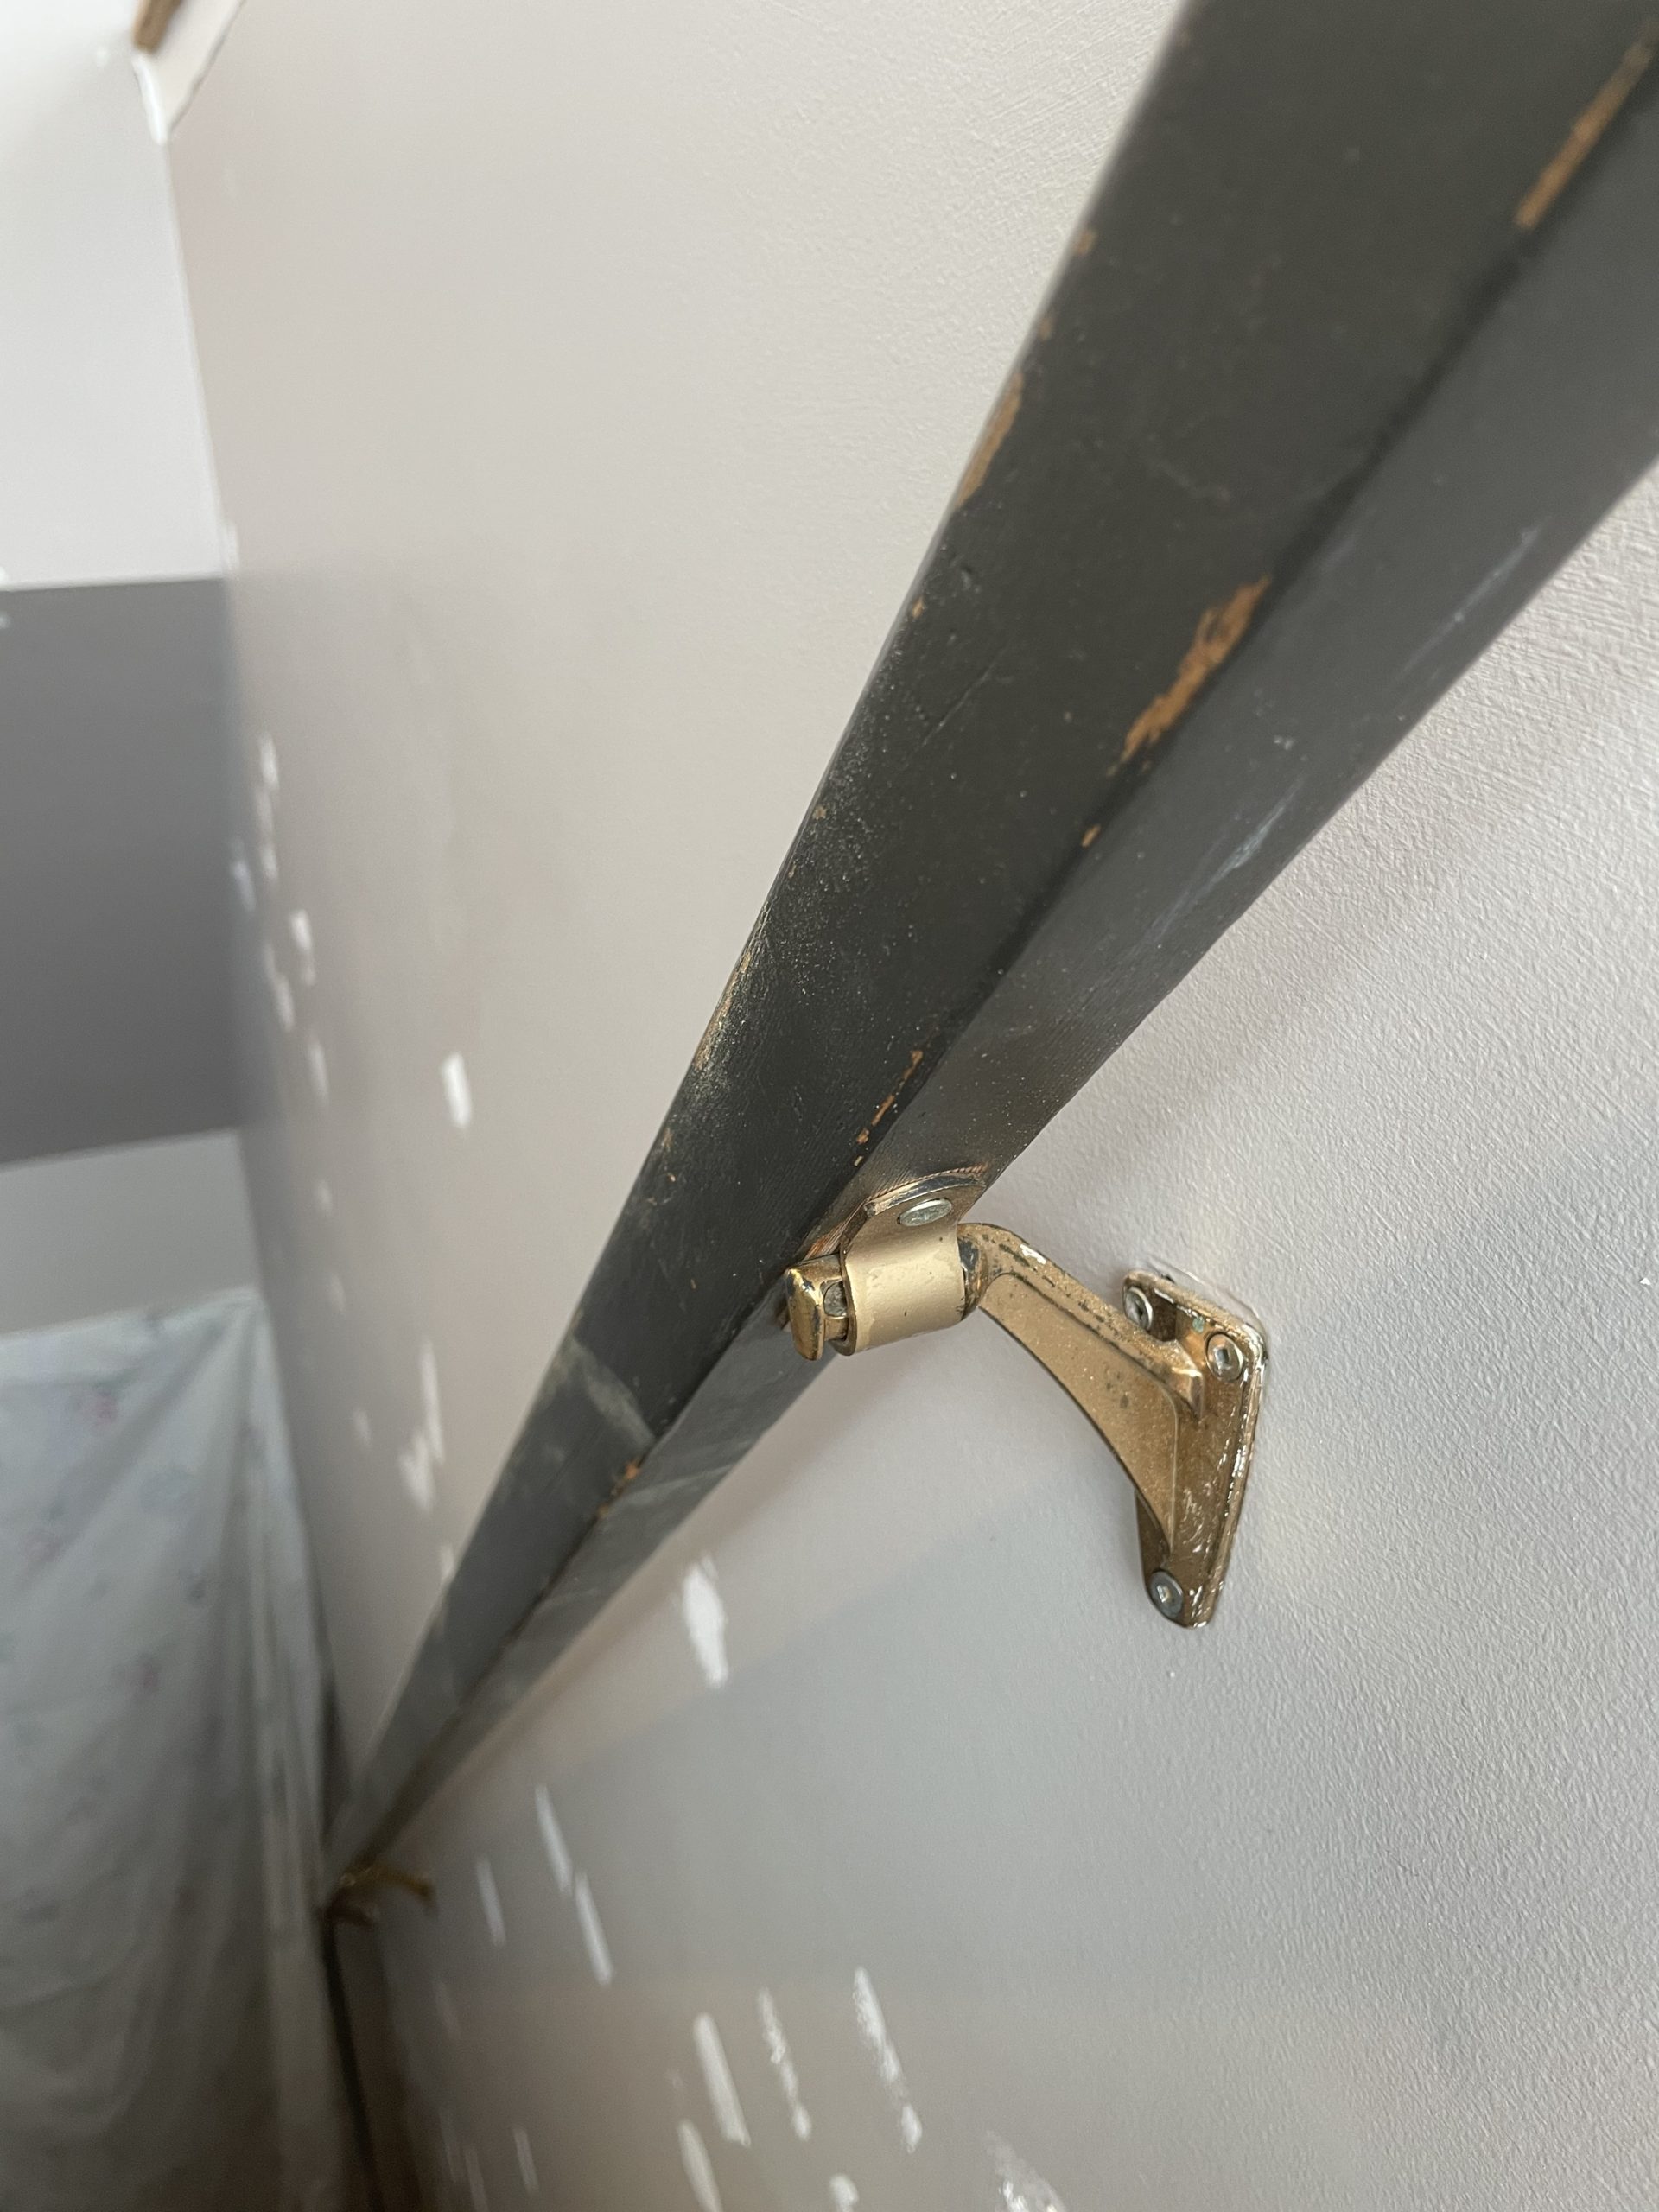
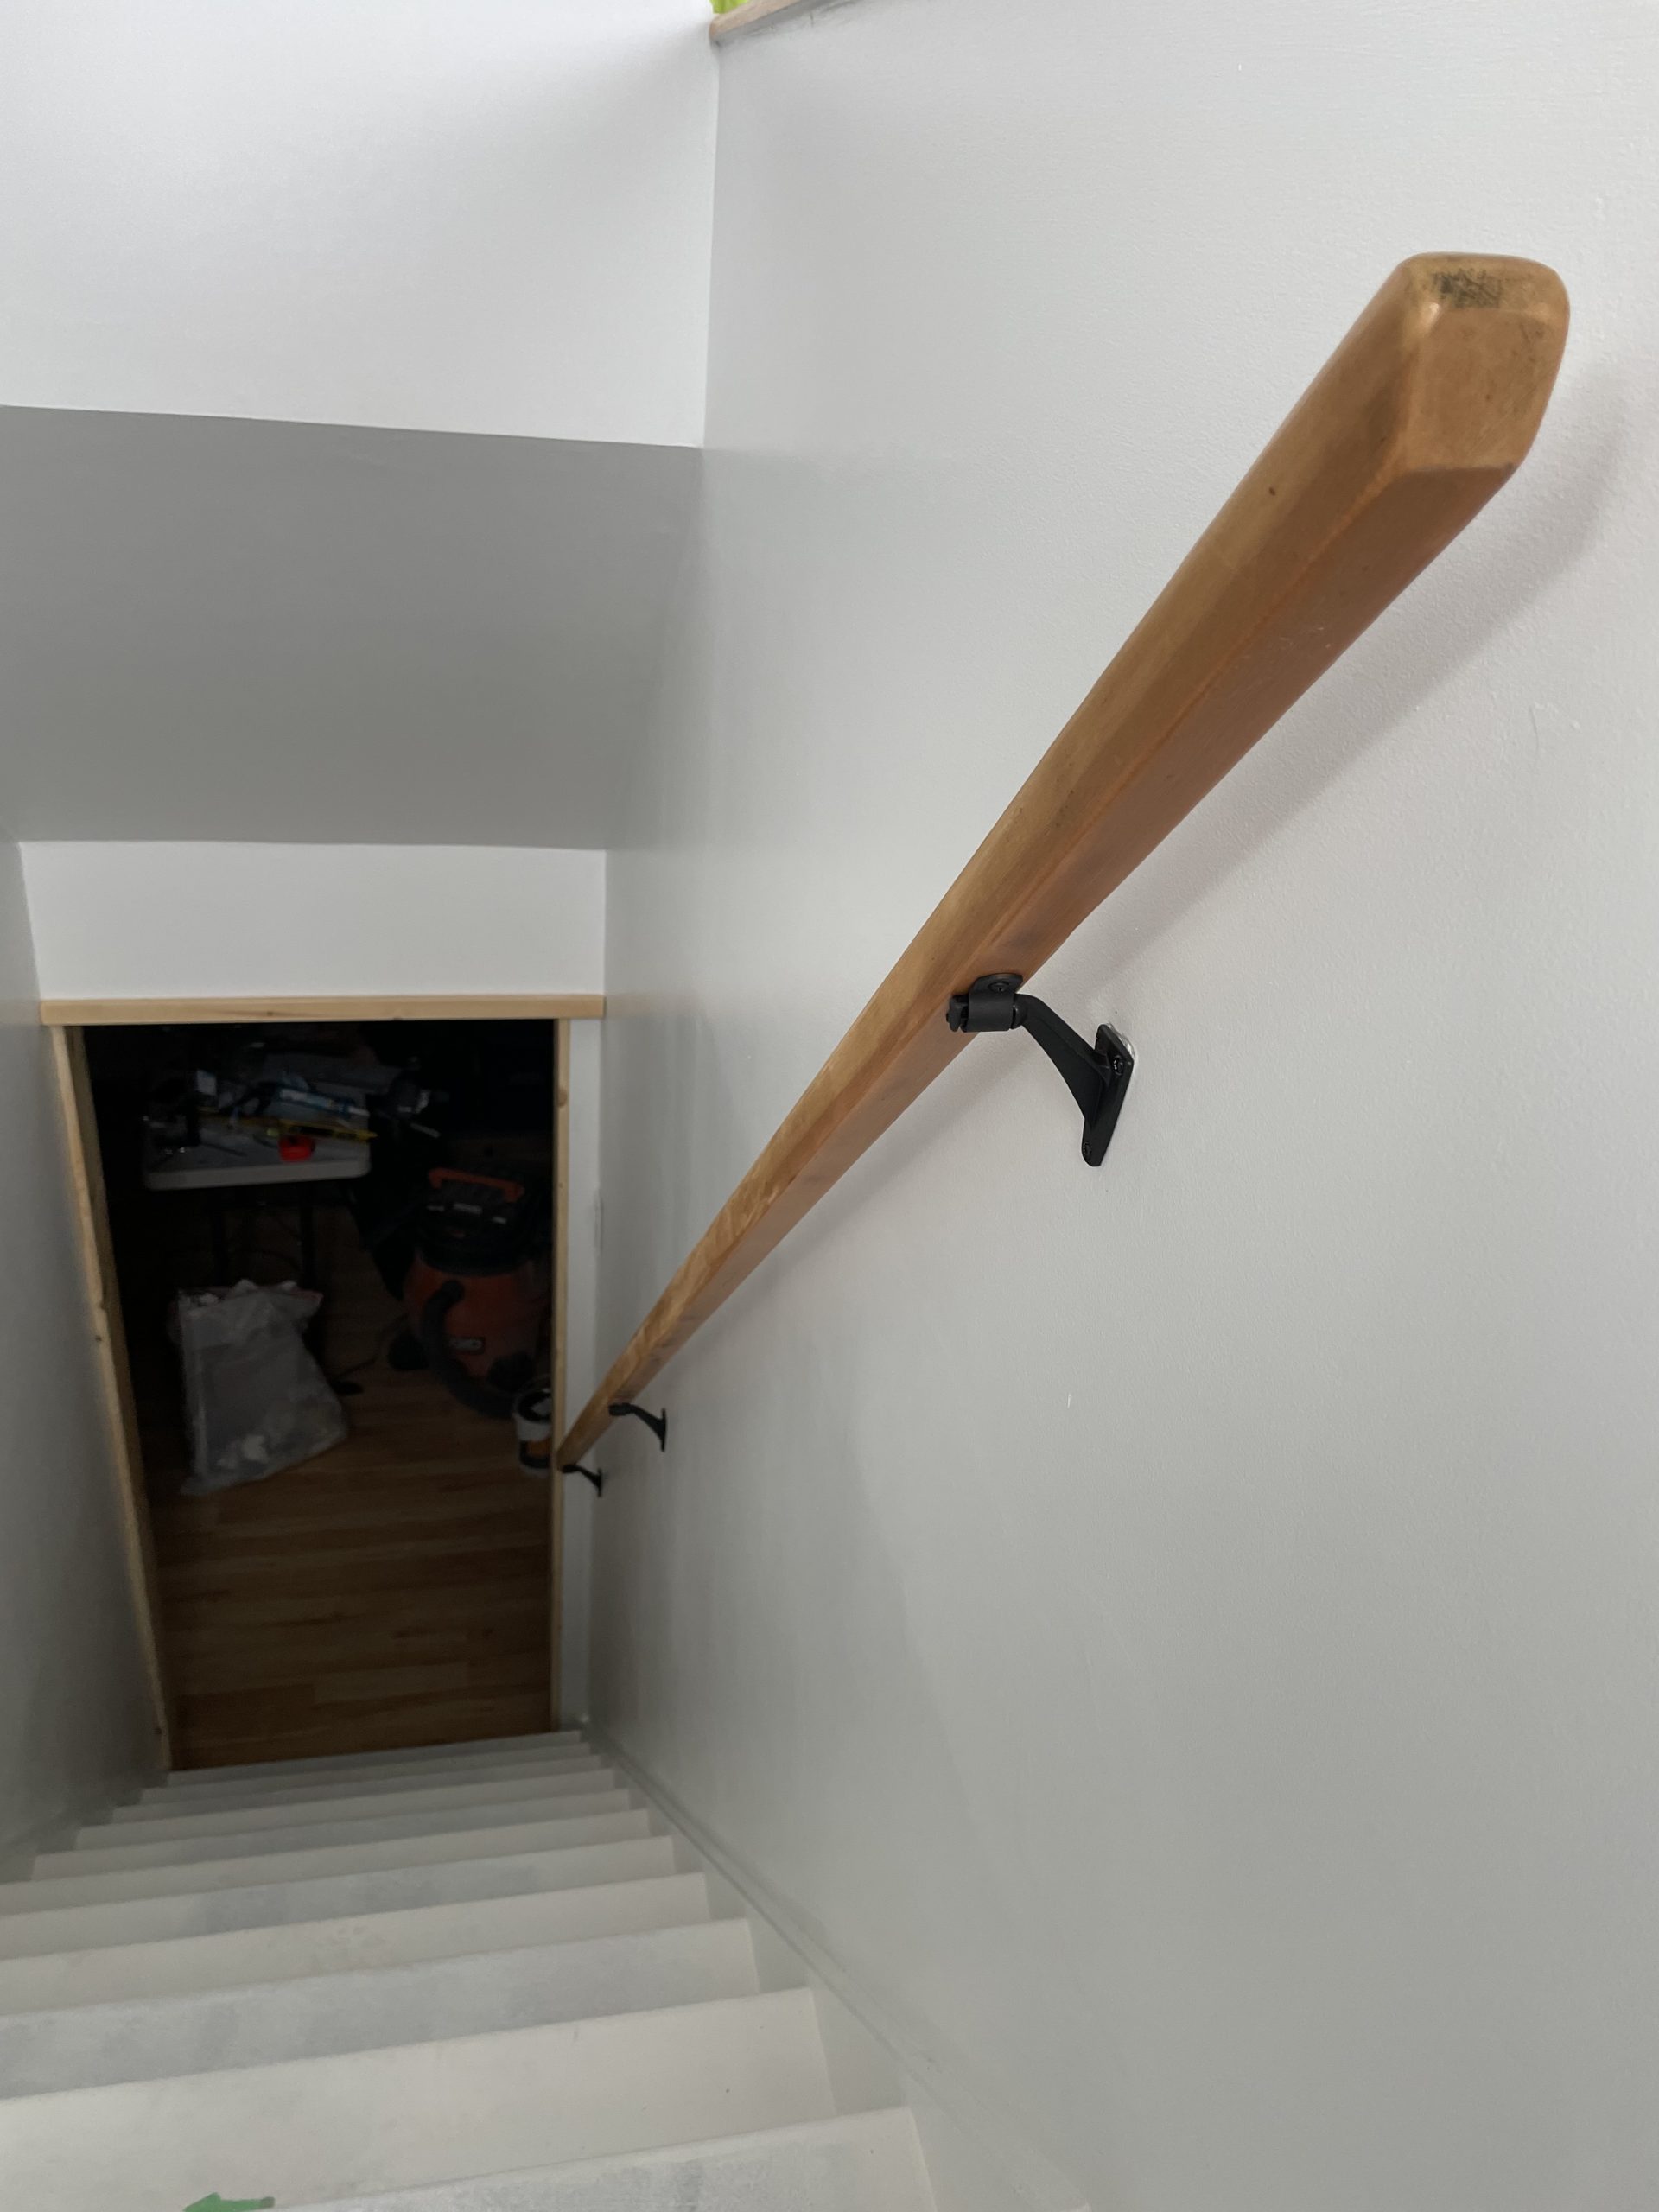
The next two photos show the before and after of the handrail. This was a super easy DIY that used all things I had at home. I took it off and took the hardware off. Washed the hardware in hot soapy water and used a wire brush. Then I spray painted it black (I’ve linked the spray paint I use for all these types of things). I did 2 coats. Then I varathaned the handrail, 2 coats. I could have even done a third. Remember to lightly sand in between coats and wipe clean with a damp rag. I used satin, water based indoor varathane. Then we put it back up. Such a big change for little work and money.
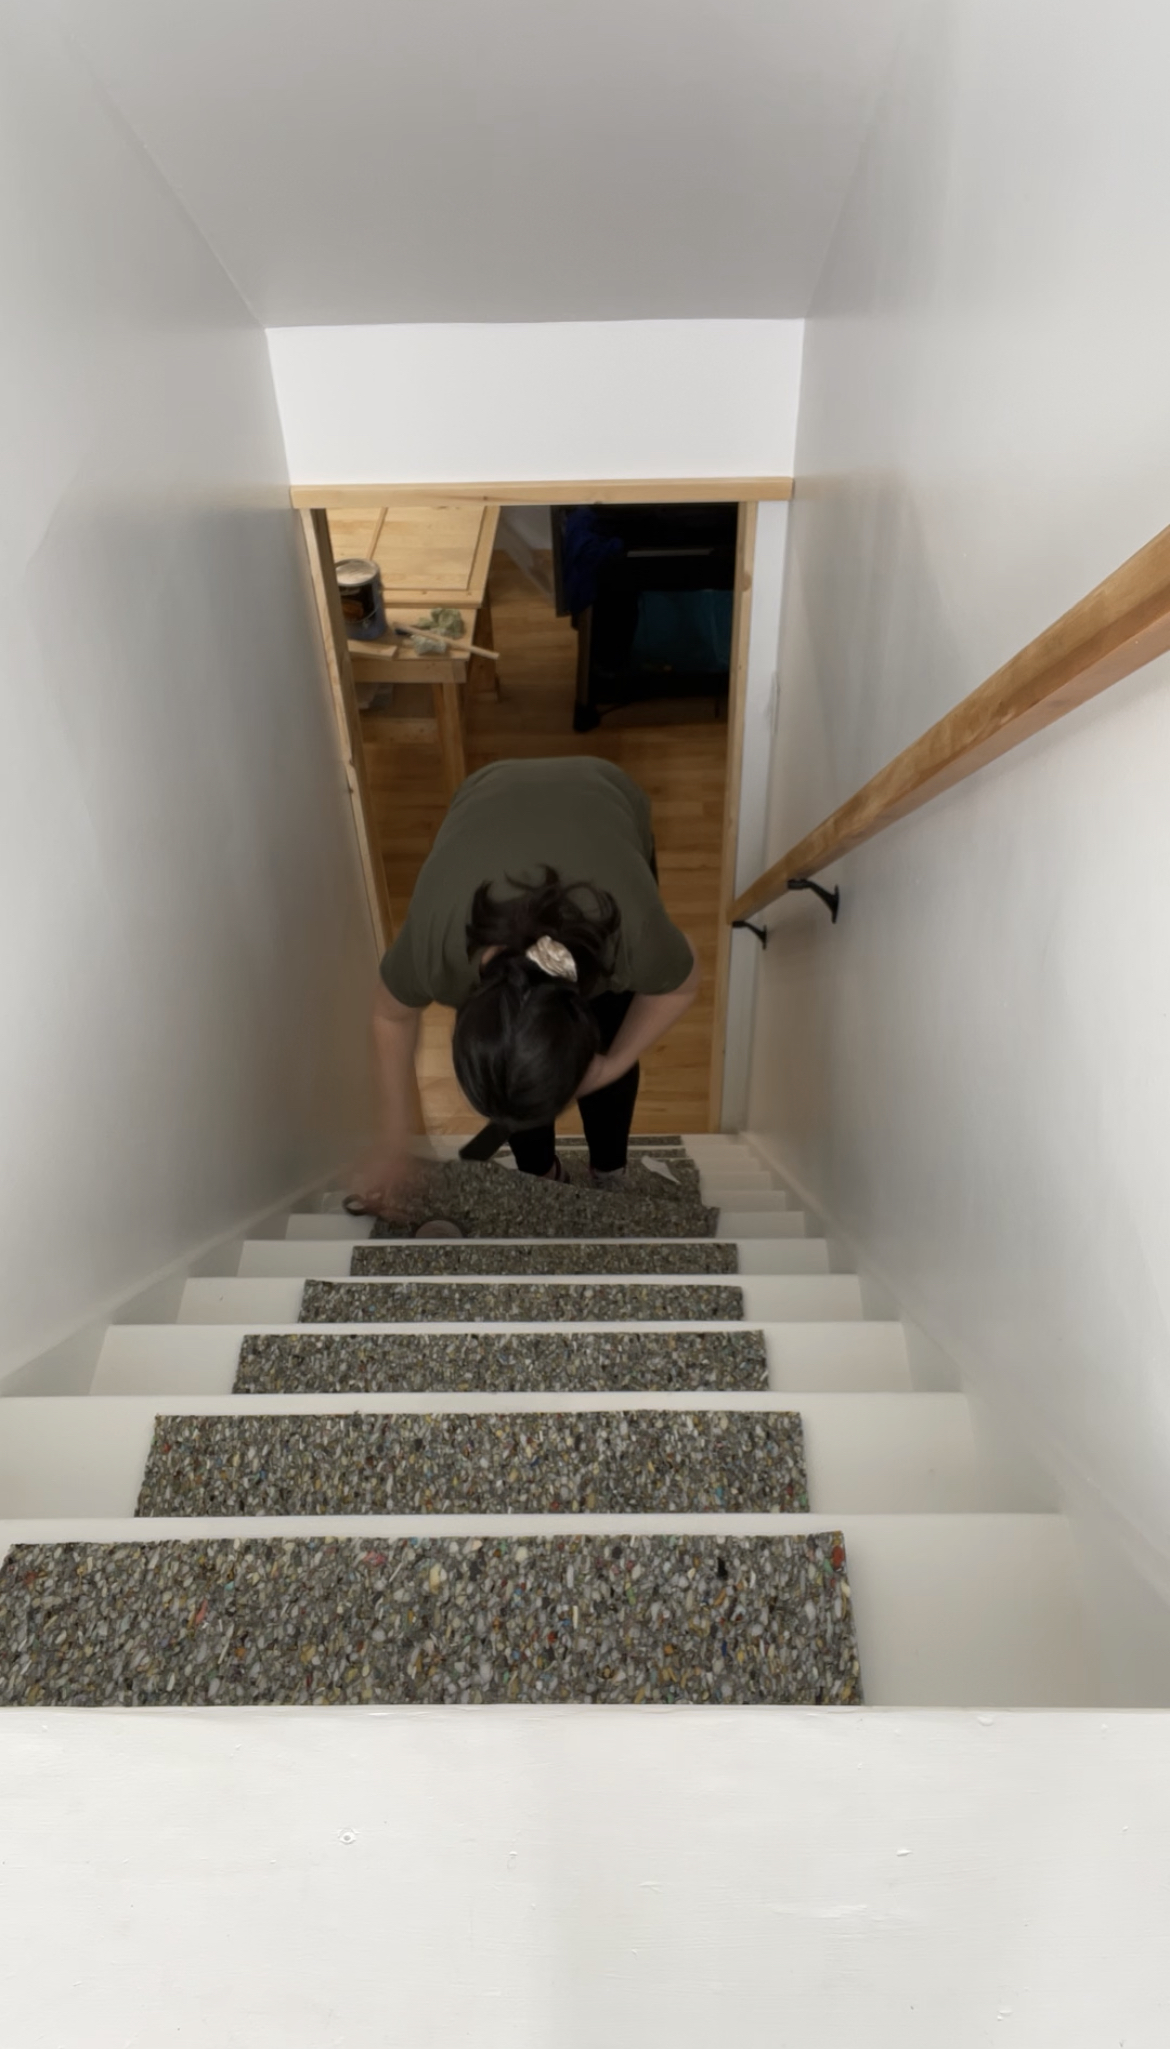
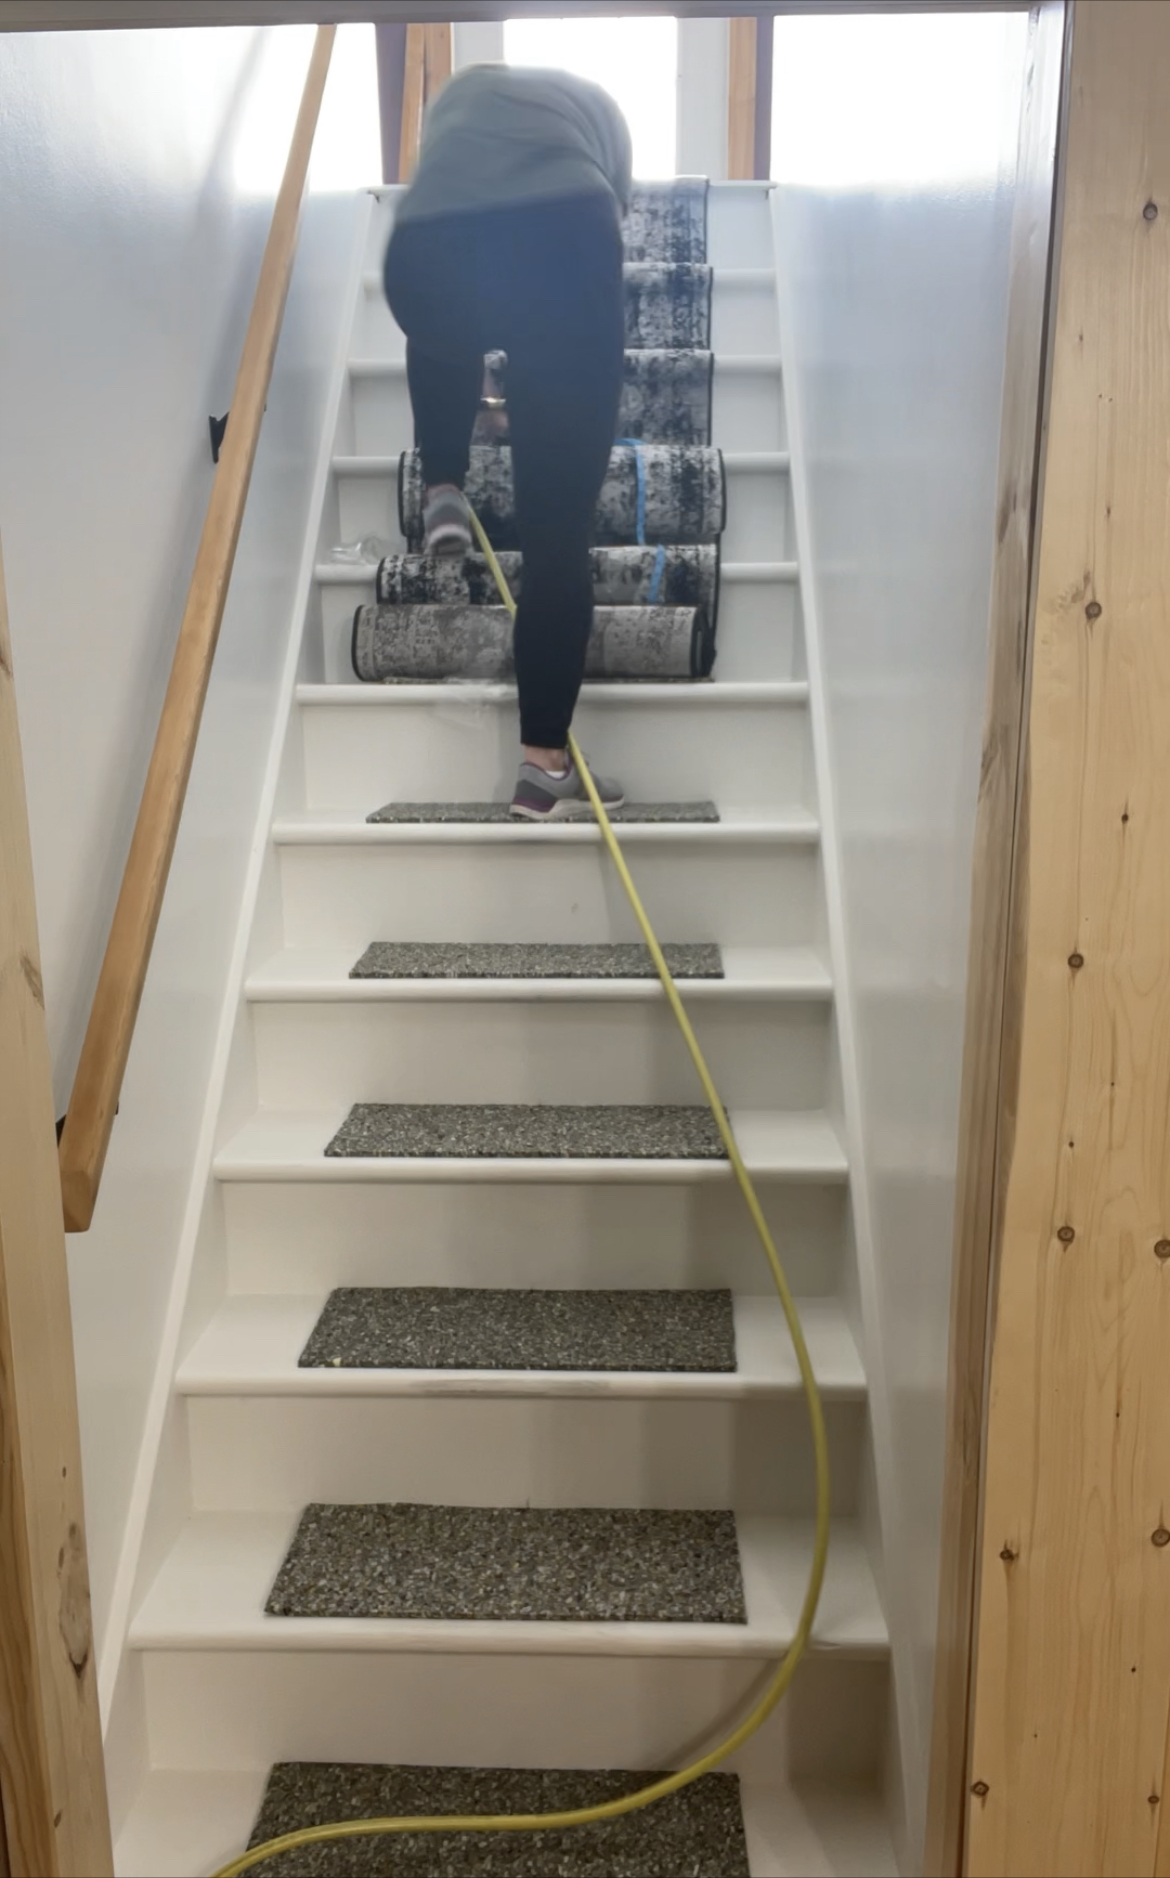
The next two photos show the underlay and carpet runner being stapled. You’ll want to make sure to measure all the way down on both sides so the runner goes on evenly. This was actually tricky!
Watch the video for more details and save this quick guide below to your Pinterest for easy reference later!
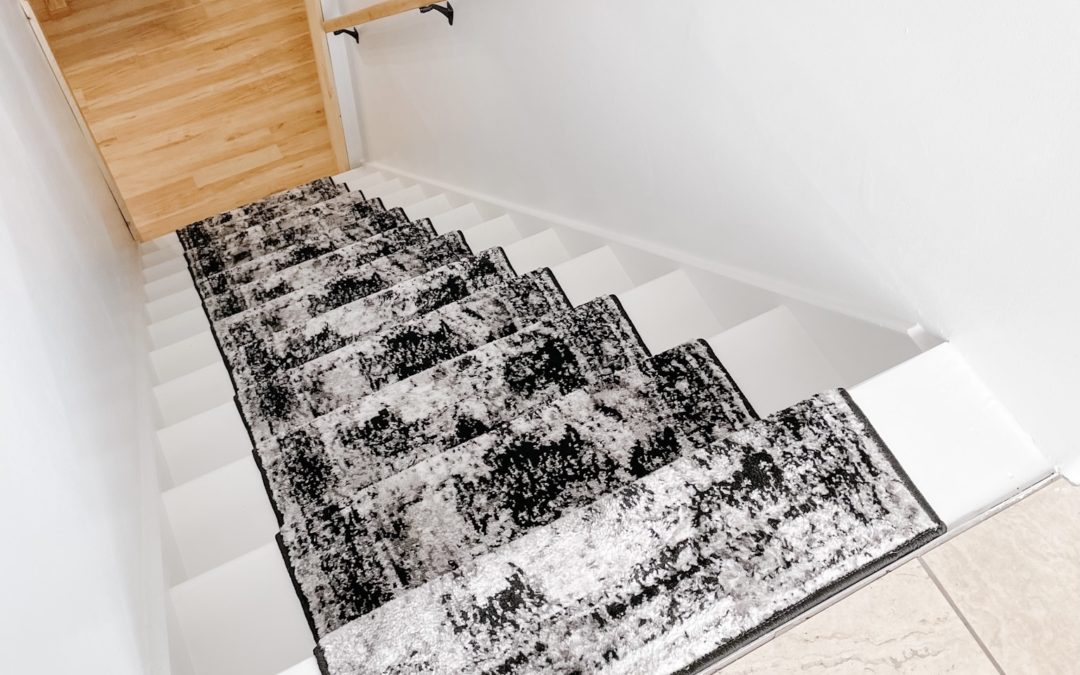
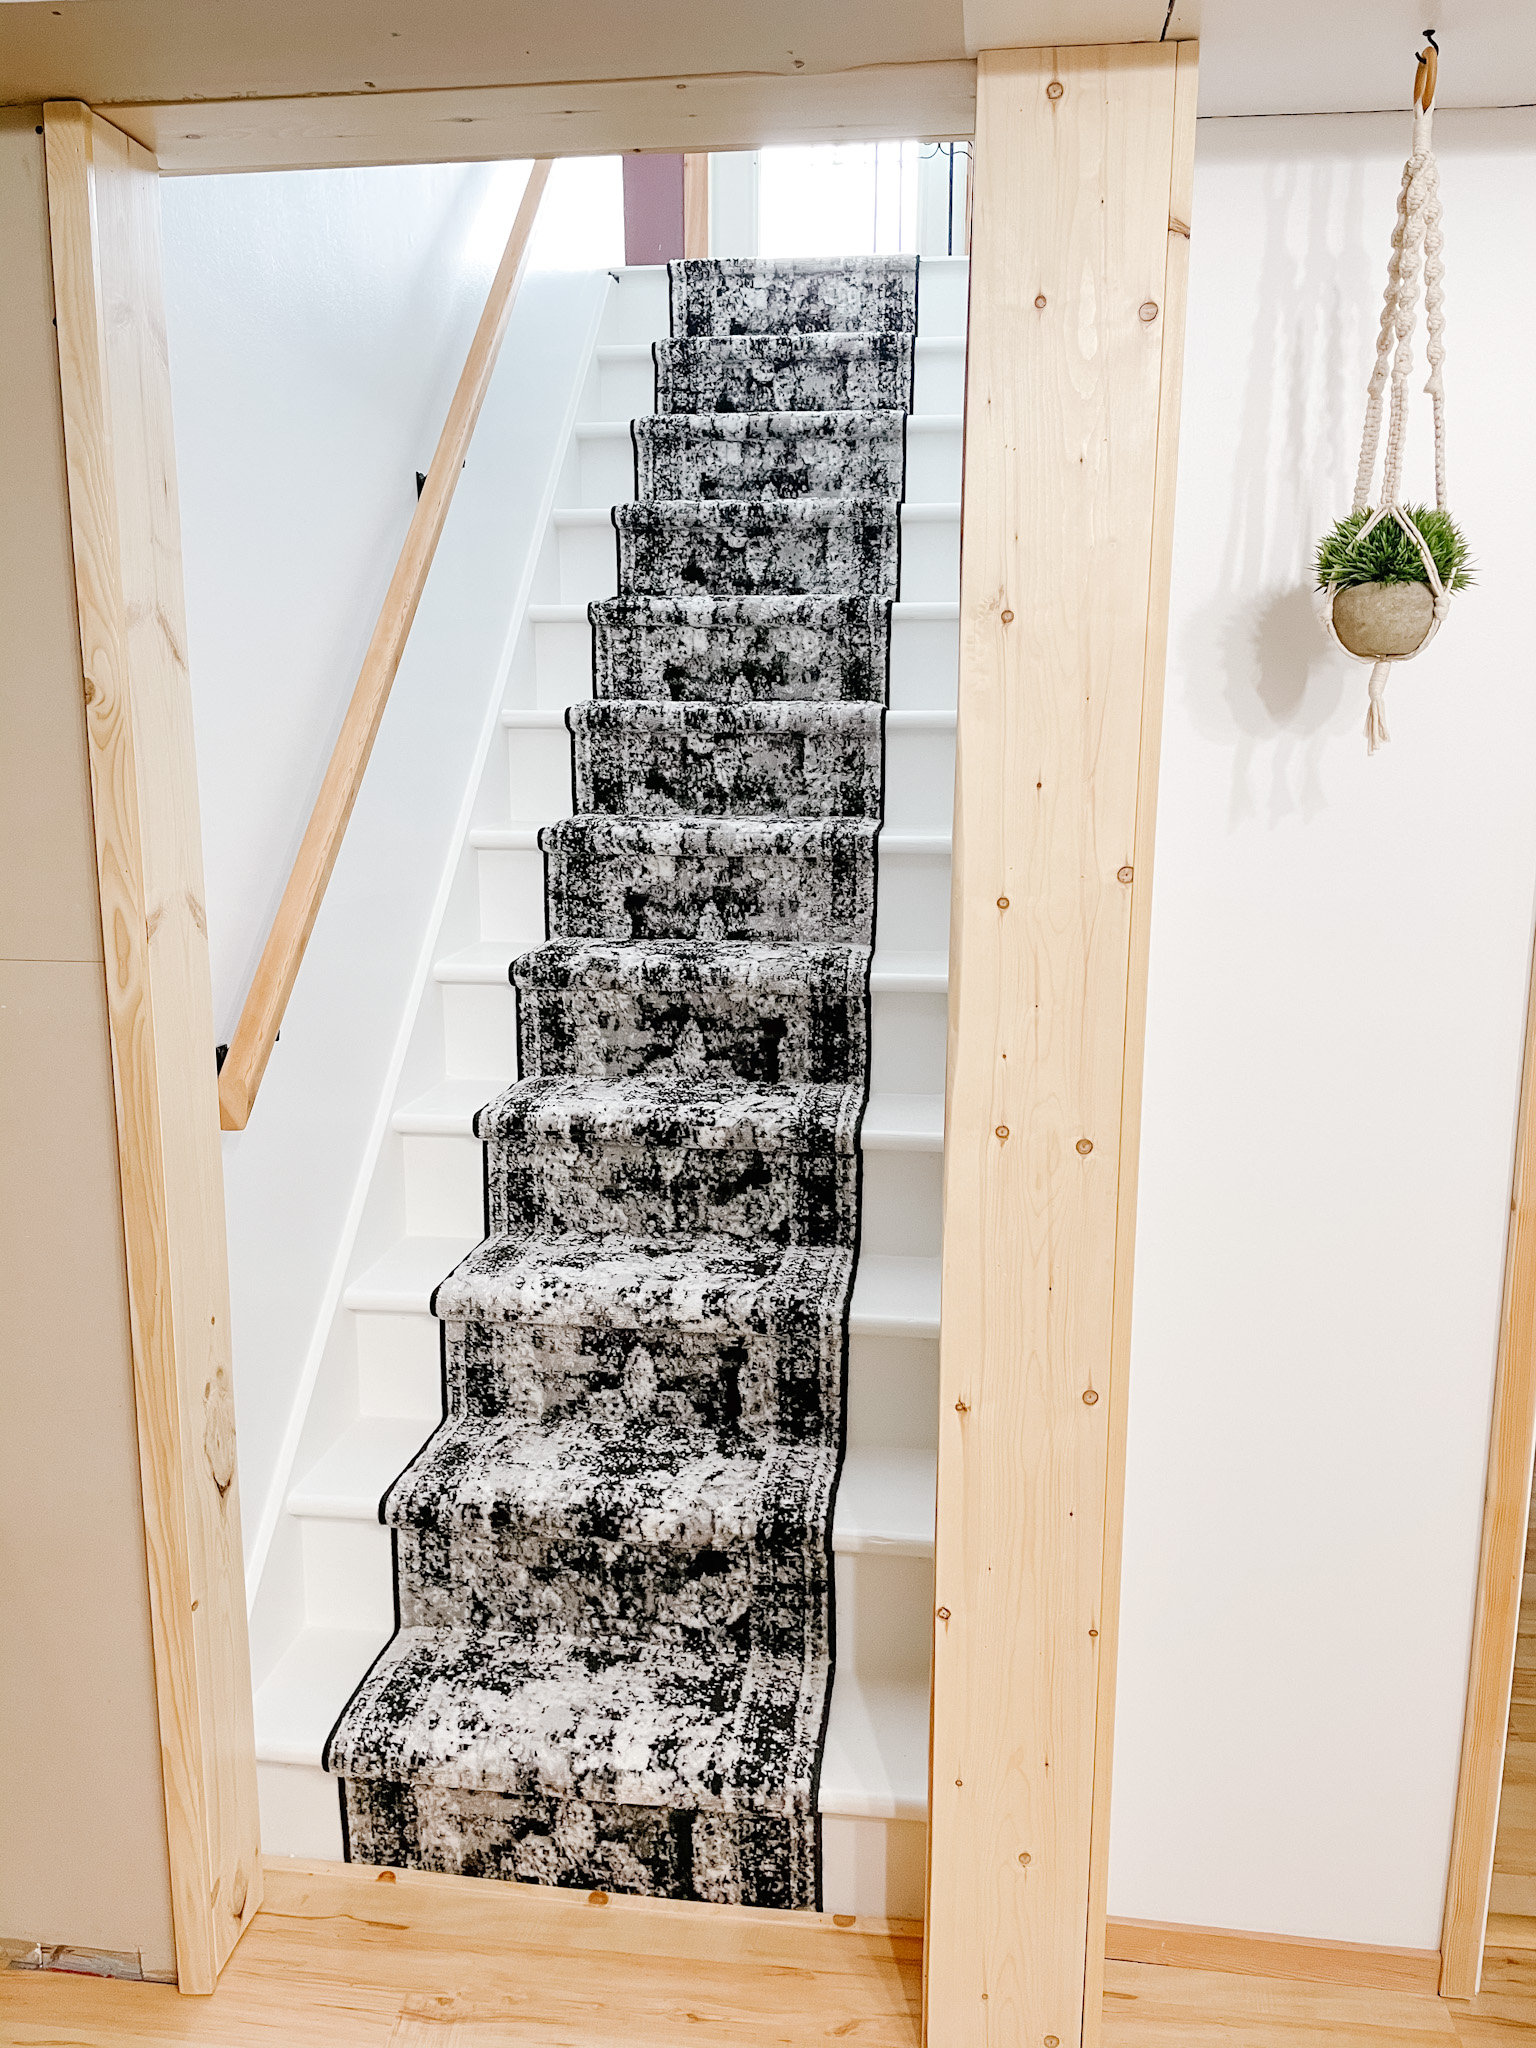
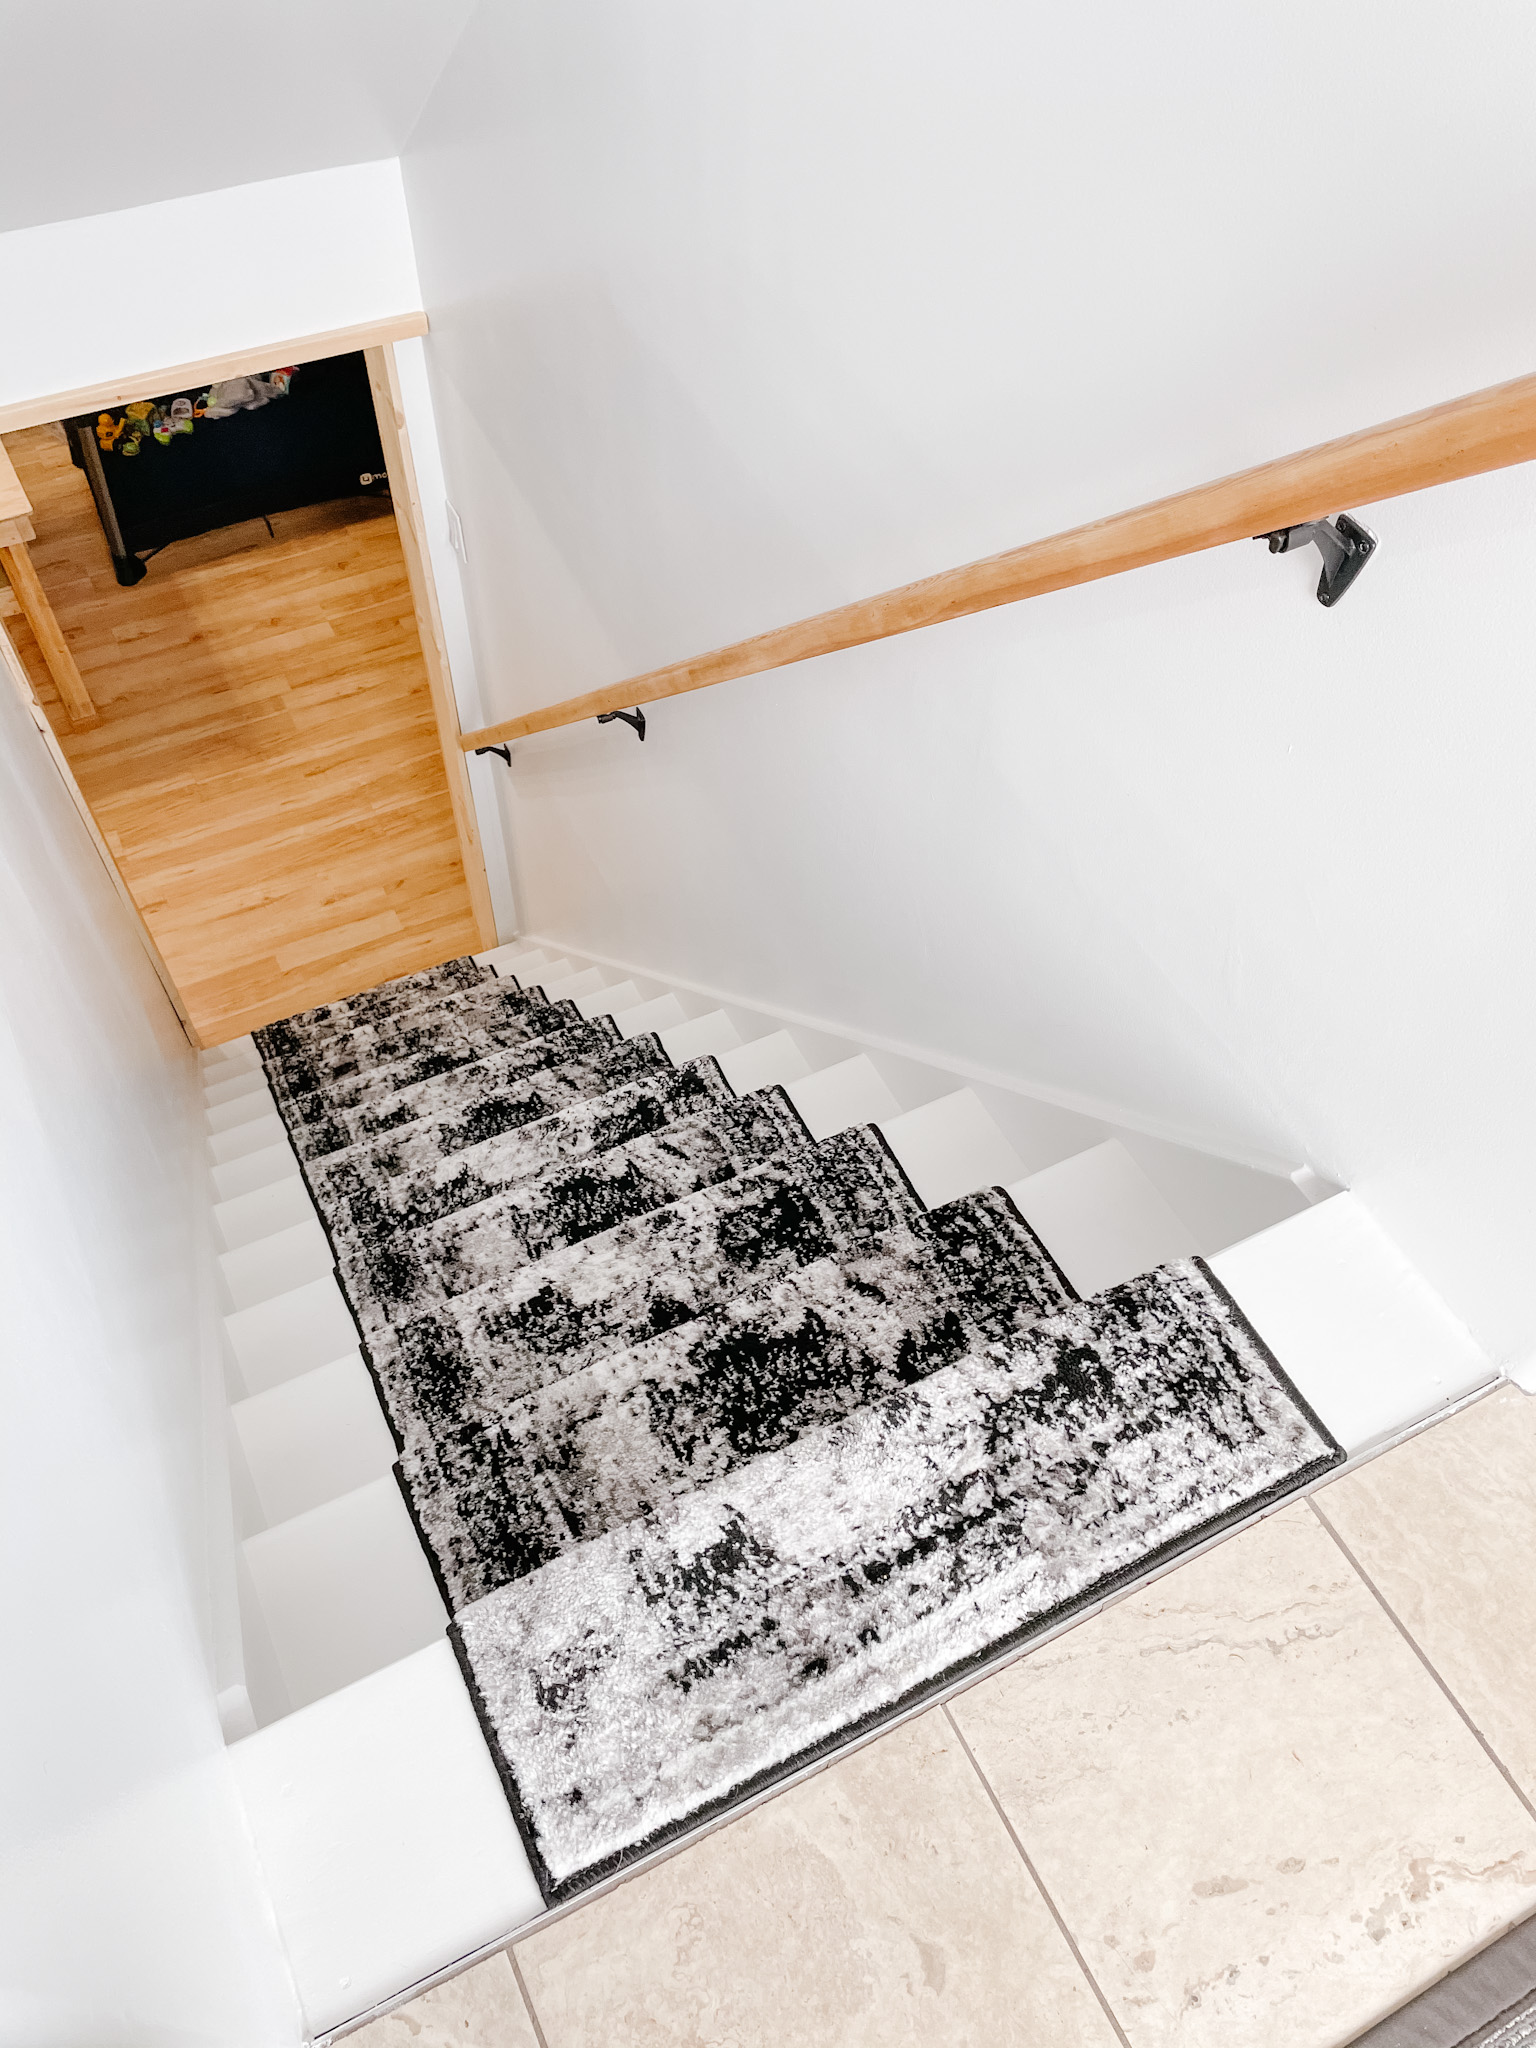
AFTER –
And now the finished staircase!
Your Questions Answered –
Here are the answers to the questions you guys asked on Instagram!
Q: What kind of paint did you use? A: Floor and Patio Paint by Benjamin Moore
Q: Placement and number of staples per stair? A: Check YouTube video for details.
Q: Did you have to pay duty on the rugs? A: No. I ordered from www.rugs.ca
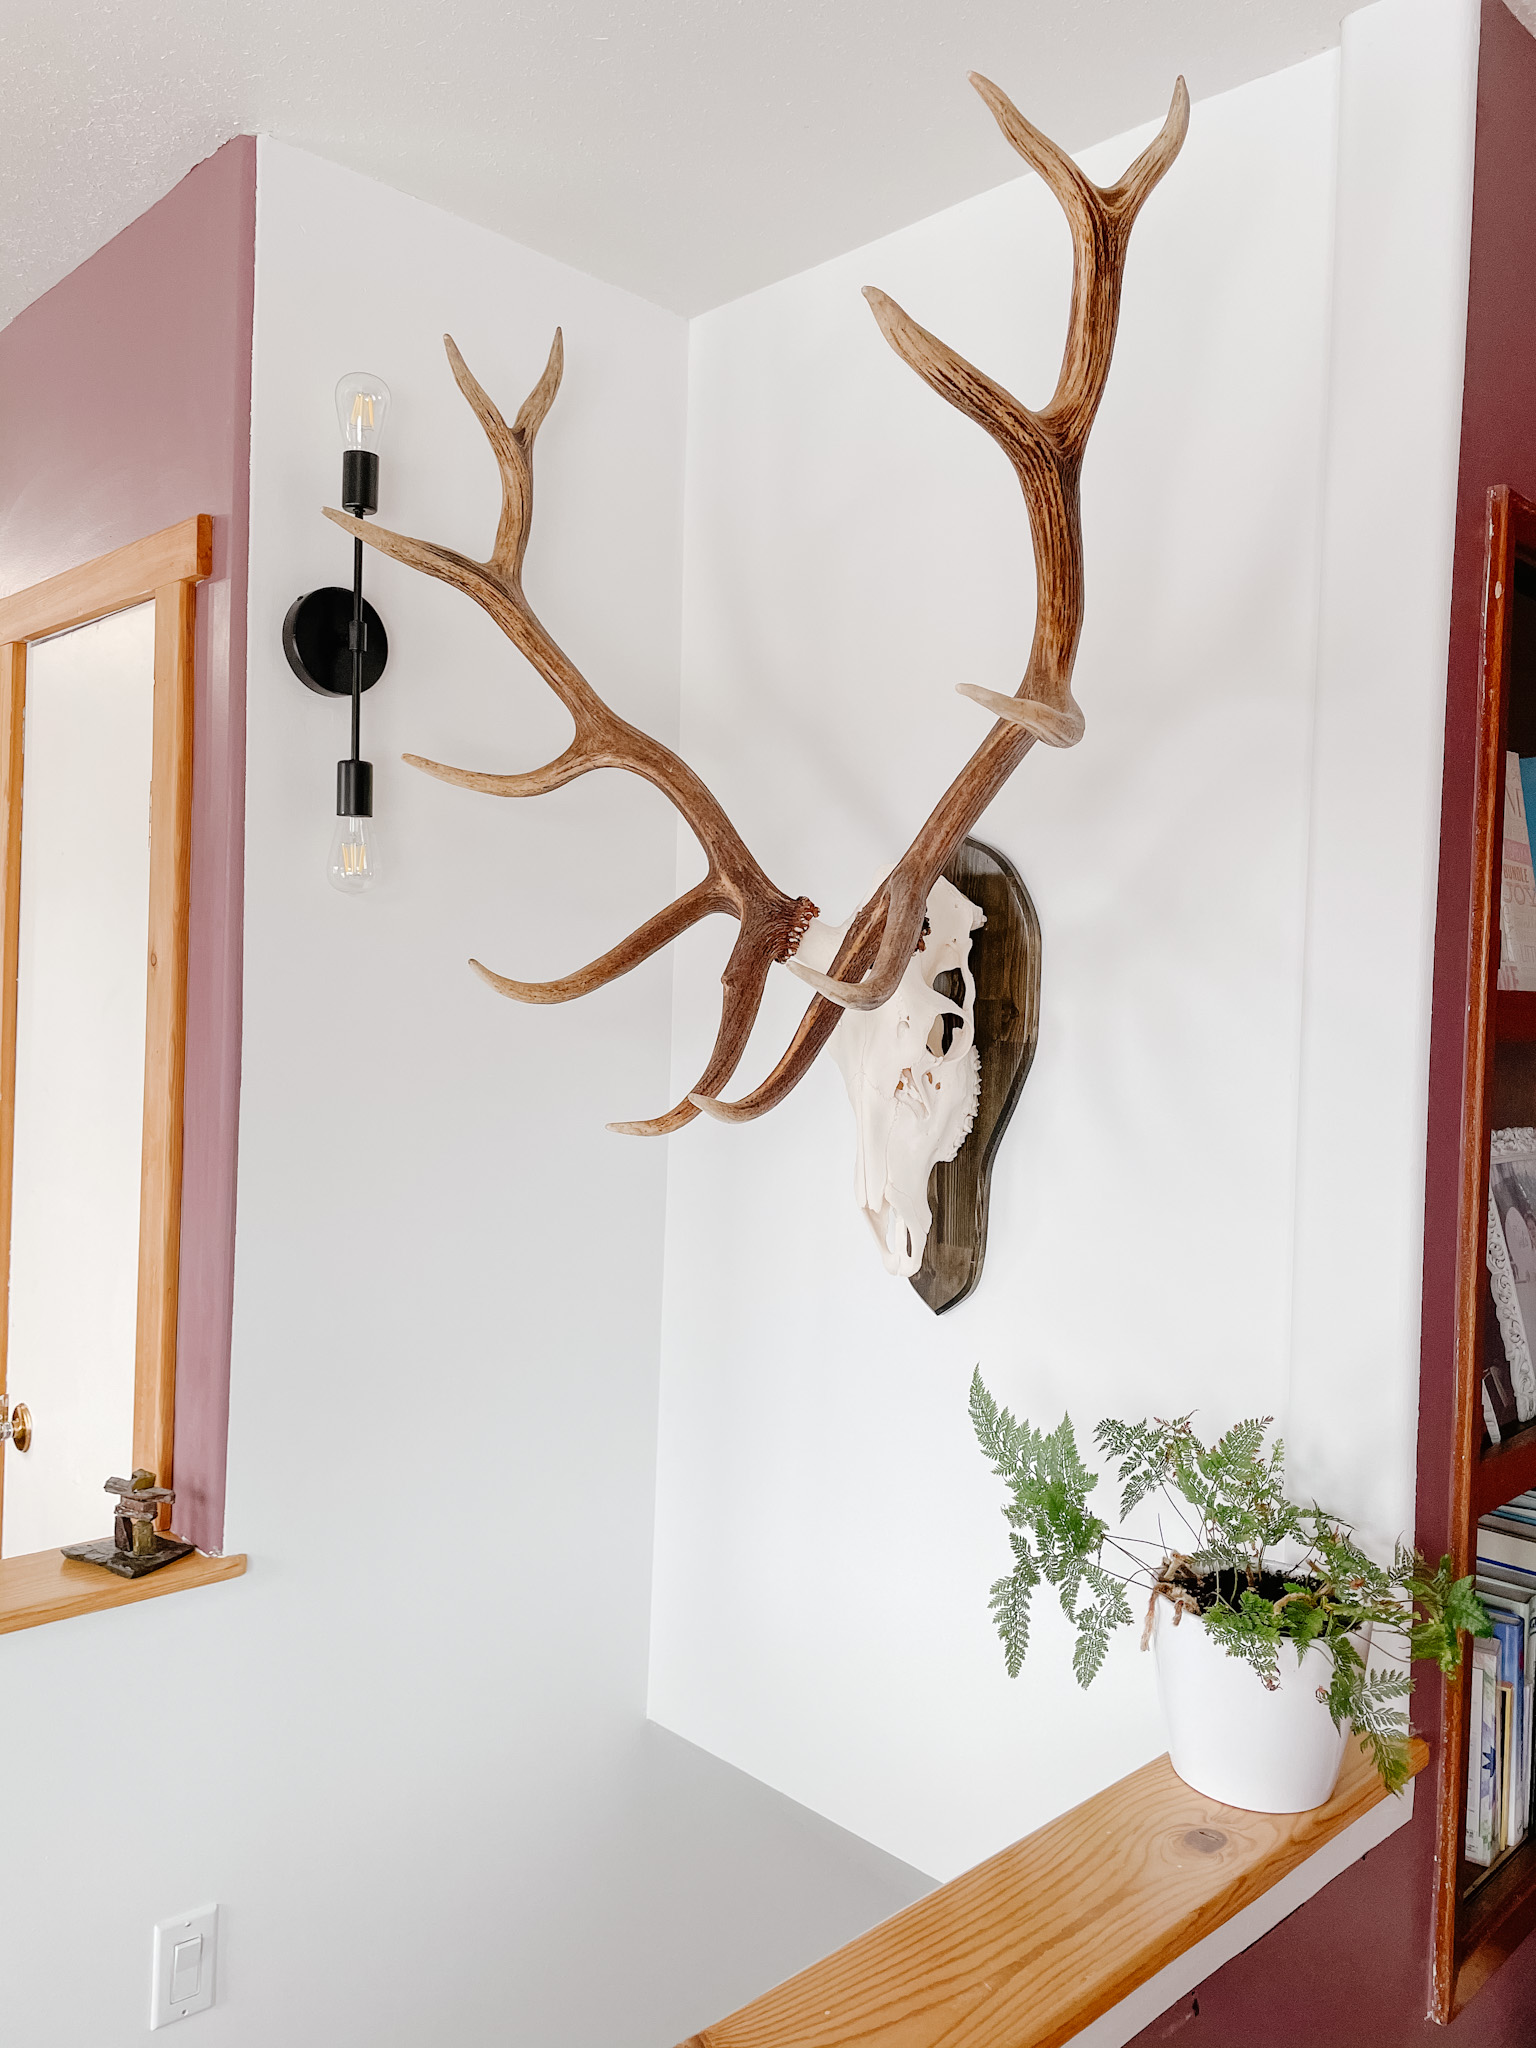
Q: Does your husband just go along with all your plans? A: This one made me laugh… I asked Mr. Sew Bright and his answer was: “I try to make some decisions, sometimes I agree, but most of the time she does what she wants.” I will add that I am getting better at asking for his advice and opinion, but a lot of the time he doesnt really care, so I just go with it. BUT having said that, if he had NO say in what I did, there would not be an elk head in our staircase…so there’s that!
Interested in checking out some of my other DIY blog posts? Click on the images below!

Shop this post …


Click HERE for more of my Amazon Favourites!


Thanks for the comprehensive instructions. Really loved following your before and after and everything in between. Thanks for the inspiration too.
You’re so welcome! glad you enjoyed it!
I always wanted to put a runner on my stairs at the last place but it totes intimidated me
So inspiring Jackie ! I can’t wait to follow along on the rest of your Reno’s. It definitely inspired us to start our own !!!
Yes! So happy to inspire you too!
I’ve loved watching this progression, Jackie!! You’ve inspired me to tackle my own DIY!
Yay! I can’t wait to see yours!