
Here’s why I wanted to install wallpaper by myself…
In all the instructions and tips I’ve read about installing peel and stick wallpaper, the advice is always to use two people. This may be helpful advice for many, but it isn’t if you simply don’t have another person to help you! I work the nap time hustle and most of my friends are in the same situation, but I wasn’t going to let that stop me from putting up my peel and stick wallpaper from Rocky Mountain Decals. They have a great selection, but I fell in love with one of their new designs, Scandinavian.
So how did I do it?
To be honest, the first few sheets I struggled. I know you’re not supposed to, but I took it down, put it back up, peeled it back, tried again, on repeat, until I got it just right. After a couple sheets I had to check myself out and think of another way. The problem was getting it on AND getting the pattern lined up. Some might not care about how exact it is, but I wanted it just right.
In this post, you’re going to learn my main tips for easily putting up peel and stick wall paper BY YOURSELF! If you’re a visual learner, click the video below, otherwise, keep reading!
Tips for installing peel and stick wallpaper by yourself
Before even thinking about installing the wallpaper, ensure your walls are not freshly painted, or if they are, make sure to let them for at least 3 weeks. I had primed my walls, but not painted, and from what I could find online, it was okay to wallpaper overtop of the primer after only 3 days.
1. Preparing peel and stick wallpaper
Lay your wallpaper out and gently place weight on it to reduce the curl. Each sheet is carefull labelled for easy installation. As per the instructions provided, number 1 was to be placed on the far left side and each subsequent number was added to the right.

2. Check for level before installing wallpaper
While letting your wallpaper sit flat for a bit, check your walls for level. If you have an older home like me, chances are the corners are not level. I used a pencil to mark on the wall a level line. I did notice that you could slightly see the pencil line behind the wallpaper so for the next one I drew the level line to the side and erased the line before adding the next wallpaper.
Alternatively, you could use a laser level if you have one. This would probably be a lot easier!
3. This is the trick to installing peel and stick wallpaper by yourself
This is the trick. When you go to put your second piece up, use painters tape to secure it to the wall so the pattern lines up. Once it is in place, gentle pull the back of the wallpaper off and down as you stick the wallpaper to the wall.
I figured this method out through trial and error after struggling on my own and IT WORKED! I really hope it works for you too because it made installing the rest of the wallpaper a breeze.
Keep in mind, this is how to install it when you don’t have a second set of hands to help you.


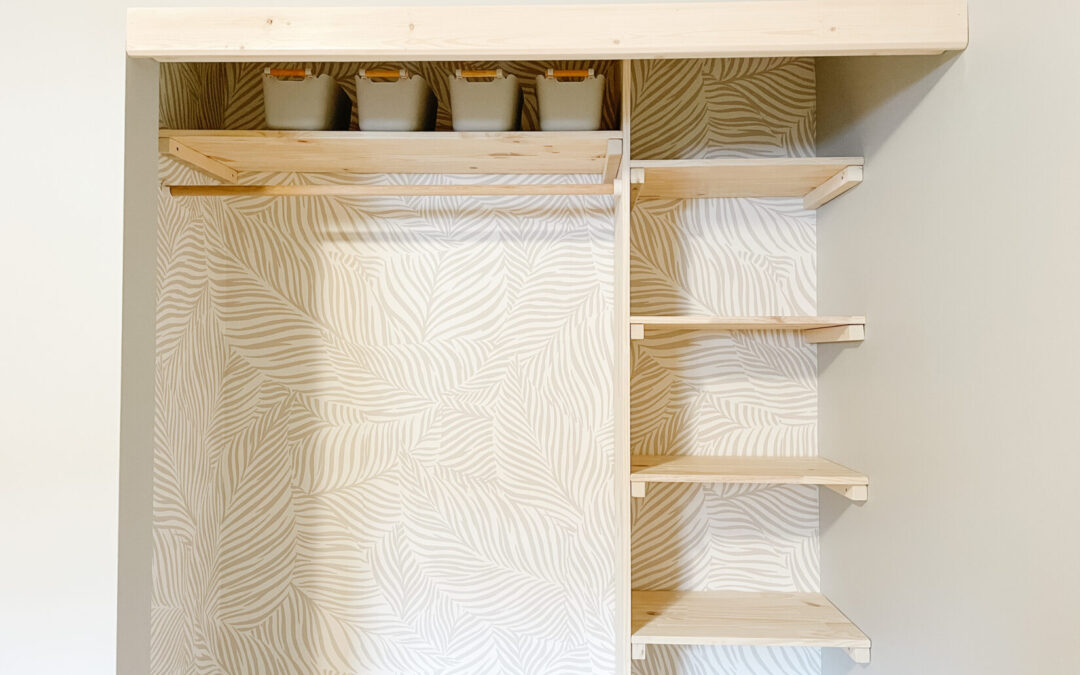
Check out these before & after photos of Rocky Mountain Decal’s peel and stick Scandinavian wallpaper in my closet!


What’s next? Follow @sewbrightcreations to find out!!
Any questions! Let me know in the comments!
We would love to see your projects! Please share with us by tagging us on Instagram @sewbrightcreations or email them to [email protected].
This post is sponsored by Rocky Mountain Decals. The wallpaper was provided in exchange for this blog post. The opinions and photos are of Sew Bright Creations’.
Click HERE for my Amazon Favourites!


