
*READ THROUGH TO FIND OUT HOW YOU COULD WIN $50 TO THE CUTTING EDGE STENICLS!!*
The very first bigger company I got a “yes” from was The Cutting Edge Stencils. I was SO EXCITED I just couldn’t wait to transform the laundry room. Although it took me a couple months to get the room ready to do the floor, it was the big thing that got me going in this room.
As I got closer to preparing for the floor I started to feel really anxious about it. I watched videos and read about stencilling, but I was worried that I wouldn’t be happy with the results. Why? Well, if you haven’t figured this out yet, I can be a *little* particular about certain things… I was worried that there would be too much bleeding from the stencil and I wouldn’t be happy with how it turned out.
The night before I was about to start I decided to practice on a piece of poster board. I tried one full stencil with a foam roller and one with the stencil brush. I had heard that the brush takes longer but typically yields a little more precise results. What I found on the poster board was the opposite; the foam roller was the winner by far. I loved the outcome and gained enough confidence to sleep through the night and feel ready to take on my floor in the morning.
I got down on all fours, was so pumped to start stencilling and bam – epic fail! I quickly wiped it all off with a wet rag, sat on the floor, texted a friend and stared at it.
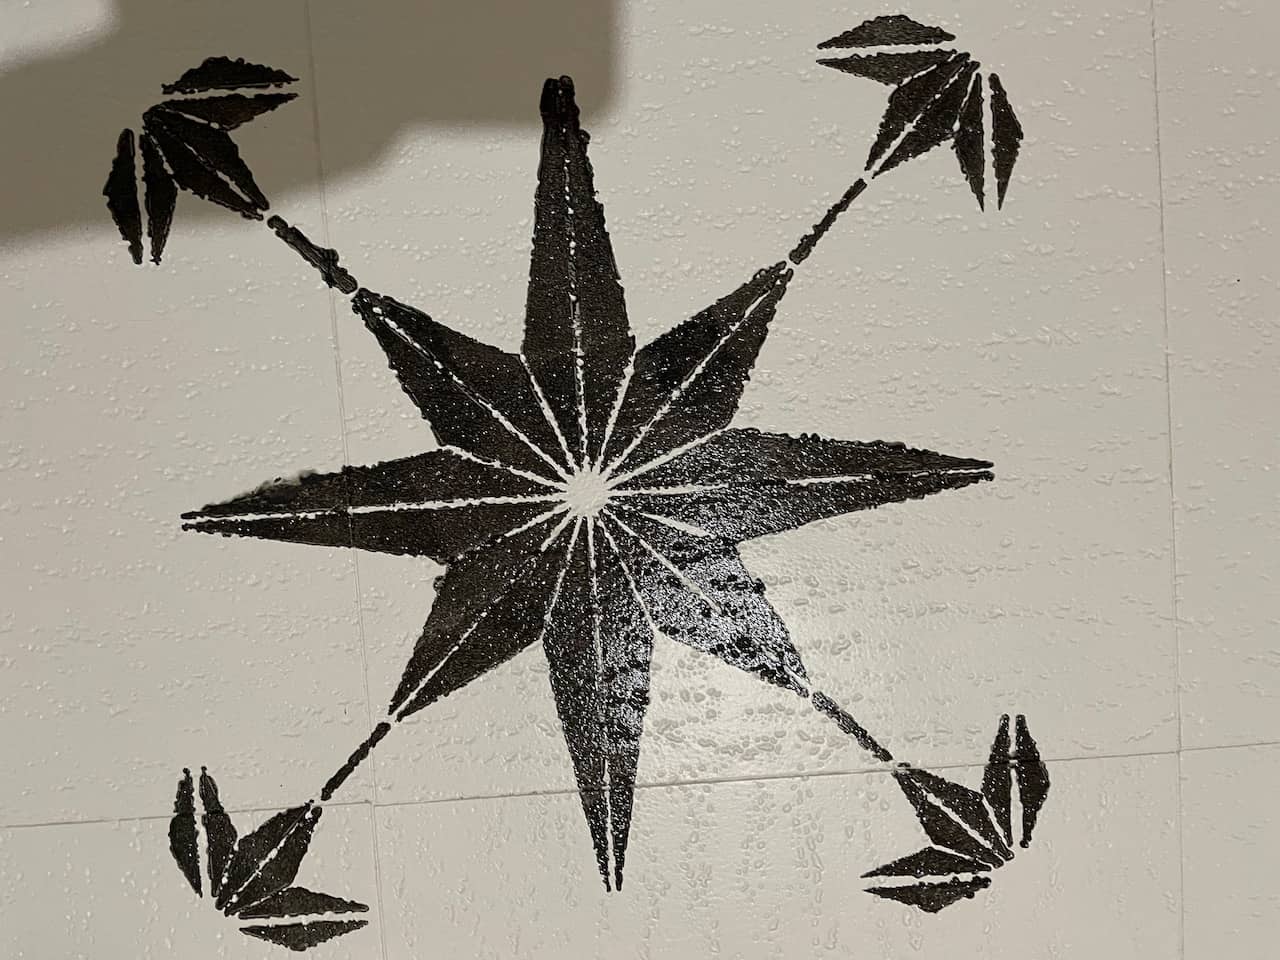
Before long I tried again. It still wasn’t awesome. I decided to try hand painting over it and I loved the look of that. I didn’t know what to do so I just kept going with the stencil and decided, heck, I’m just going to paint over it all, I can do this I thought. To my surprise each one got a little easier (with just he foam roller and stenciling). Soon I realized I was applying way too much paint at first.
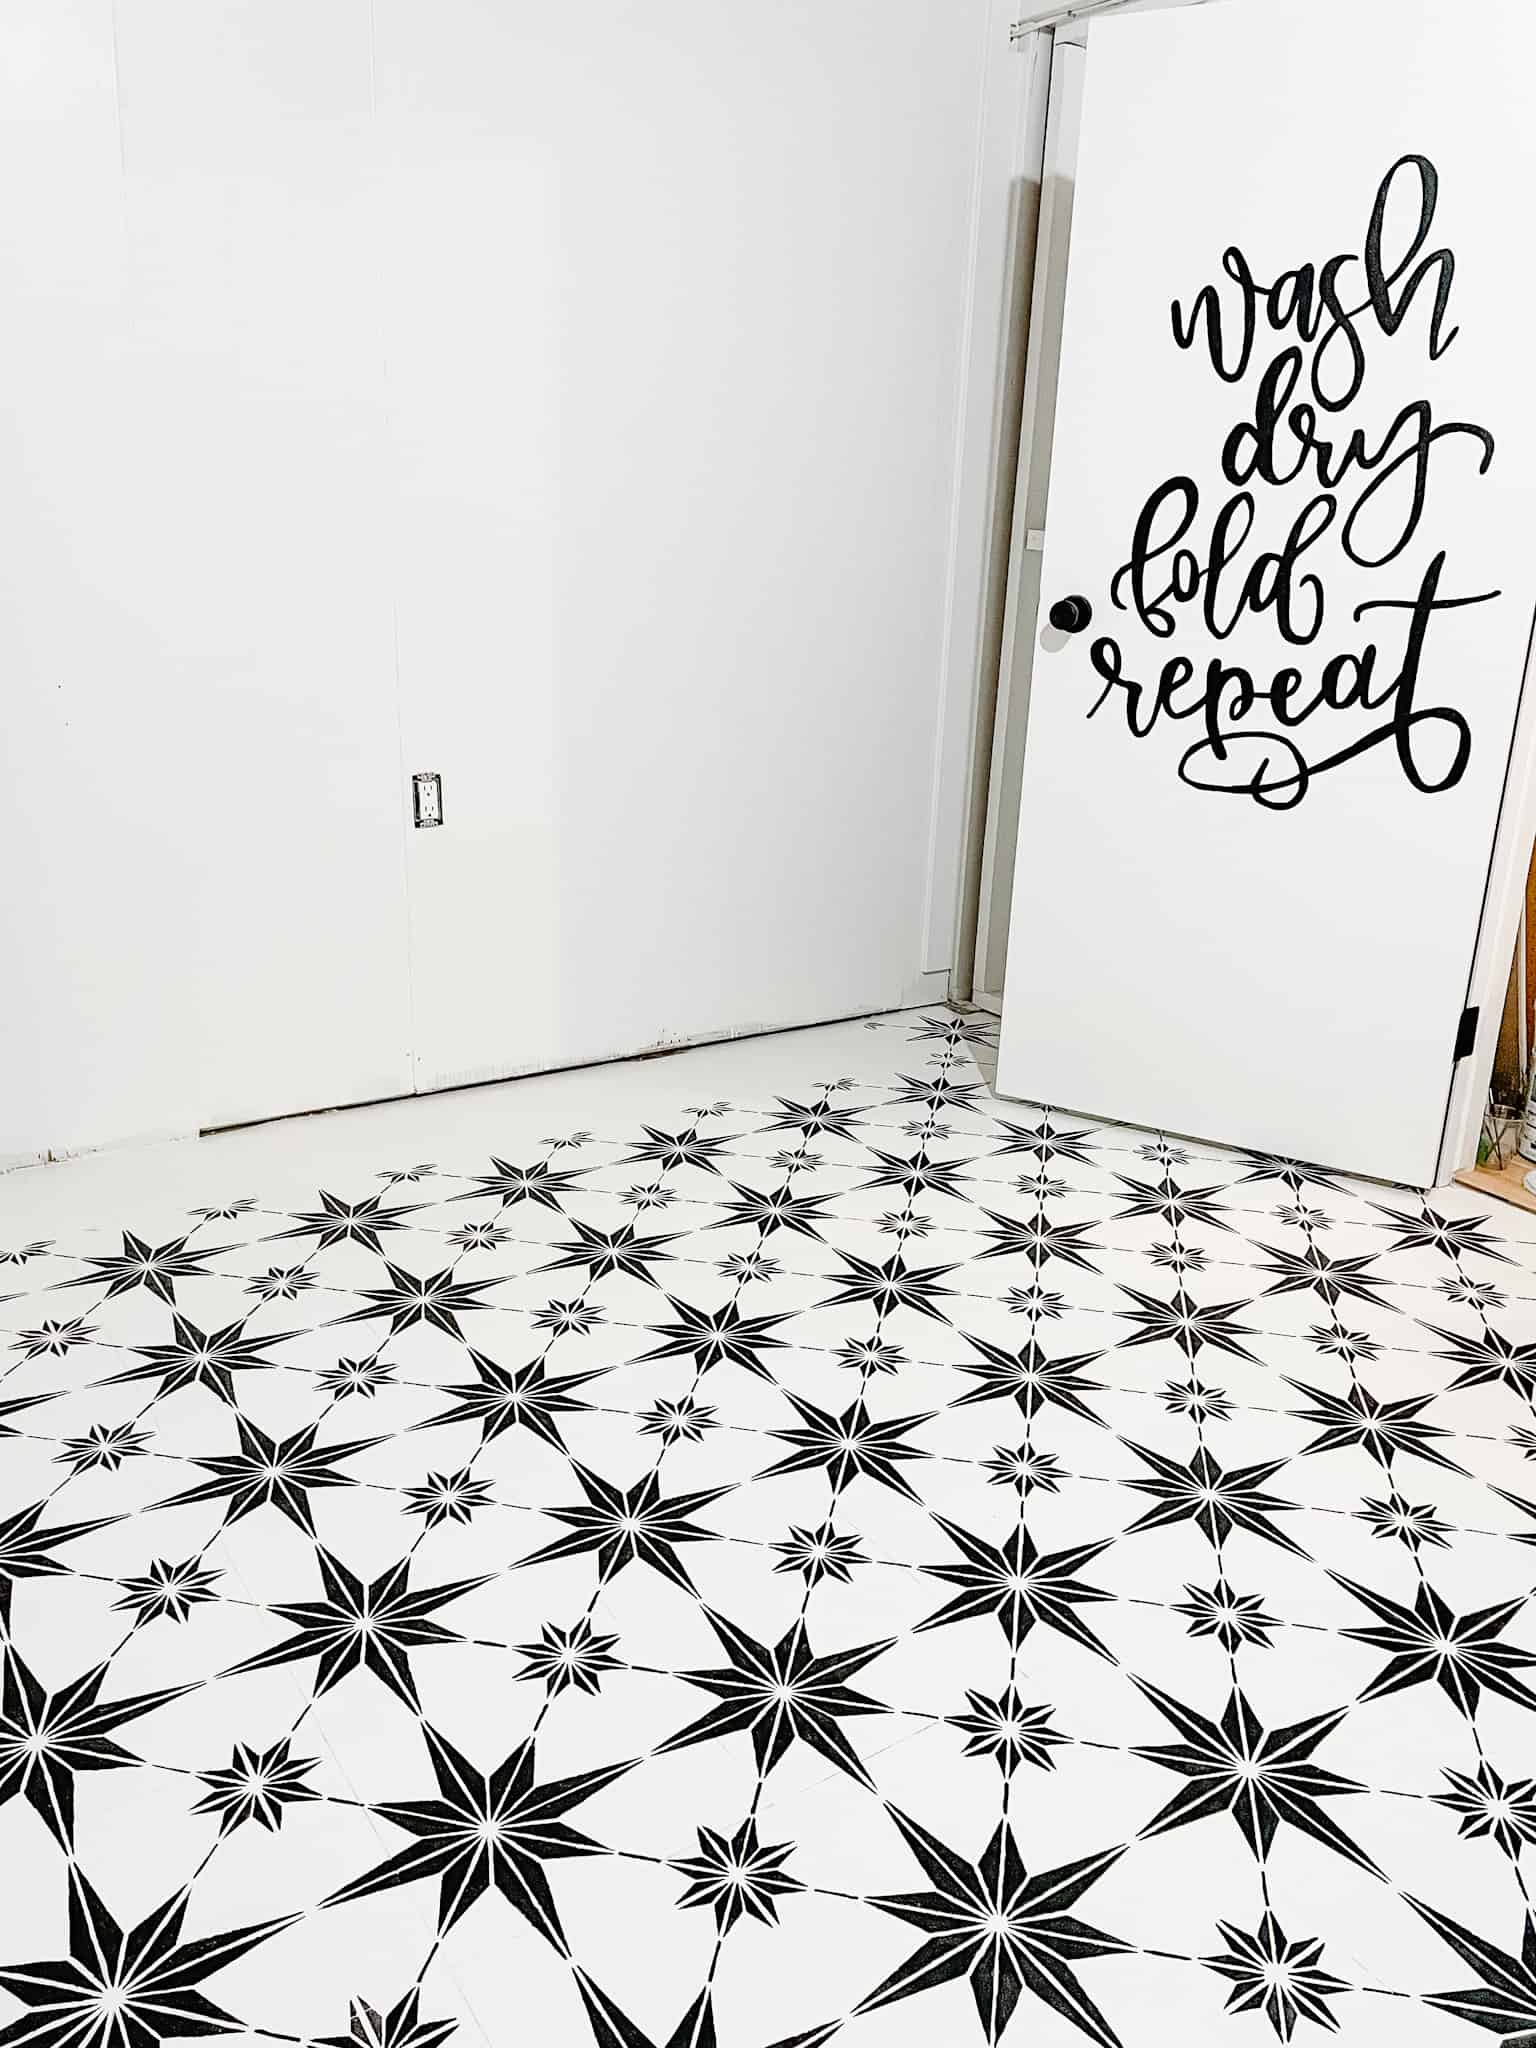
I put more paint on because I wanted a darker black, but you can’t do it like that. If you want a darker colour you need to apply multiple, very thin coats. Once I got the method down (having very little paint on the roller), I decided to try going over it again a second time with the stencil. I only did this once and again, it didn’t yield the results I was going for, so I decided to stick with hand painting them all after stencilling. You can see in this photo, the one on the right is hand painted in and the one on the left is not touched up at all. Honestly, I think both look great!
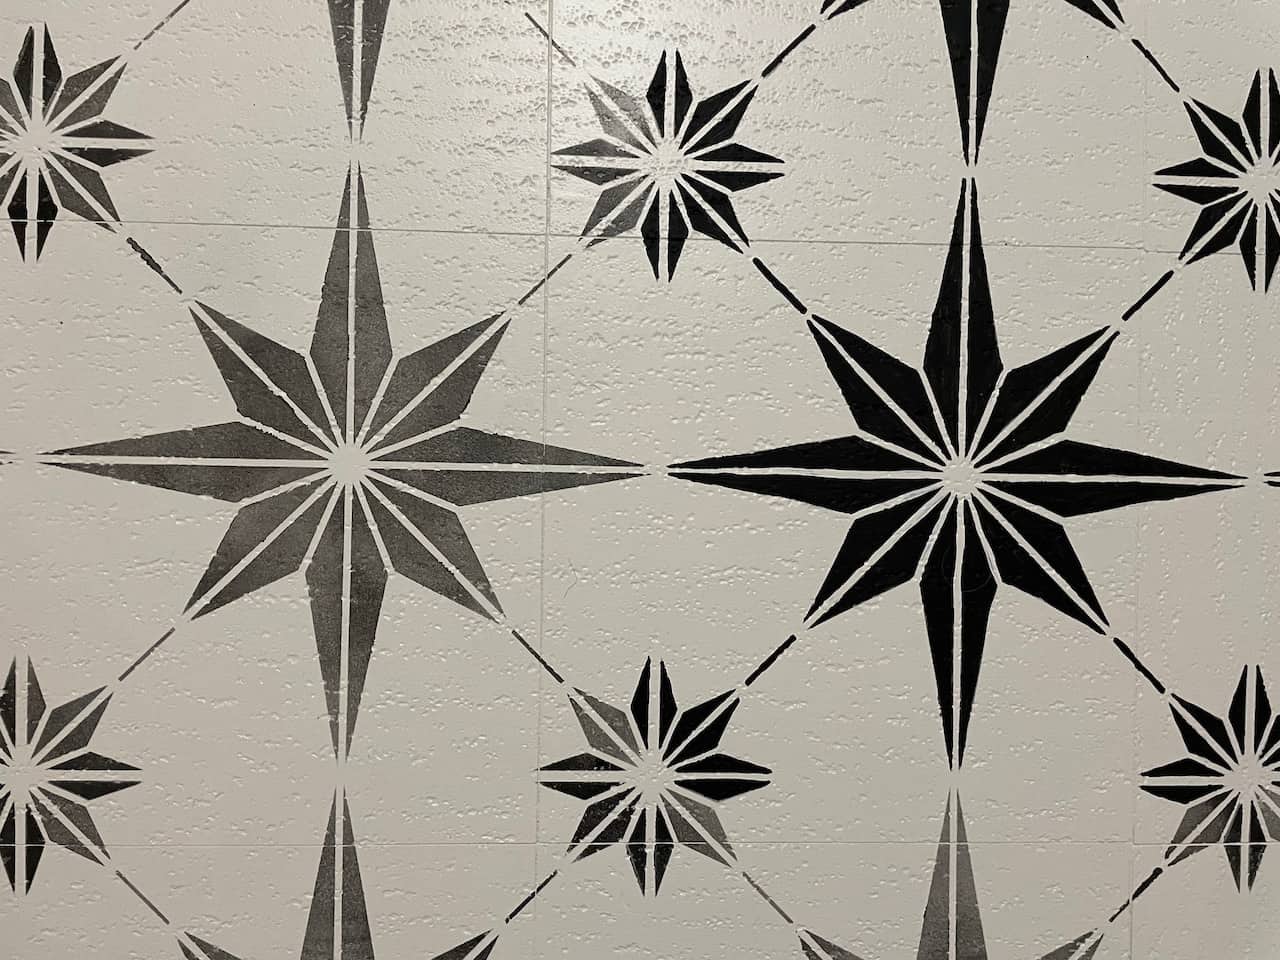
Here’s the thing. I was after a look that was different then what I should have planned for. Once I got the hang of stencilling I really liked the look of the lighter paint, however at that point I had already started hand painting them in darker so I felt like I needed to continue with that for a uniform look.
I’ve had several people ask if painting was really necessarily. NO, definitely not. It was a choice I made to get to the look I had pictured in my head. Would I do it again like that? Most likely no. Next time (and yes, I do plan to stencil again), I would plan for a lighter paint finish.
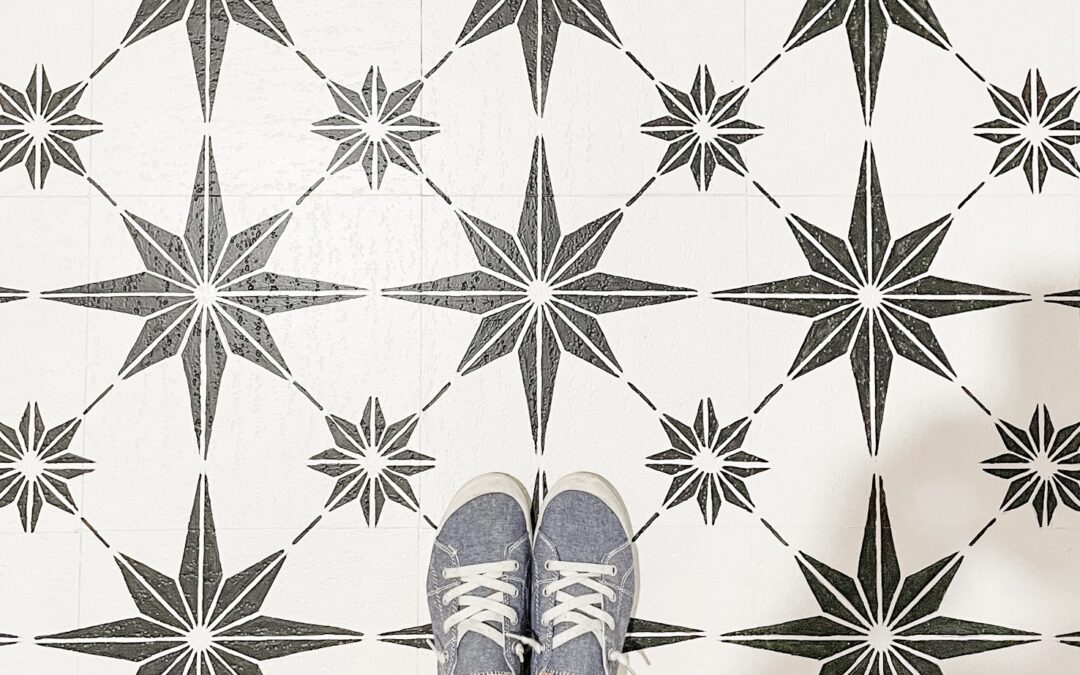
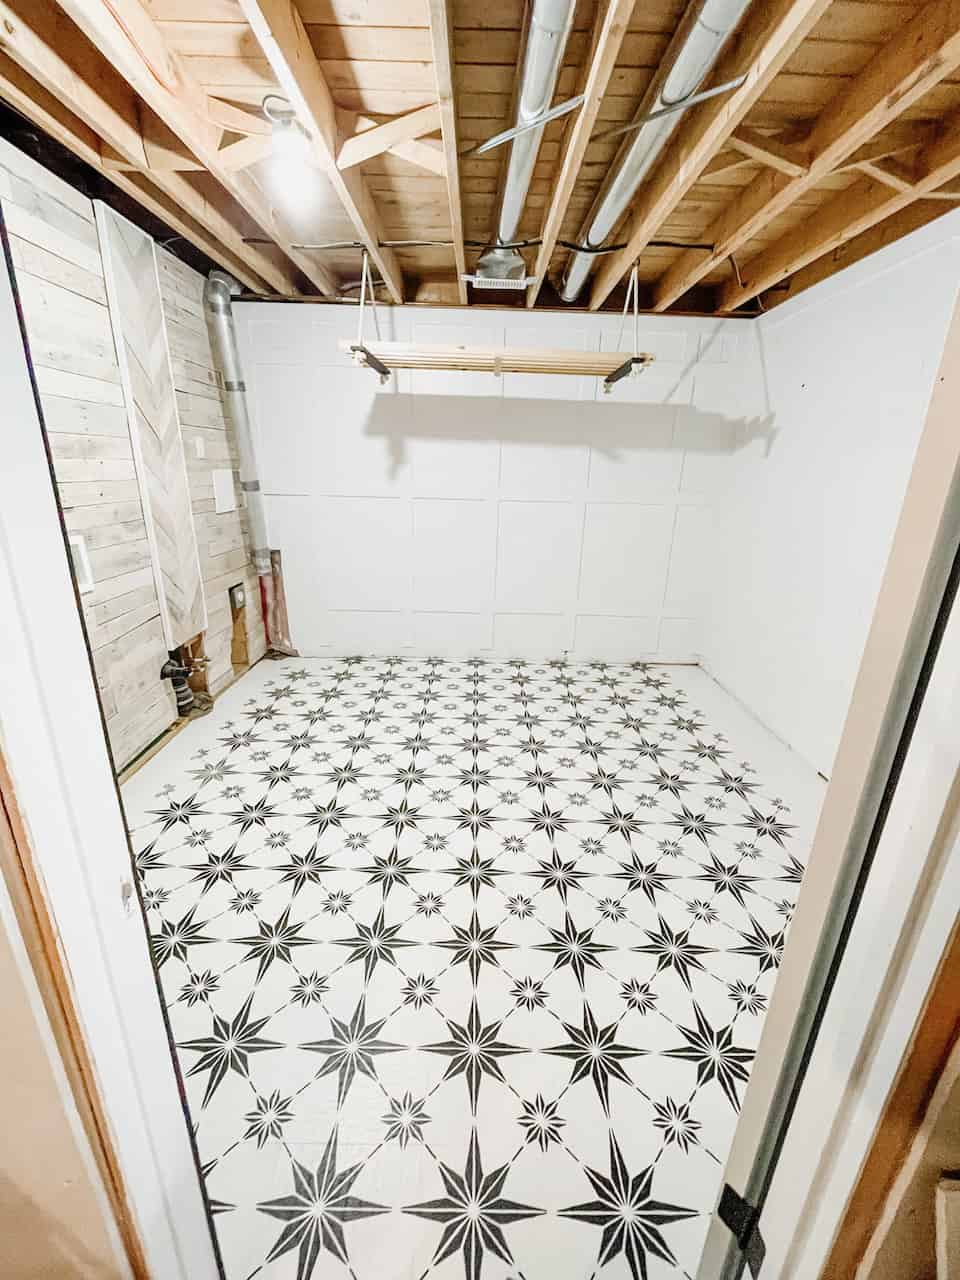
But ask me if you think it was worth it… I DO! I didn’t have a lot of budget friendly options for this floor; part concrete and part vinyl tile. I was able to paint over it ALL and make it look like it all was meant to be and I am SO HAPPY with it! I mean, check out this before and after?! WOW!


Shop this post …
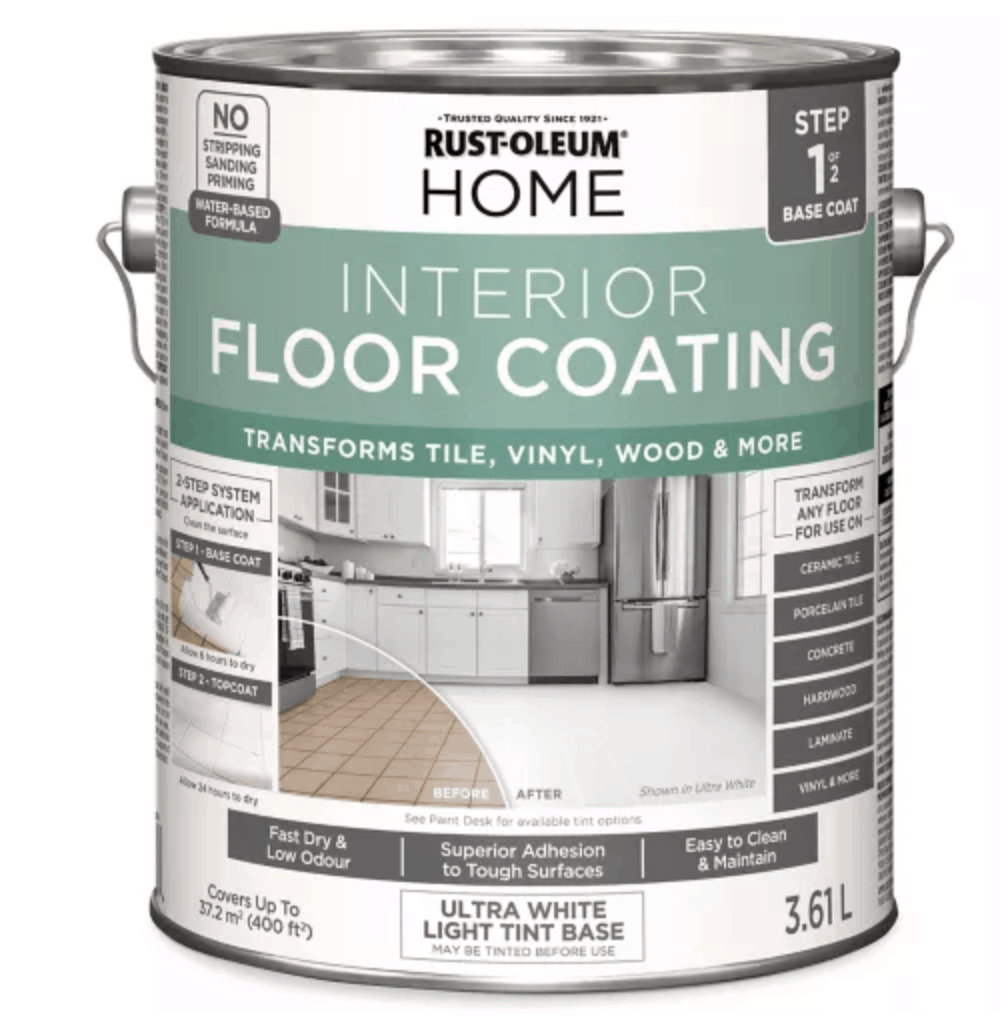
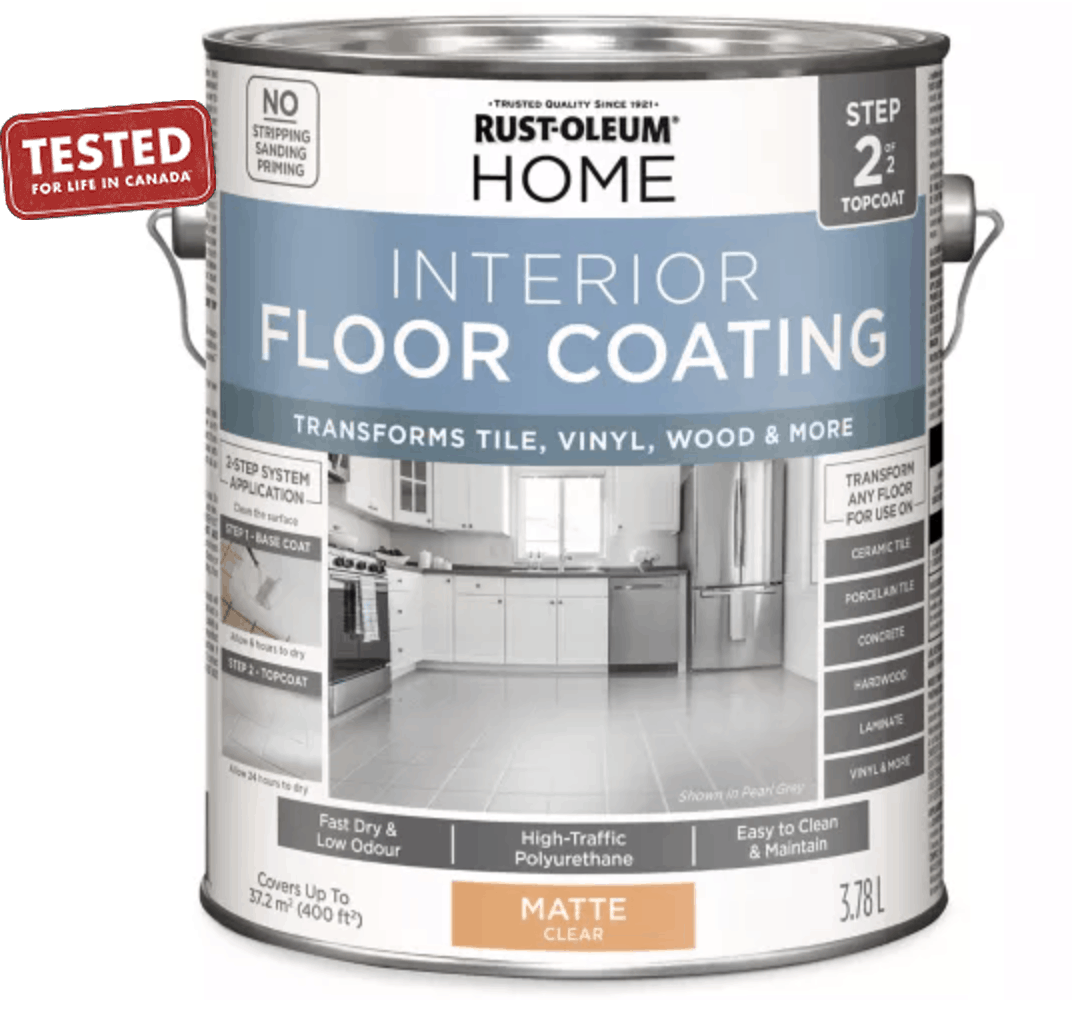
I’ve linked the paint that I used below. Click HERE for the 12×12 Star Tile, brushes and foam roller.
Click HERE for more of my Amazon Favourites!
Now for the really fun part…
I’ve collaborated with Cutting Edge Stencils to give one lucky random winner $50 to shop your favourite stencil!
To enter: comment on this blog post what stencil you love! Click HERE to see all the options!
*Open to Canada + USA residents 18 years + and closes Tuesday July 13th, 2021 at 10am PST*


Ah! So amazing! I’ve been stalking posts to see if someone could post a video of their progress and am SO happy I found your video and Instagram! I want to transform the bathroom tile and tile around our chimney and finally feel comfortable enough to make that leap! I’ve been thinking of the Nola, Augusta, and Quattro tile…but I can’t make up my mind because there are so many beautiful options!
How did you end up deciding on the stencil you used?
Yay! I’m so glad you found me and that my videos / blog is helpful! Feel free to reach out on Instagram if you have any other questions!
This star tile really just spoke to me! I thought it screamed laundry room and I wanted something fun for this space 🙂
Good luck!
I think my fav stencil is the boho beads. But honestly I love so many of their stencils. Especially the trees. I wish they were easily attainable in Canada.
Right? So many good ones!
I love all the herringbone stencils! And the Nola Tile too!
Me too! I’ve been thinking about getting the herringbone one!
There are soo soo many stencils that I love! I can’t make up my mind right now? I’m definitely going to try stencilling in the kitchen though, a cheaper option to backsplash!
It is so hard to pick!!
I love the Chinese ginkgo stencil. You don’t have to align it and can give a great look in any way you use it
I love that idea! Would look so great!
I’d pick either the herringbone brick overall stencil or the hand drawn chevron wall stencil. I’ve not had a backsplash in my kitchen for four plus years and I’m over it. I am so undecided and don’t love the peel and stick tile I picked out (of course I don’t!). I love the star that you used – it is just too big for my application
I love the herringbone brick too! I want that one for outside on concrete 🙂
Looks so great! I would love to try this in my home. I have the perfect spot too!
Tell me more! Where would you stencil?
Mountain Pines!!! But also SO many others!!!
Ooooh thats a great pick!
Love the star stencil
Such a classic!
Hi Linda – congrats, you are the winner of the giveaway! Please email [email protected]. Thank you!
I love Mountain pines and starfish all over! I have been wanting to Reno our bathrooms so bad, maybe a feature stencil wall is in their future?!
Ooooh a stencil feature wall would be amazing!!!
There are so many! I do love the Soho tile though!
Good pick!!