
This post is not sponsored but some links may be affiliate, which means I may earn a small commission if you shop using the links. There is NO extra cost to you. The opinions and photos are of Sew Bright Creation’s.
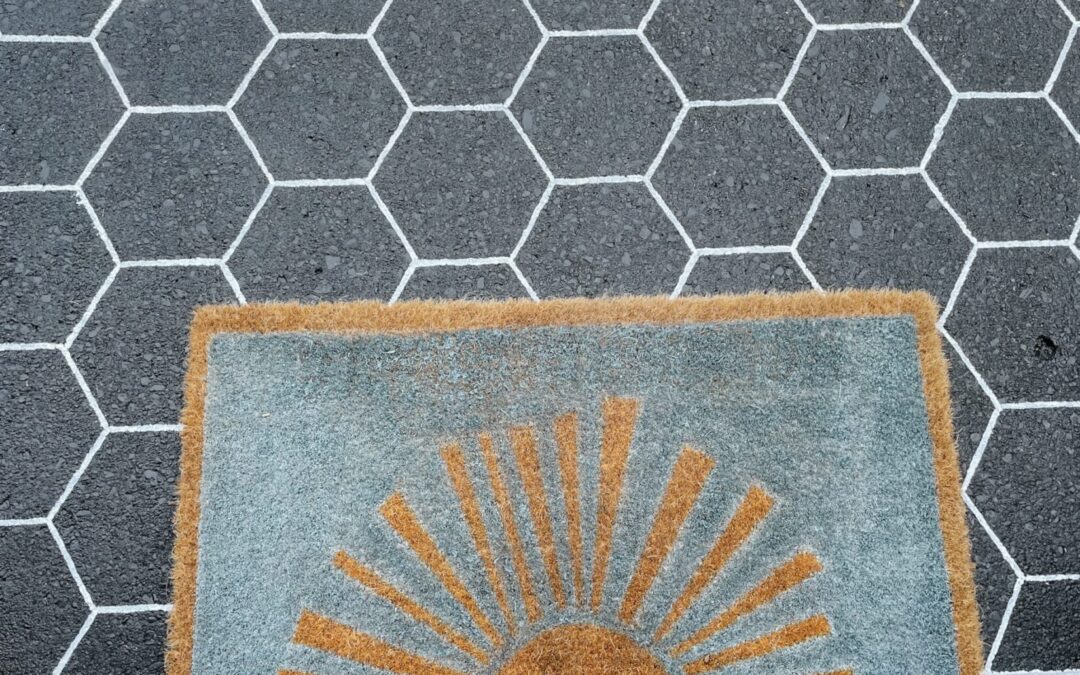
Make faux hex tile with this homemade stencil
Want the look of tile without the price? Try this homemade stencil to create a stunning faux tile!
Supplies needed to make this hex tile stencil:
- Black paint (Benjamin Moore Porch and Patio Paint
- White paint (exterior)
- Fine tip paint brush
- Chip board
- Cricut Explore Air 2
- Rags
Let’s get started – hex tile stencil
Step 1:
Prior to painting, I used my CRAFTSMAN Pressure washer to give it a really good clean. This is important because if you are painting on any dirt then it will wear off quickly.
Let dry completely before painting.
Step 2:
I used Benjamin Moore Porch and Patio paint to paint the concrete step solid black. Whatever paint you use, make sure it is for exterior use (if using outside) and can be used on concrete.
Step 3:
Cut out at least 2 stencils in your desired shape. I used my Cricut to cut 2 hexagons out of chip board. I like chip board because it’s thicker than cardstock paper and is solid so the edges are completely straight. If you don’t have a Cricut, use a ruler to get straight edges.
The widest part of the hexagon stencil is 7 1/4″ but you can make yours any size you want!


Step 4:
Position stencil at one corner and use a fine tip brush (I even cut the bristles short) to carefully paint along the edges of the chip board stencil.
Push down on the chipboard to ensure it doesn’t slide around.
Gently lift chipboard up, white edges clean with a clean dry rag and move it to the next side.
Step 5:
Keep repeating. I found it easiest to proceed horizontally and I alternated between the two stencils to ensure the edges were clean and dry.
I was worried that smudging would be a problem, but it wasn’t! I didn’t have any touch ups to do. What you see is how it turned out the first time.


Step 6:
Use painters tape to outline a boarder and paint white.

I love how it turned out and would highly recommend this DIY! I was very simple! If you need a visual, make sure to watch the video tutorial below!
I did not seal it because this is just a shed step that isn’t used a lot, but if you were doing a front step or an area that will get a lot of use I would recommend putting some sort of top coat or sealer on it.
For every day DIYs find us on Instagram @sewbrightcreations!
Want more behind the scenes content? Check us out on Patreon too, Sew Bright Creations.
Would you try this homemade hex tile stencil?
Let me know if you give it a try!
xo Jackie, Northern BC Mom & DIYer


Click HERE for more of my Amazon Favourites!


