
To no surprise, our DIY Hallway renovation has escalated quickly! Renovating never goes as planned, especially for older homes. Our 1960s bungalow is no exception. If you’ve been following along on our Instagram stories you know what I’m talking about. I’m sharing lots of snippets of what a real renovation looks like! Click HERE to get caught up. In case you missed the update last week, we are renovating our hallway as part of the Spring 2024, One Room Challenge (ORC).
FYI, ORC = One Room Challenge, you’ll see this acronym a lot over the next 8 weeks!
Click the following text or photos below to see my past One Room Challenge transformations! When you have really crappy before photos, it makes the after one’s look even better 😉
Back Entrance Renovation – Fall 2023
Office Renovation – Spring 2023


First, let’s talk about what the One Room Challenge is. Have you heard of it? It’s a biannual event that is held every spring and fall. Anyone with a blog, Instagram or TikTok account is welcome to join the fun. It goes over 8 weeks and each week you share an update on your room. It’s a fun way to connect with other like minded people and be able to encourage each other through all the ups and downs of renovating! I highly encourage you to check out all the other participants HERE.

Before Photos of our hallway
PROJECT GOAL: Remove past layers of low quality renovations and simplify the space by creating a bright, classic hallway that is welcoming and calming.
From a distance it might not look that bad, but our walls are three layers. Wood horizontal shiplap with 1/4″ wallboard over top and then drywall over top of that. Once the drywall was added it made the wall thickness uneven with the door jams and the trim that was put over top was notched out of the drywall and VERY poorly done. Honestly, it just looks like crap.
This hallway is getting renovated from ceiling to floor, however the new flooring will not be put in until the wall is removed on the other side of the house. Still waiting on the Engineer we’ve hired for that…


Progress of our hallway renovation
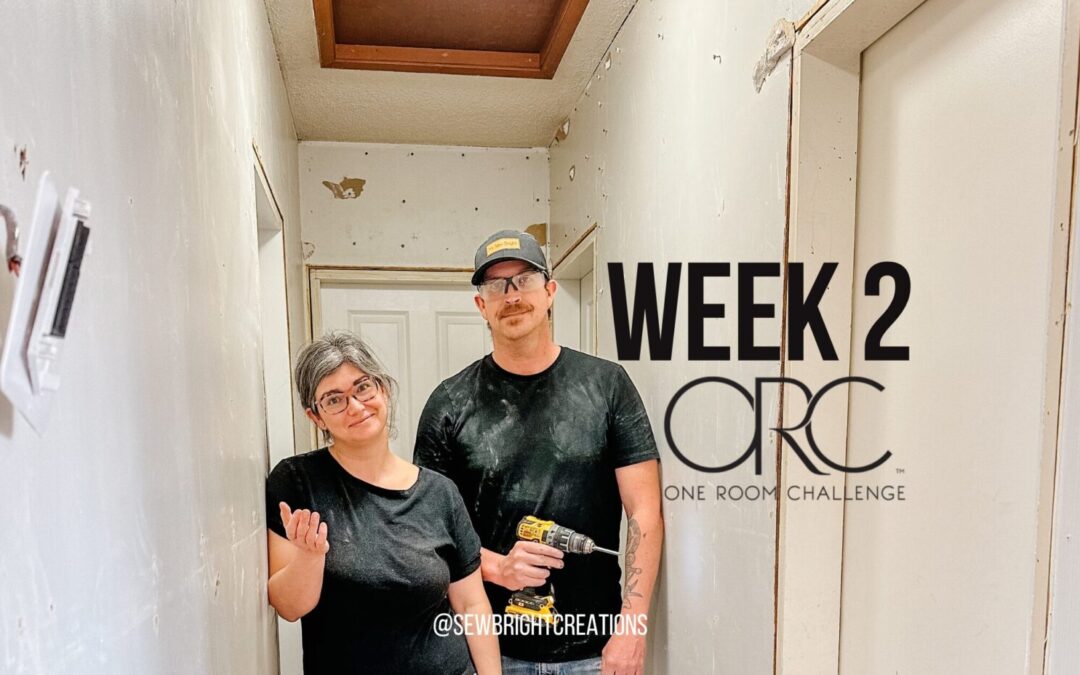
WEEK 2: This past week Mr. Sew Bright and I removed all of the drywall and most of the wall panel, which exposed the wood shiplap. SO many of you keep saying how we should keep the shiplap exposed…but I’m just not sure I want that much of a rustic look in me home, or that it really goes with the overall vibe we are going for. It would still require quite a bit of work to get it where it needs to be and it would also mean cutting out the trim mouldings so everything fits and I don’t know that I want to go there… to be continued!
Next up, remove the rest of the panel board, rip up the flooring and tackle the ceiling.
Check back for the week 3 update, you’re not going to want to miss it!


Here’s the plan for our DIY Hallway Renovation
Spoiler alert: the plan has changed since writing this, but I’ll wait until week 2 to fill you in on the changes!
- Week 1: Plan
- Week 2: Demo drywall (Yay, so far we are ahead of schedule)
- Week 3: Remove floor, work on door jams and doors
- Week 4: Do something with ceiling and attic box
- Week 5: Paint and install doors
- Week 6: Walls?
- Week 7: Install trim
- Week 8: Touch ups, decor and reveal!!
Based on my previous experience this will not end up being the final plan but I do find it very helpful to at least start with a plan. For the day to DIY updates, check our Instagram stories.
Here’s my inspiration. I am still unsure about the beadboard for the walls and unsure about the rug, what do you think?

Just like my past One Room Challenge Renovations, I’ll be keeping track of cost. After all, this is a budget friendly renovation. I’ll be sure to share cost details each week, so check back if that’s something you’re interested in.
Any questions! Let me know in the comments!
We would love to see your projects! Please share with us by tagging us on Instagram @sewbrightcreations or email them to [email protected].
This post is not sponsored however some links may be affiliate, which means I may earn a small commission if you shop using the links. There is NO extra cost to you. The opinions and photos are of Sew Bright Creation’s.


I also think the exposed shiplap looks so cool…maybe you can keep just some of it showing? Looking forward to what you decide!
Thank you Julie! I would love to find a way to keep a bit of the shiplap showing too 🙂